Examples of how to modify a HESCO Barrier
Introduction:
Flood Defense Group is the USA distributor of HESCO Bastion, and we are regularly called upon to help our customers build HESCO in the field, and these are examples of how to modify a Hesco Barrier.
During the process of building HESCO barriers, we have encountered numerous situations where we chose to modify the product to solve a variety of problems. This is a compilation of situations and scenarios where we chose to modify our HESCO Bastion flood barriers which we have documented for general awareness.
Disclaimer: This document is not meant as advice but rather a presentation of what we have done in modifying this product, which may be useful to your own applications. Flood Defense Group regularly modifies this product when we believe the situation calls for it, but these modifications are done solely at the risk and final endorsement of the end user. Flood Defense Group does not assume liability for the final outcome of any flood barrier installation or its performance beyond a manufacturer’s warranty covering product defect.
Let's get started!
Modify HESCO to Create Buttress Walls or Anchors
It is simple and inexpensive to install ‘buttress walls’ or ‘buttress cells’ to a line of HESCO Bastion for added stability as desired. This is well described as creating 90-degree angles within a HESCO wall for additional stability or reinforcement.
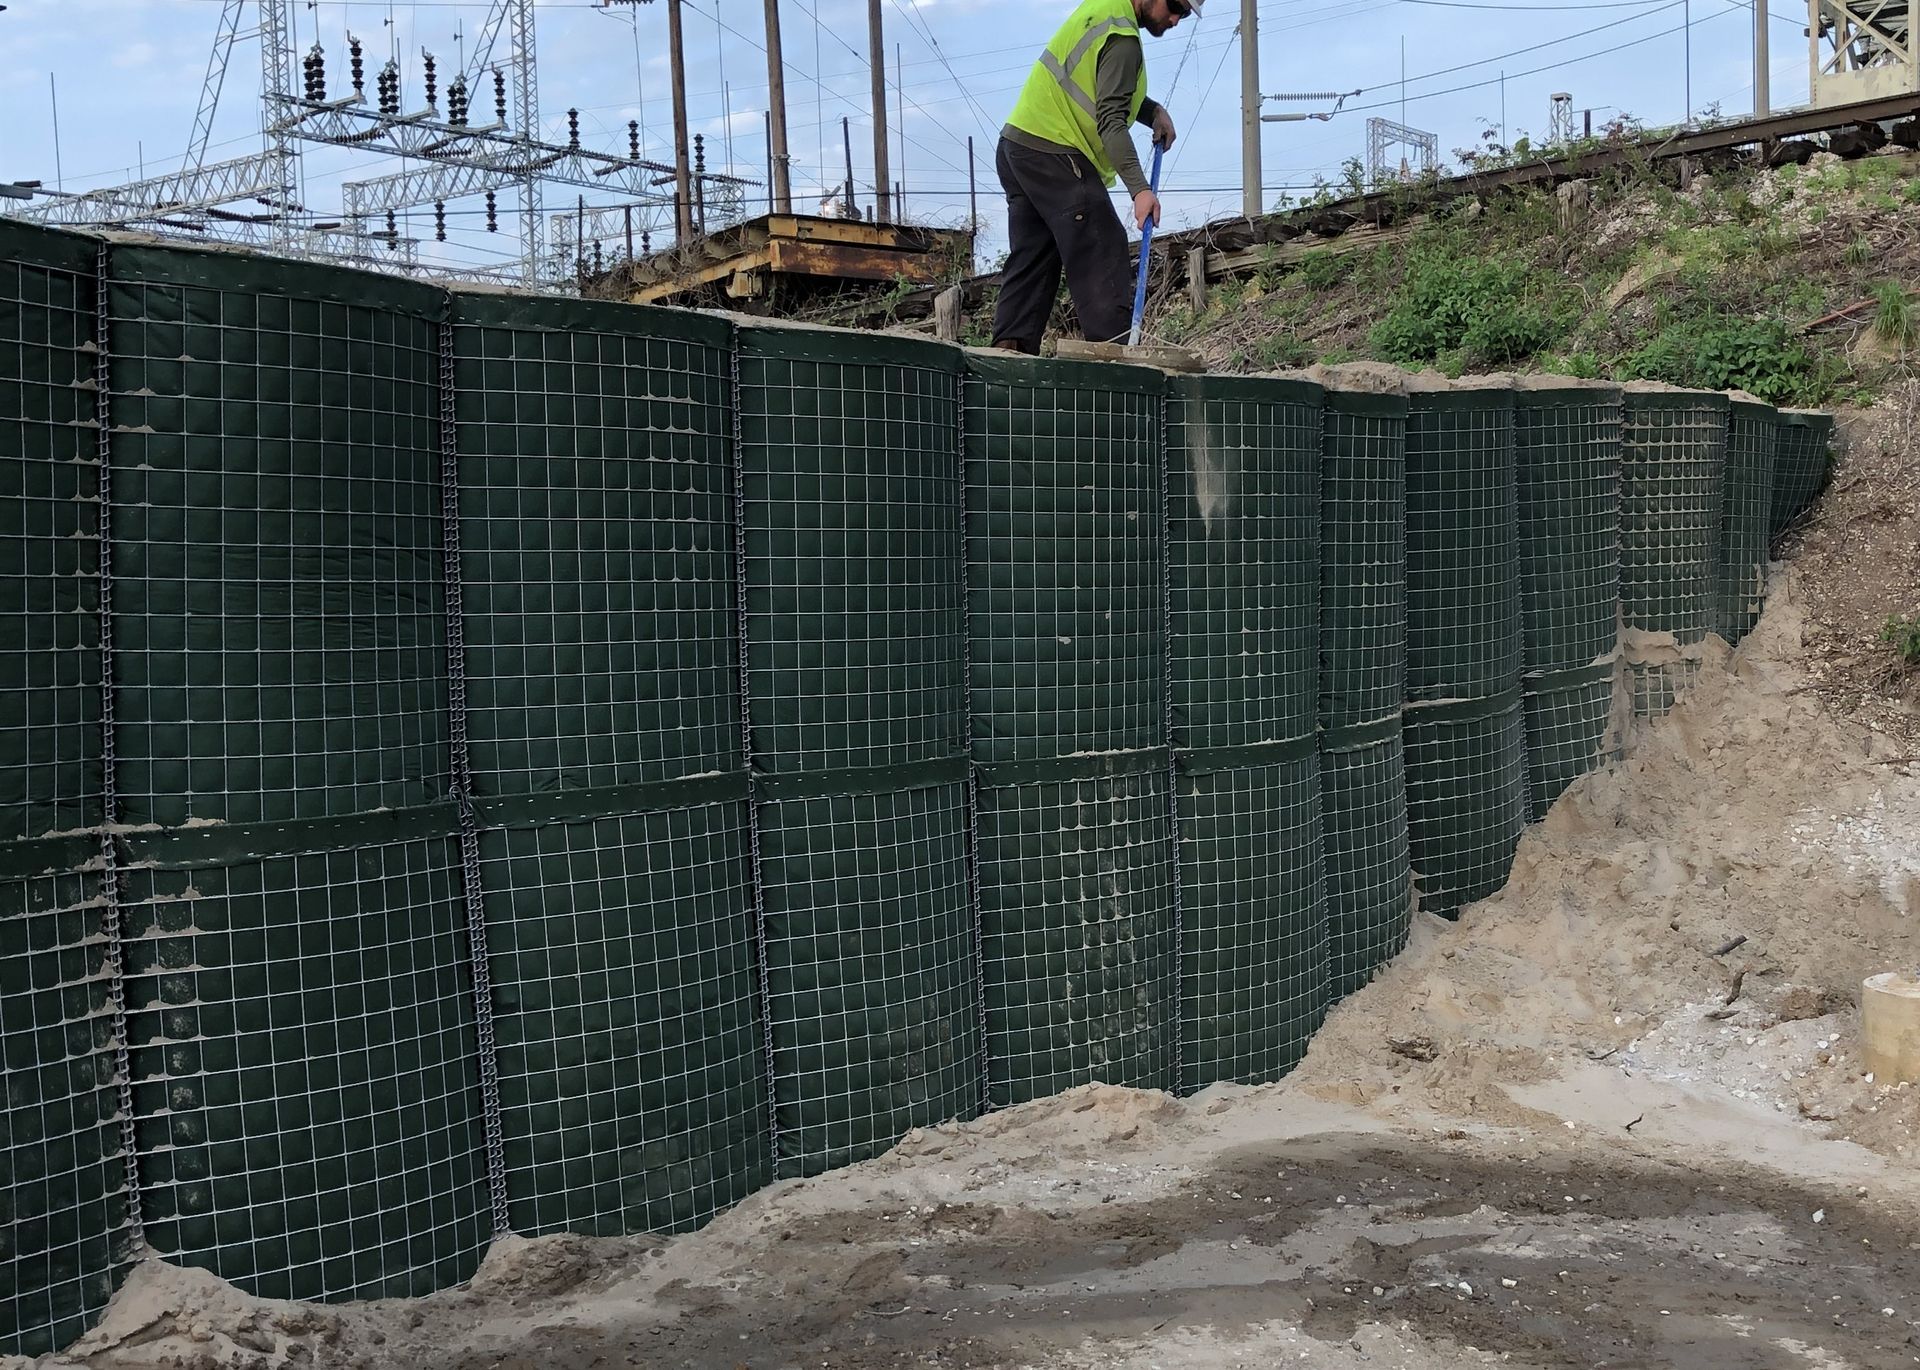
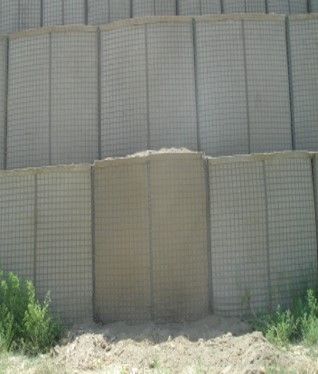
These photos show how we were able to take a few cells of HESCO and attach them to a main line of HESCO Bastion at a 90-degree angle where the floodwall ties into to an earthen
berm. This is an easy method to add additional reinforcement to any HESCO barrier in strategic locations like this which may benefit from some reinforcement.

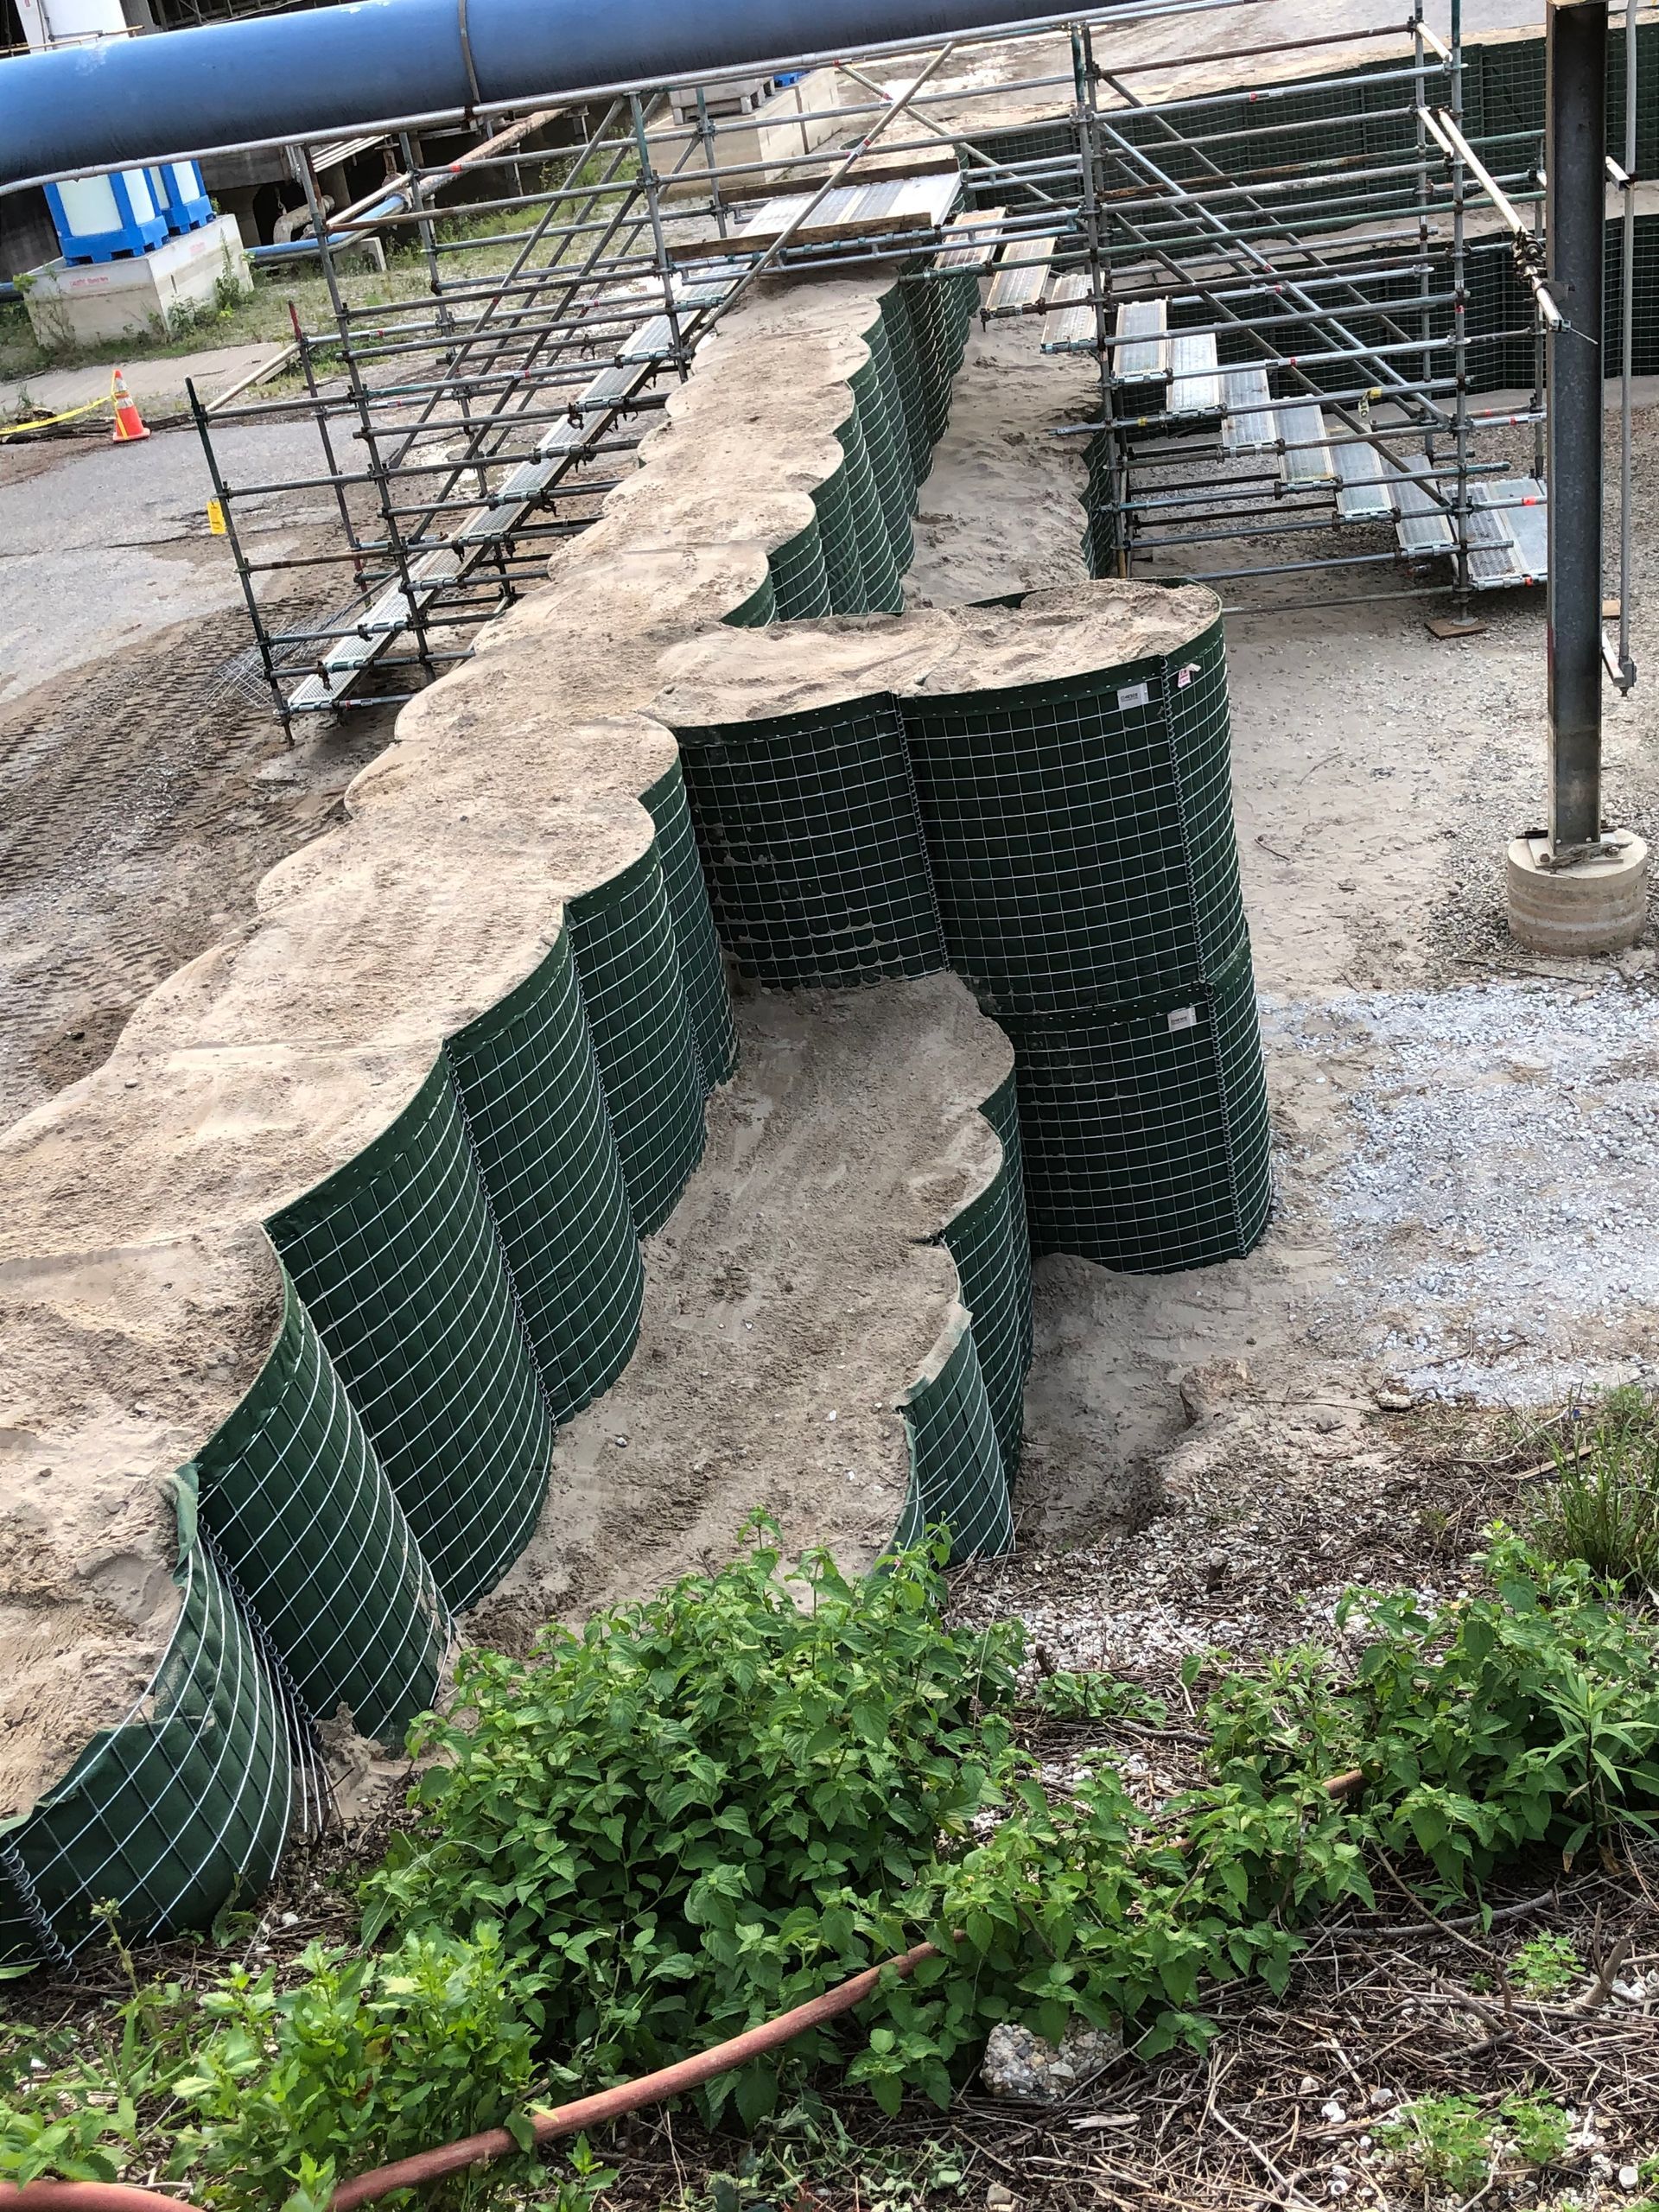
Perhaps this could be considered ‘overkill’, but the speed, ease, and minimal expense associated with simply adding some buttress cells onto a HESCO wall does provide added comfort when floodwaters arrive and are near the top of your barrier! These buttress cells can be added during construction or even years later as desired.
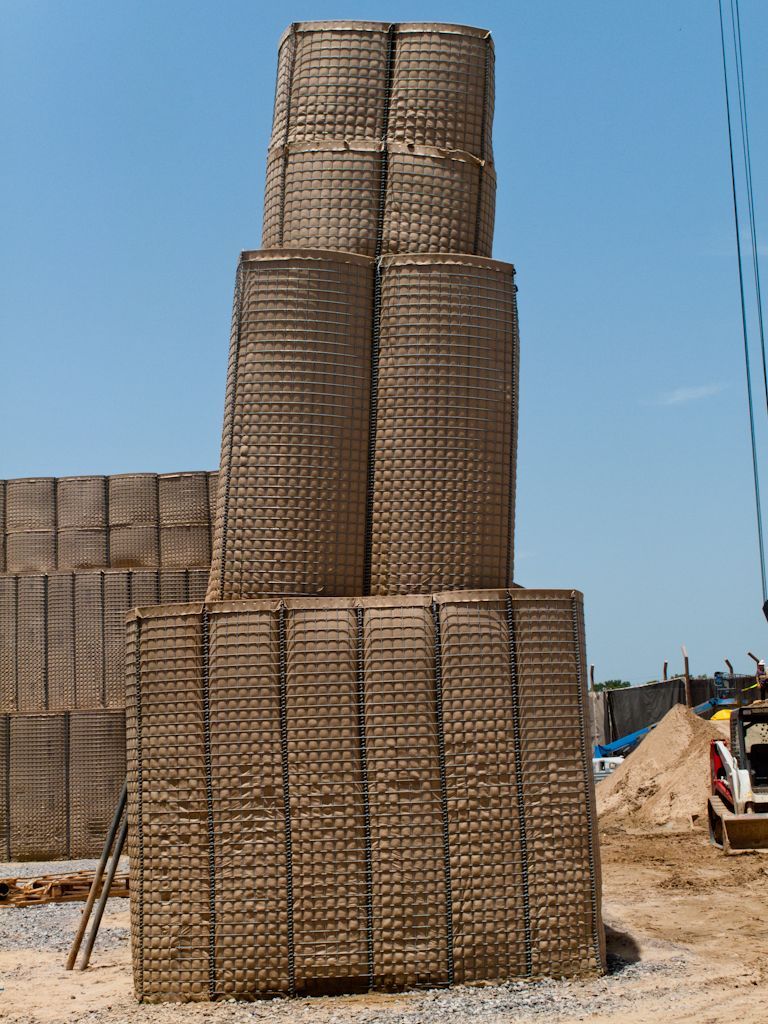
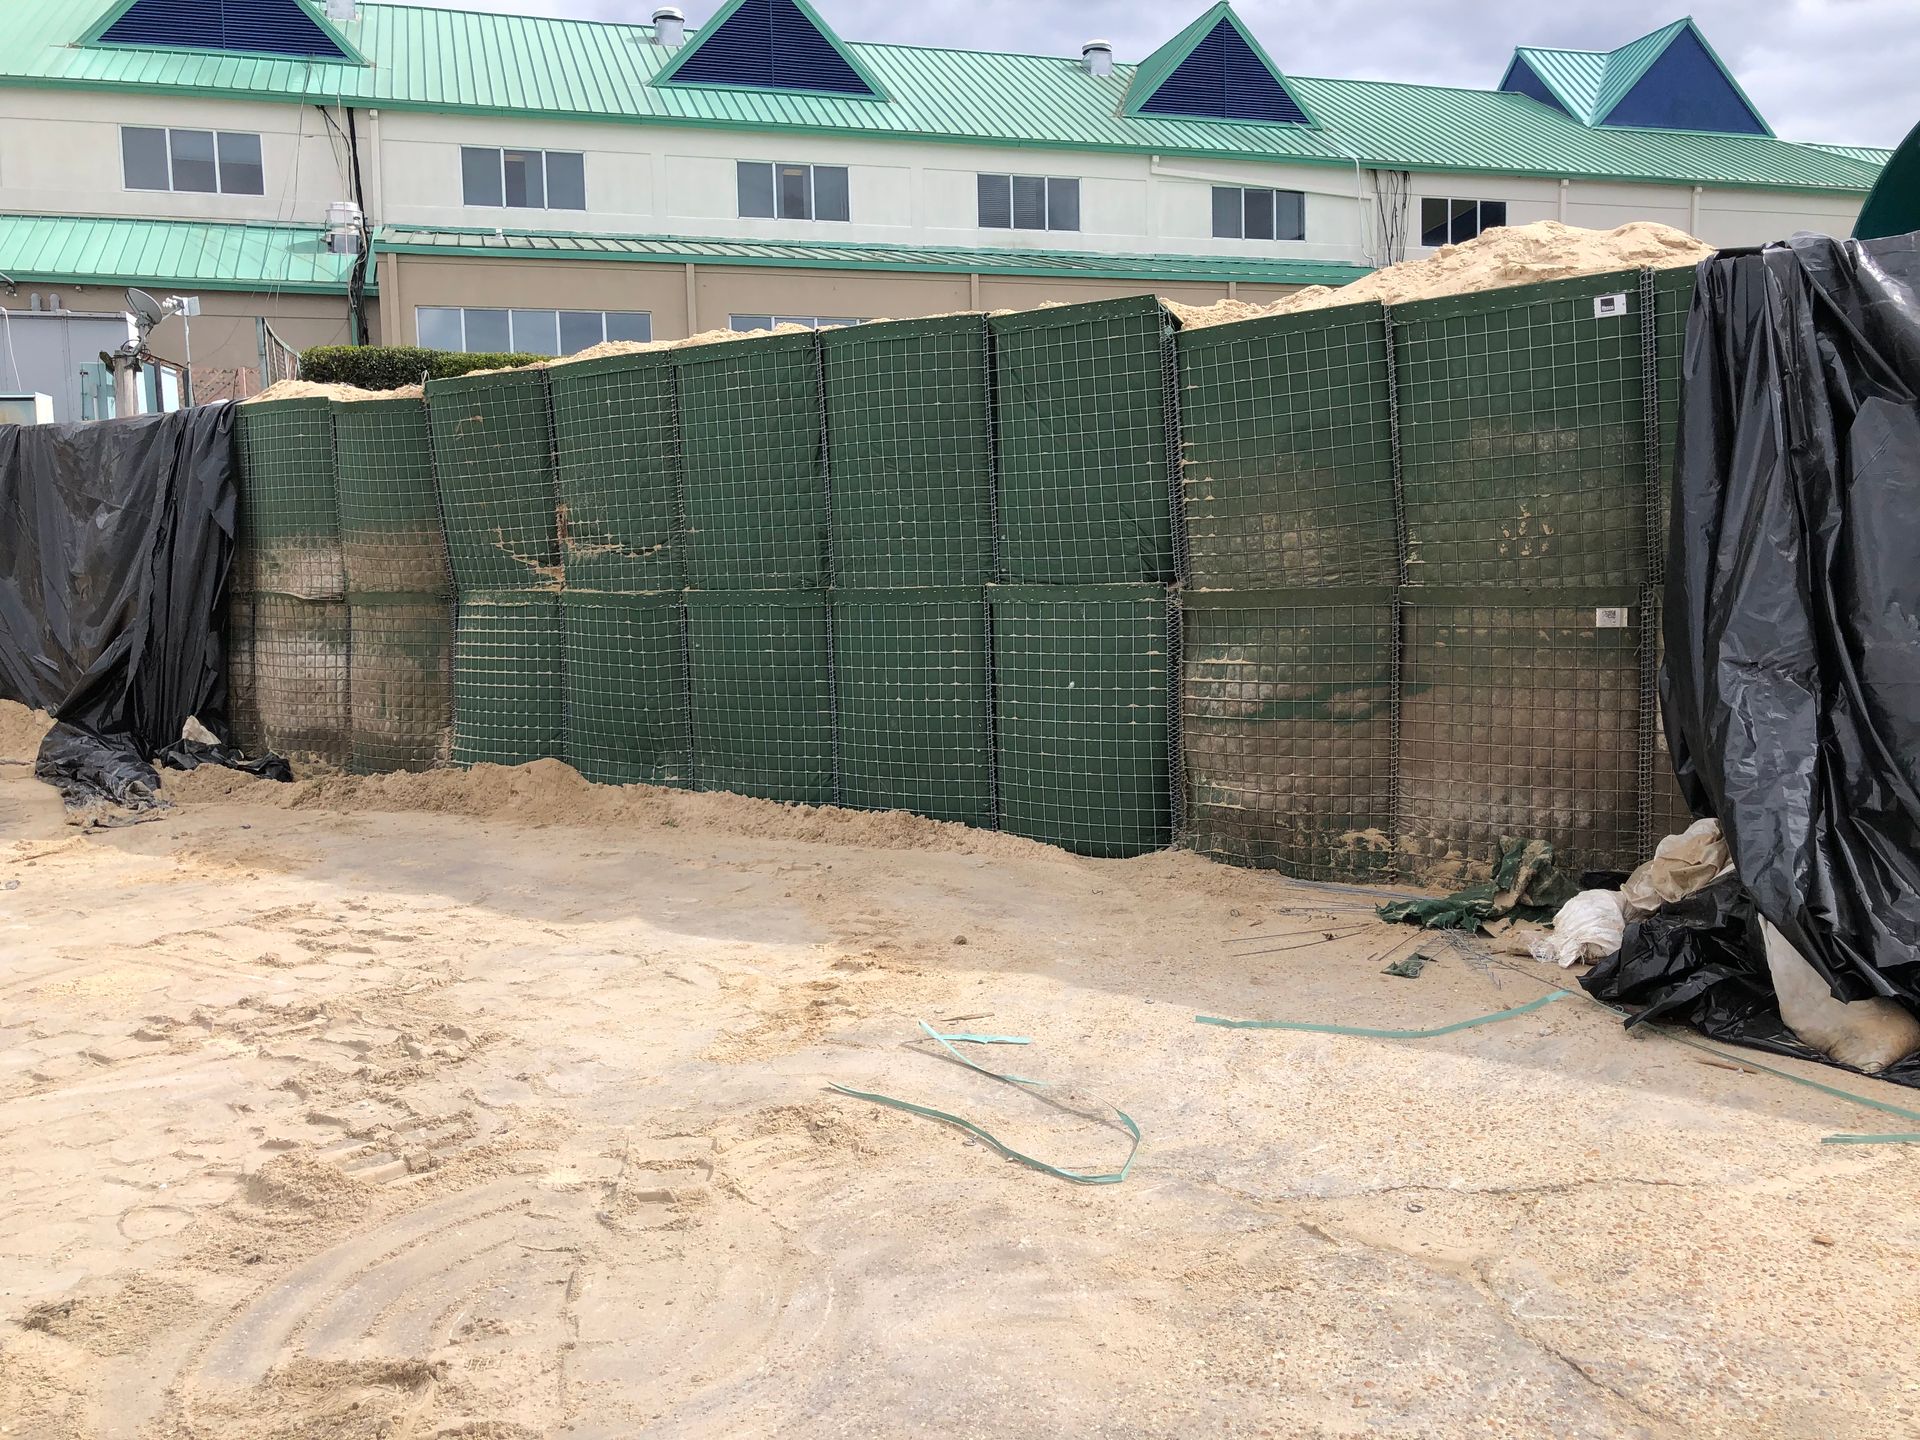
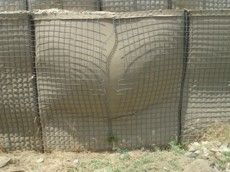
EXAMPLE: In this example, there is a wall of HESCO that is leaning. This is happening because the lower units were not compacted during construction and the weight of the fill material in the upper units is causing the structure to settle and lean.
In this example, buttress cells could be sporadically added to prevent further leaning of this wall.
BUTTRESS CELLS CAN BE ADDED DURING THE CONSTRUCTION OF YOUR PROJECT OR LATER!!
Modify HESCO to Tie Into a Levee or Earthen Berm Without Digging into it!!
We must regularly tie/end a HESCO flood barrier into existing levees or berms. There are two common methods of doing this.
1) Dig a hole into your berm, place/fill the HESCO within this keyhole, and backfill around your barrier upon completion
OR
2) Modify the HESCO Bastion by cutting it down to size such that it appears to disappear into the berm without digging into the berm at all
GENERAL RULE: For flood defense applications, we suggest you NOT dig into a levee or an earthen embankment
SUPPORTING RULE: Digging into the ground creates loose soil. Loose soil plus moving flood water creates erosion. Erosion during a flood event quickly creates or supports cascading effects of disaster.
It is our preference to go with option 2 and not dig into a berm or levee. We like to modify the HESCO Bastion to conform to the earthen berm. This is a fantastic method because it prevents erosion vulnerability during a flood event by keeping existing vegetation and root structures within the ground, undisturbed, and functioning to provide erosion mitigation during a flood event. This is easily done by taking a new unit of HESCO Bastion and completely disassembling it. You can then modify/cut the HESCO panels as required, and reconnect it one cell at a time while you conform individual cells you are creating to the embankment you are tying into. It is relatively quick and simple……especially when compared to the ill-advised technique of digging into a levee.
Step 1 – Butt a unit of HESCO as close as possible to the levee you are tying into such that the HESCO remains level and fill it
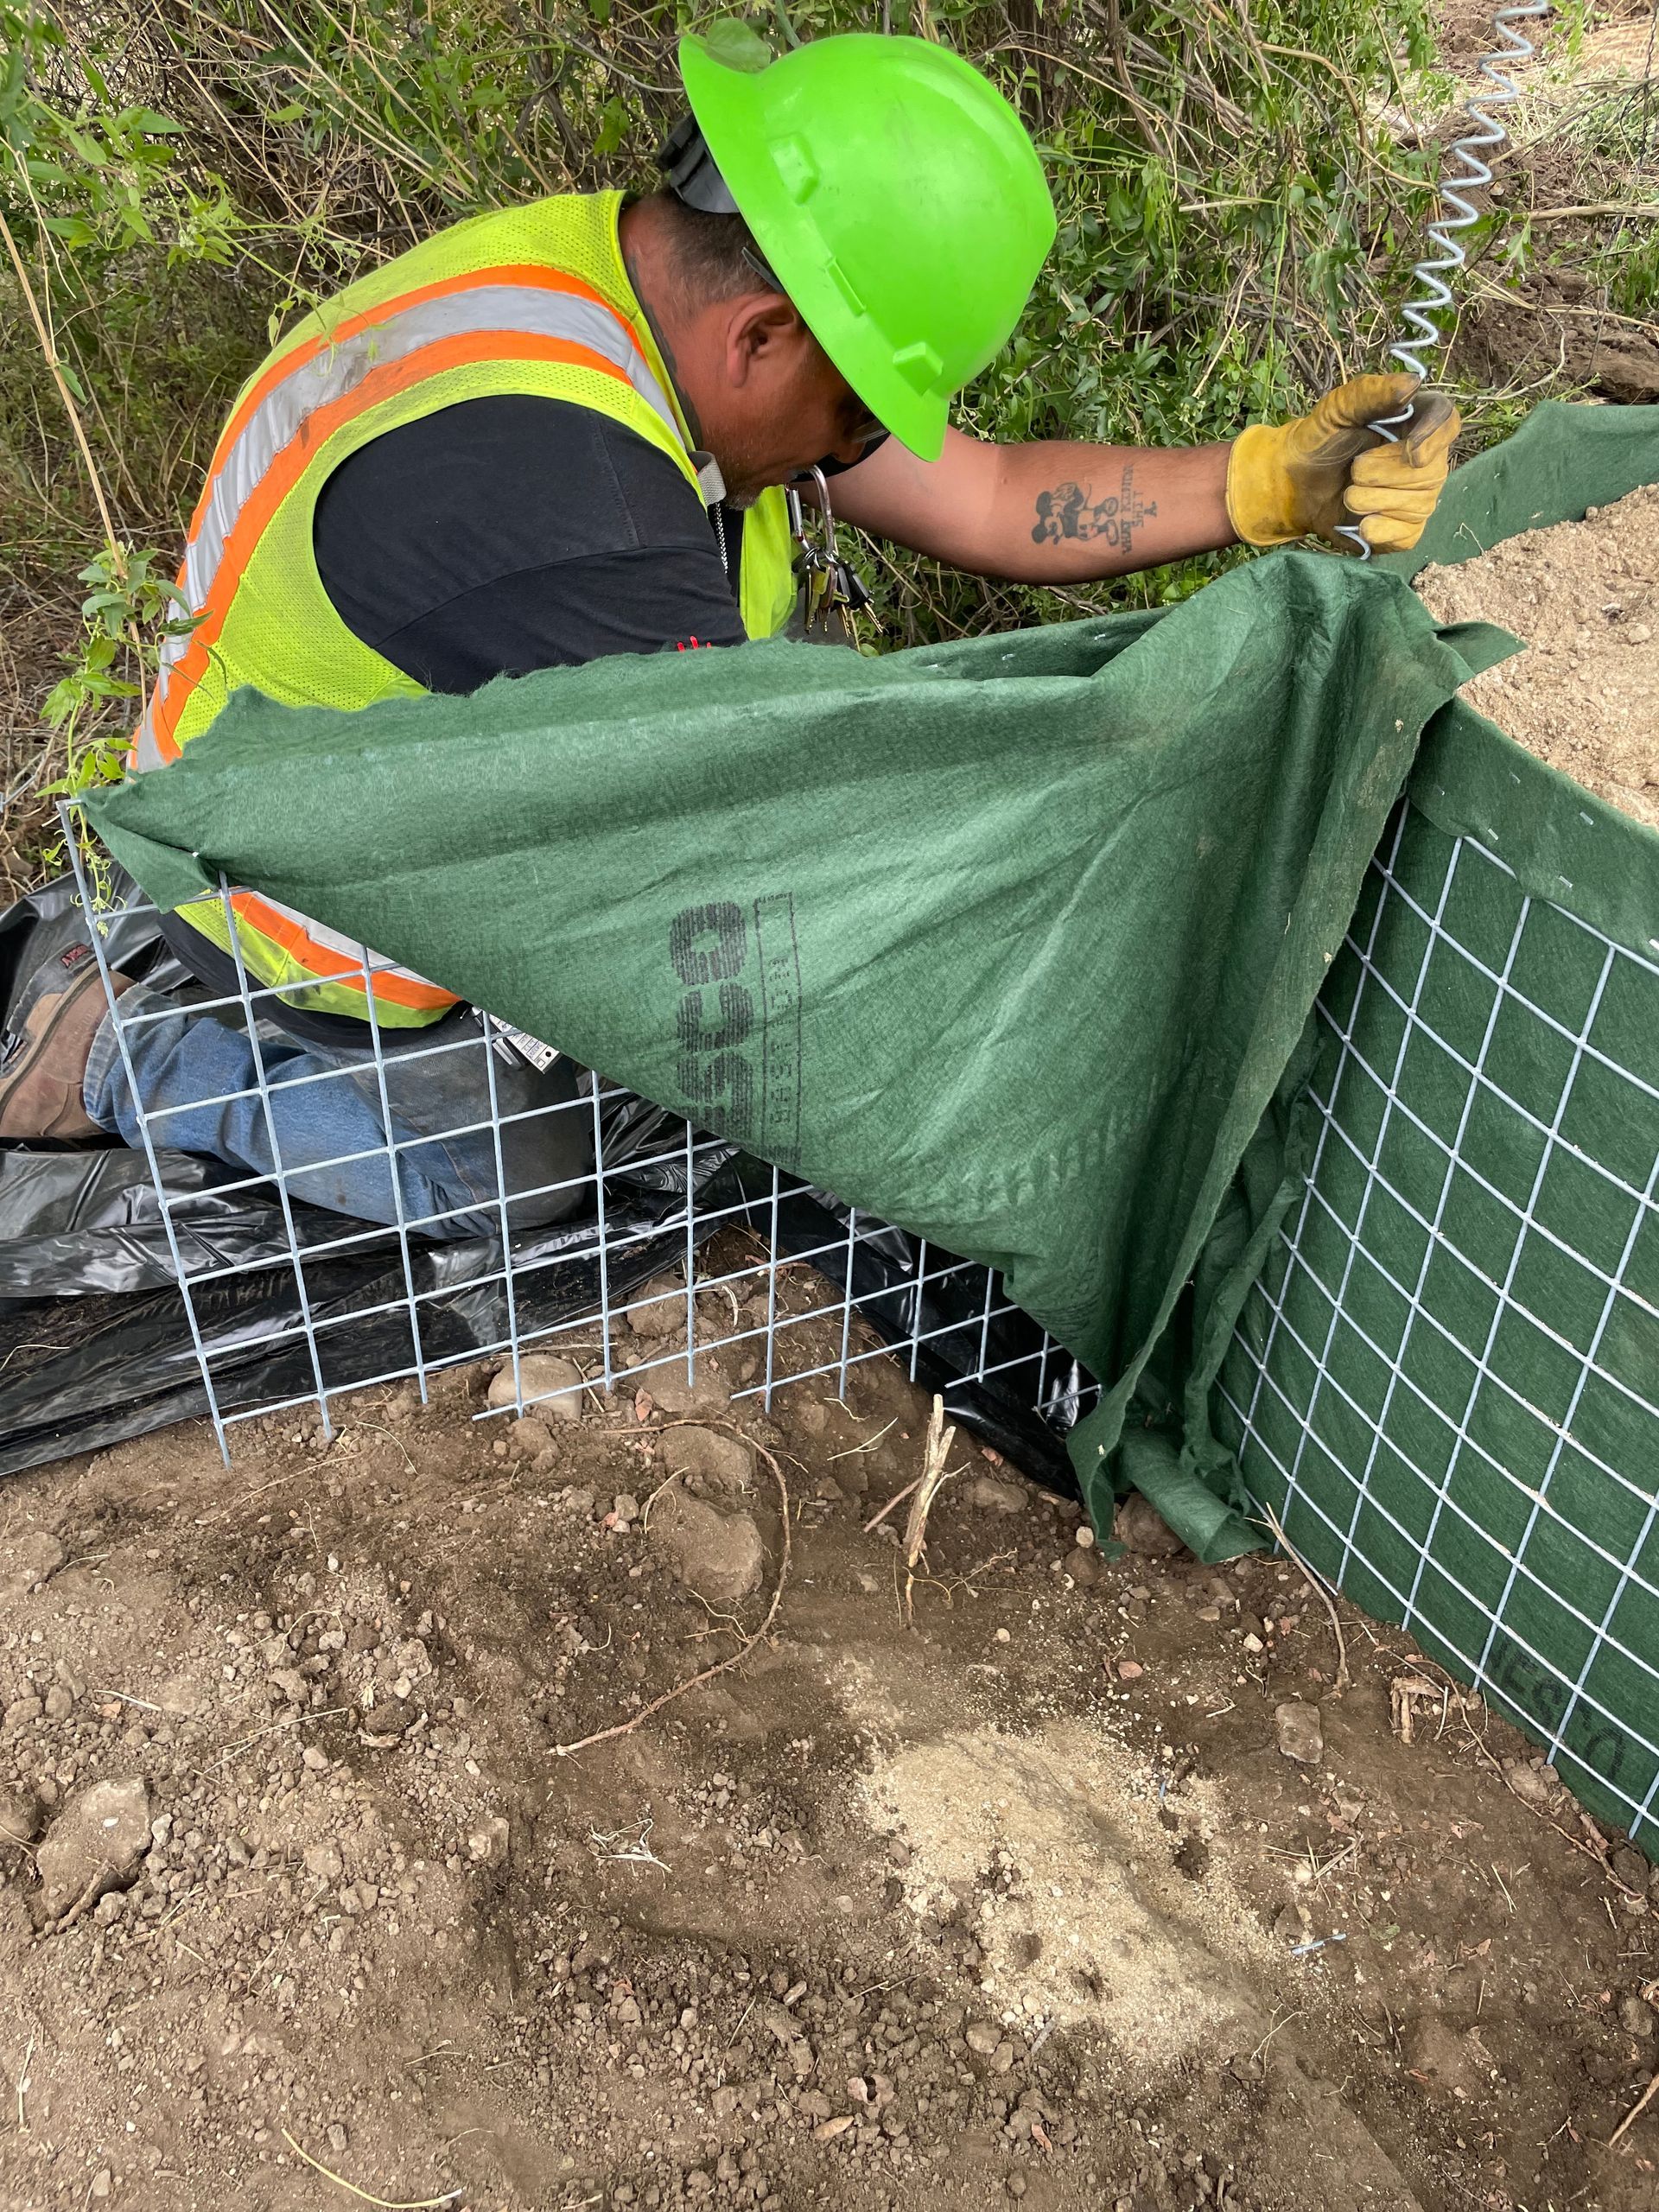
Step 2 – Take an individual panel, with the geotextile attached, and cut the welded wire mesh in a manner that the panel conforms to the levee you are tying into. (do this on each side of a given cell you are creating) NOTE: Make sure that the geotextile is correctly lined around each new cell you create to prevent soil from escaping. NOTE: When you disassemble a full unit for ‘parts’, focus on ripping out the staples and only taking out the center diapragram panels. This will leave you two ‘face panels’ that are connected with geotextile which is helpful when putting these cells together. NOTE: You can generally do this without ever having to cut the geotextile.
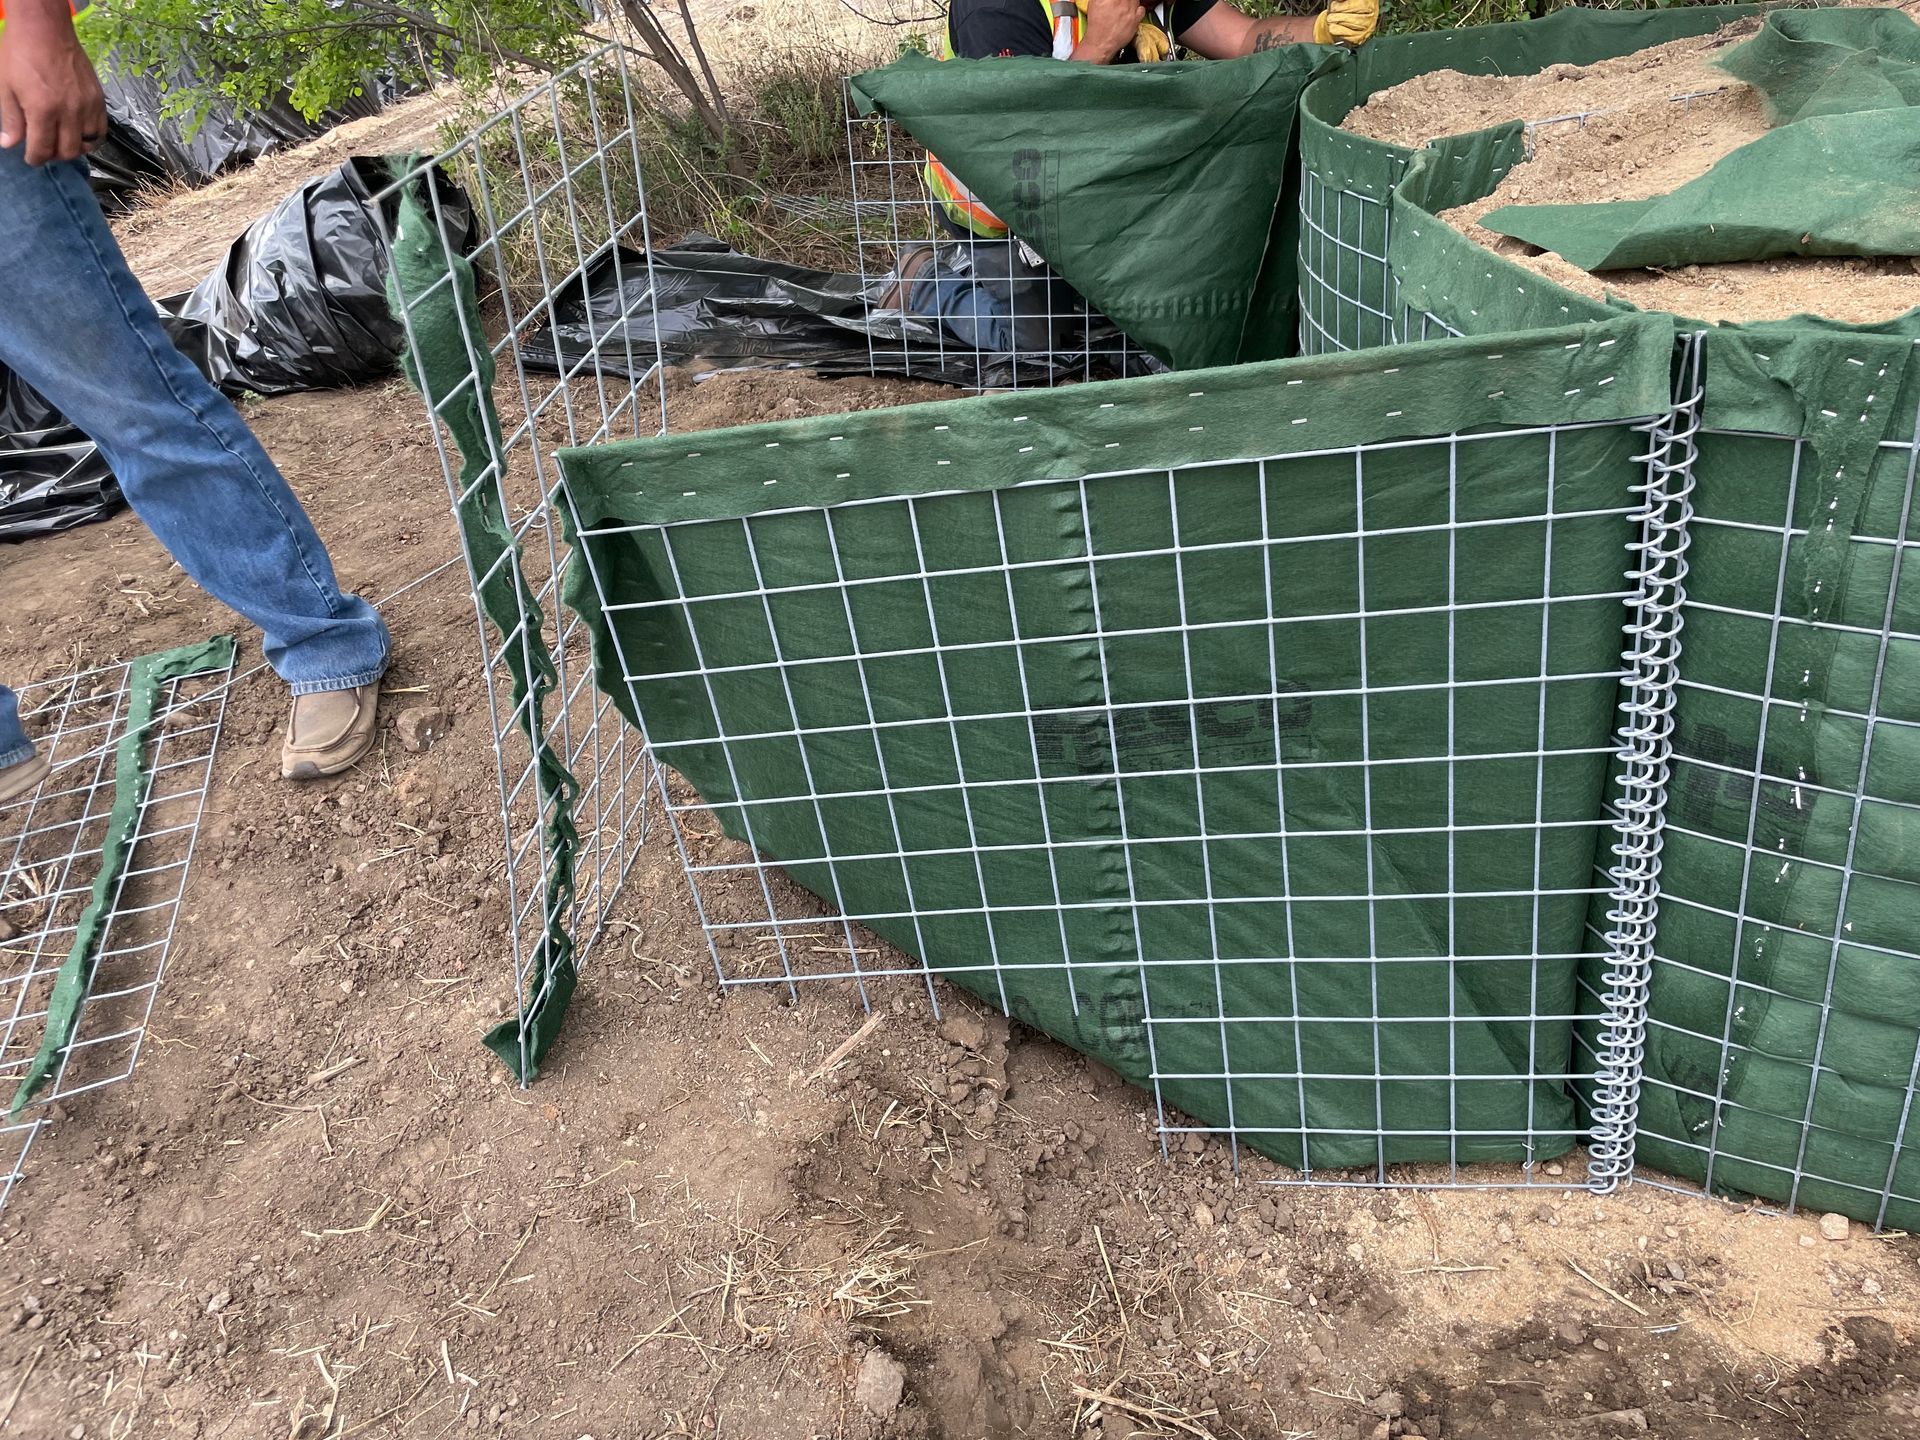
Step 3 – Cut your internal ‘diaphragm panel’ to match the ground and connect your two face panels
Step 4 – Fill the HESCO such that it ‘disappears’ into the levee

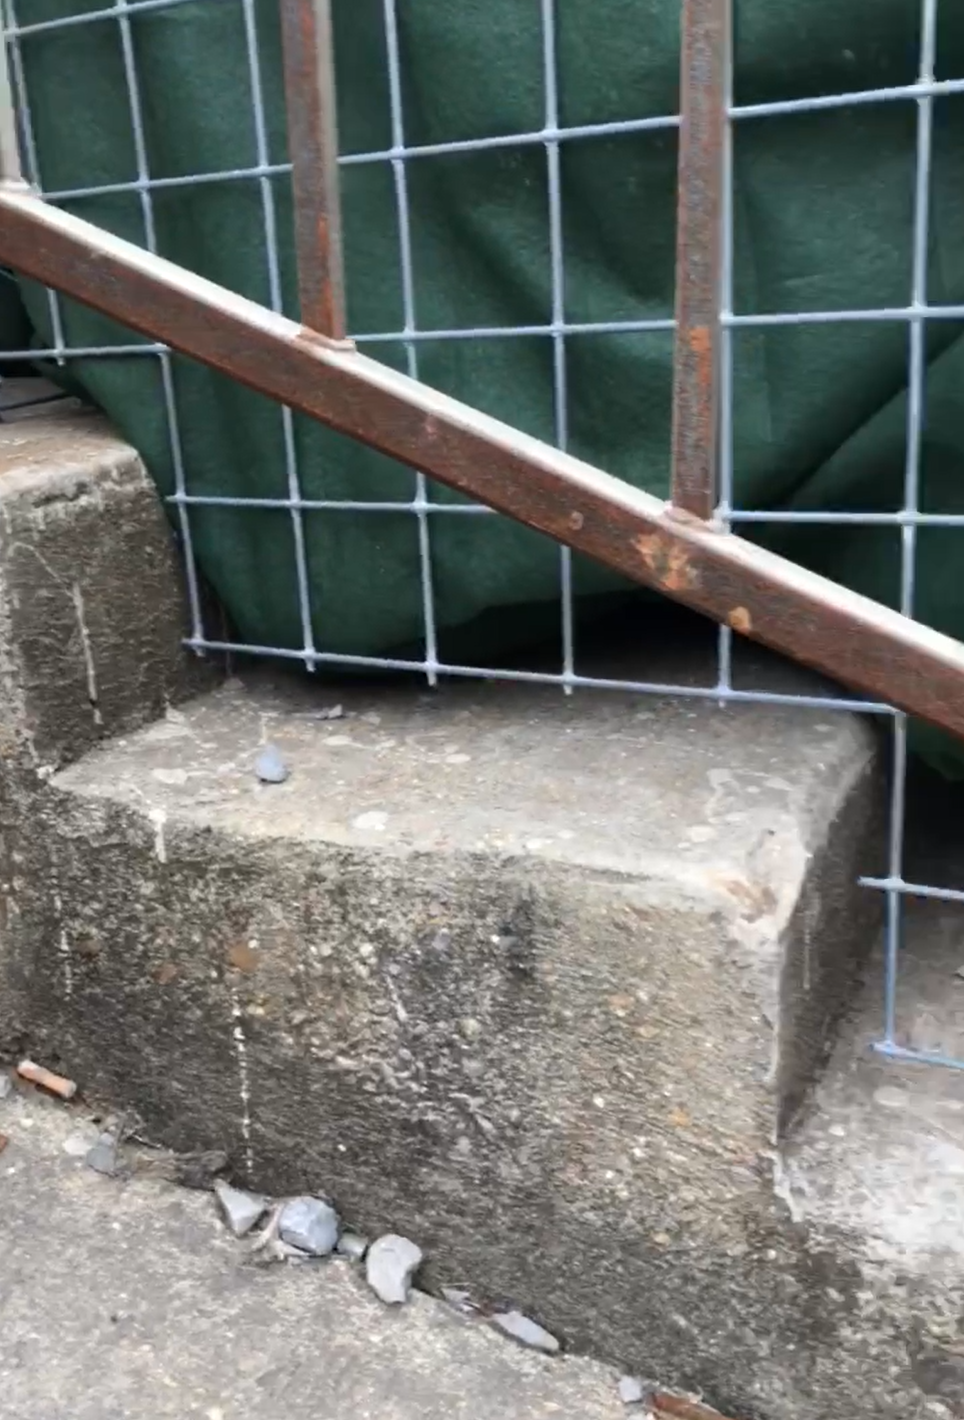
Honorable Mention: Modify HESCO to Conform to Stairs This is exactly the same as modifying HESCO to conform to a levee or earthen embankment except that in this case…….you are modifying it to transition up stairs by simply cutting the welded wire mesh to match the footprint it is sitting on!
Modify a HESCO to Pass Through Immovable Pipes, Cables, and Utilities
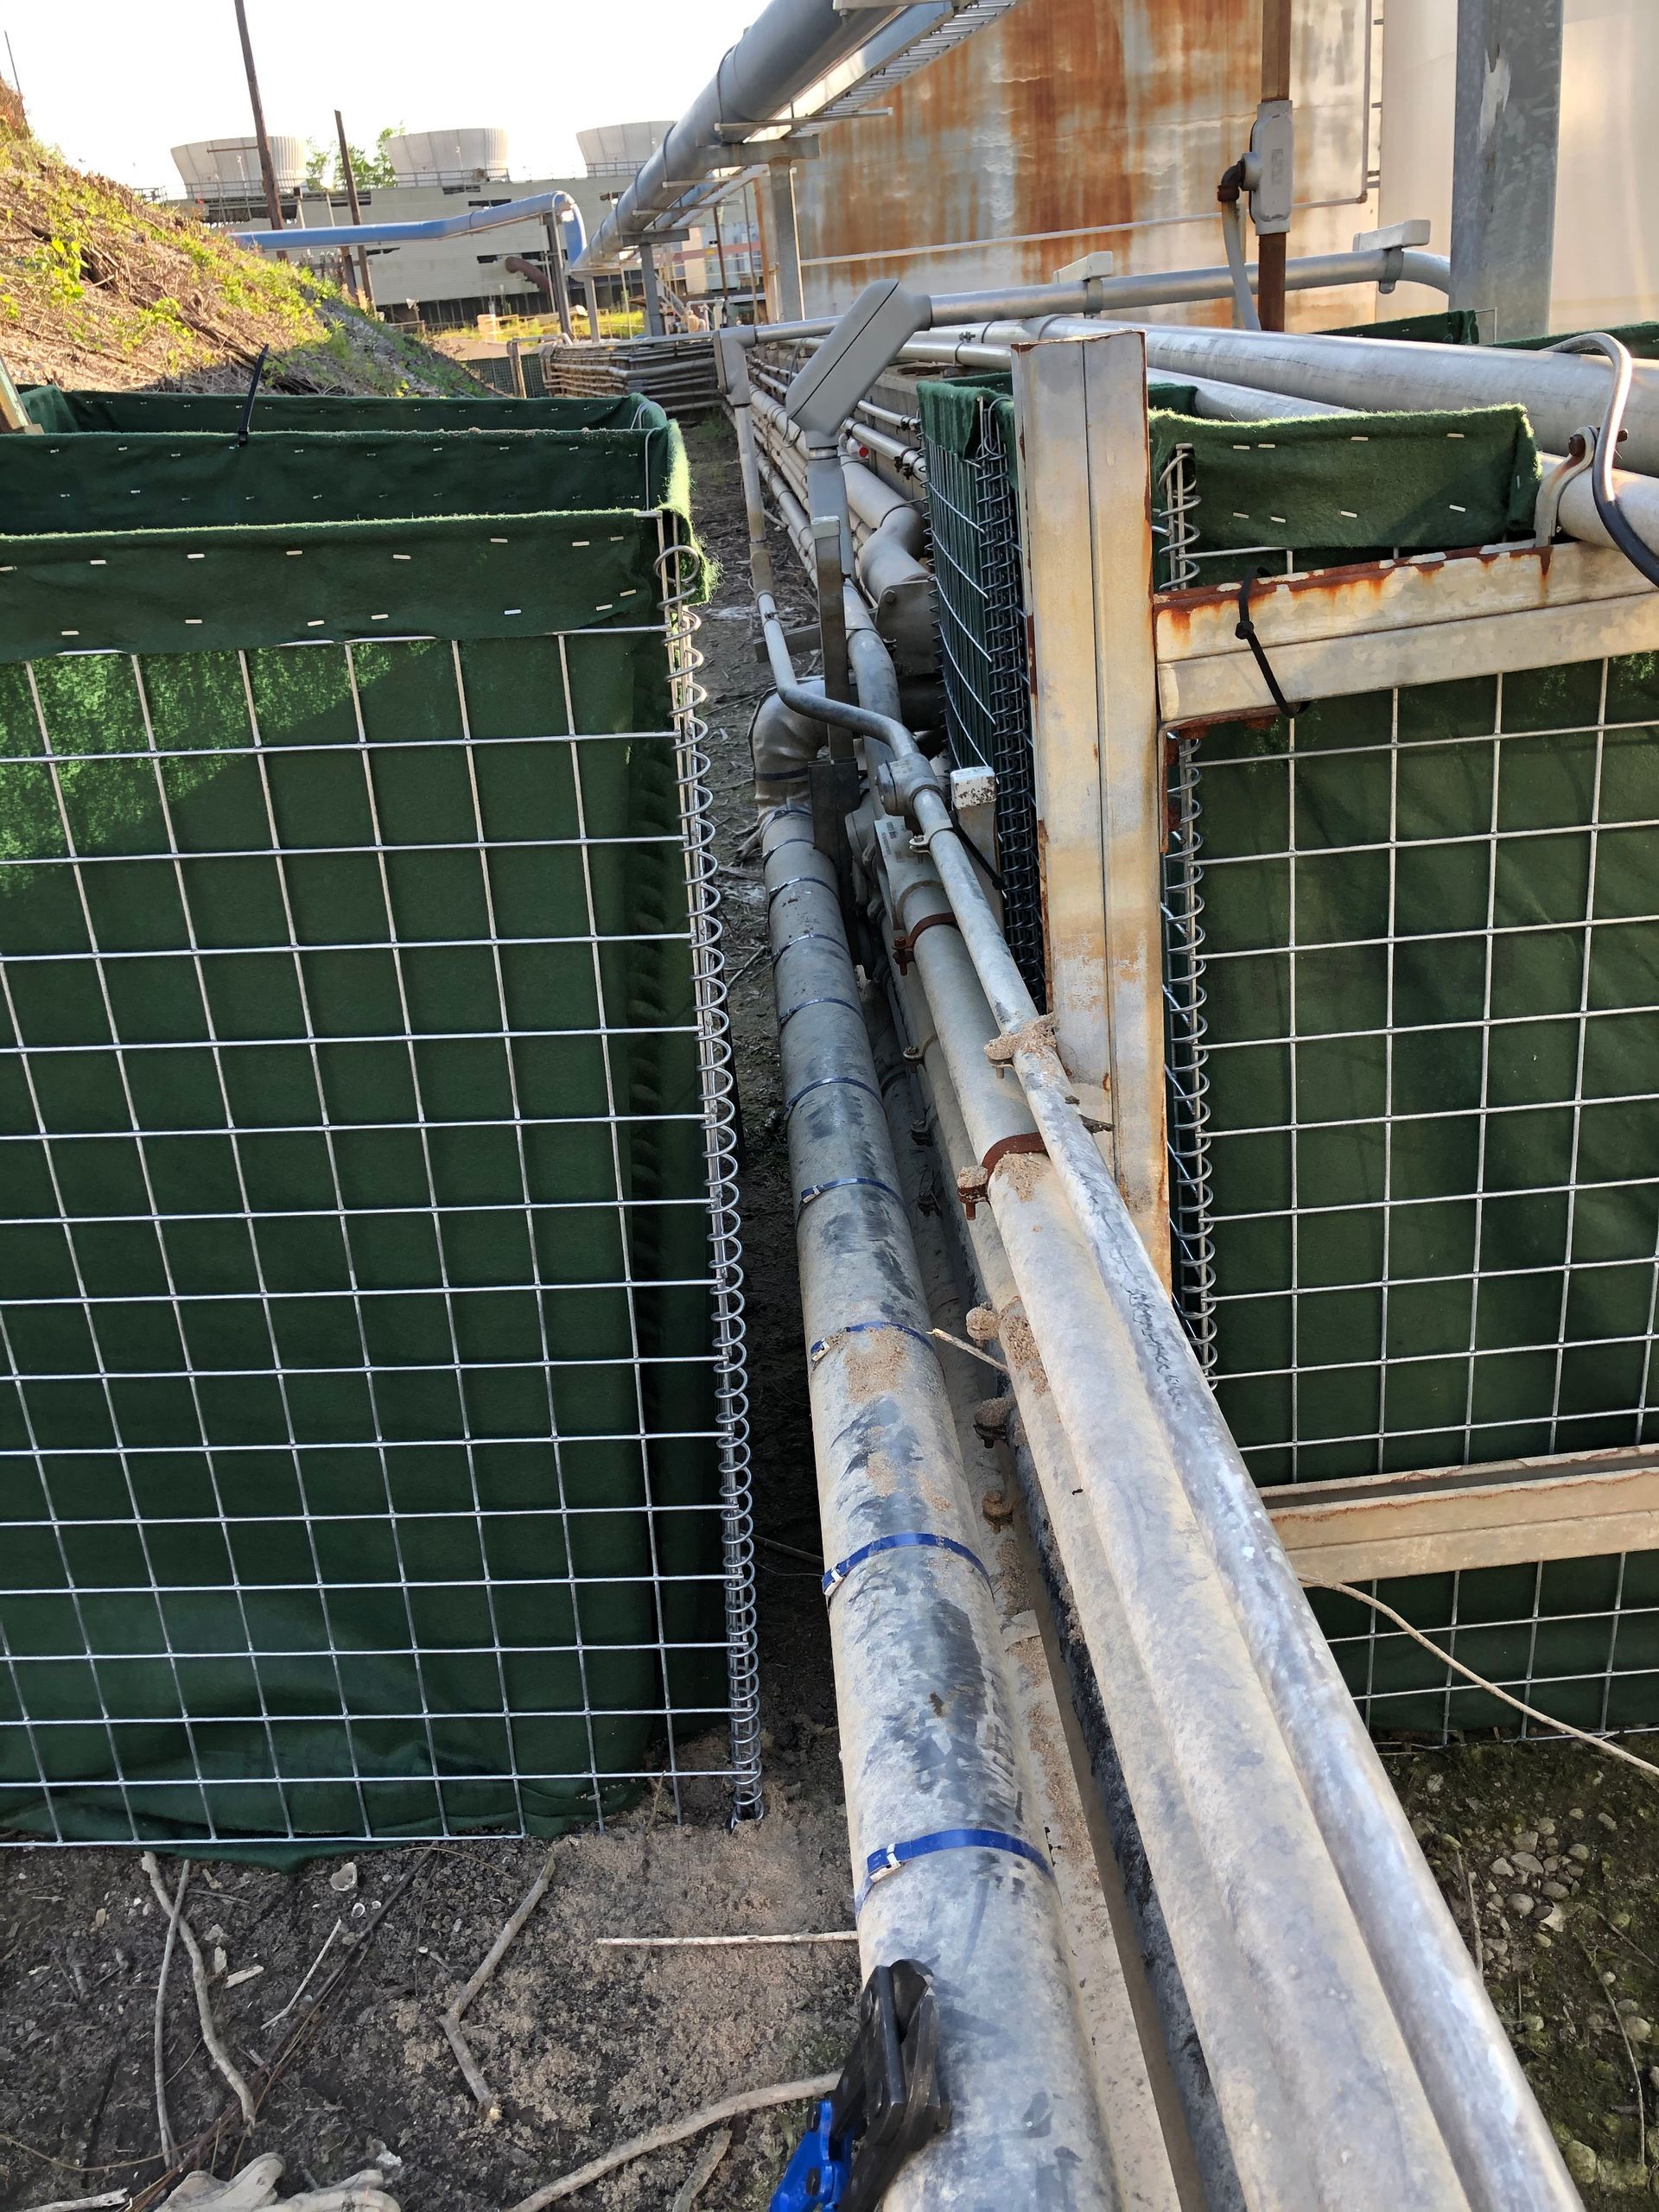
We enjoy working with this product in difficult locations such as this because it is easy to modify for a good fit when the situation requires. In this example, the barrier had to transition through the pipes pictured and into the berm on the left side of the photo. The photos below show the steps to take when it is necessary to work around pipes or similar obstructions that cannot be moved.


Step 1 – We started by placing a unit of HESCO Bastion on either side of the pipes as seen in the photo to the photos below.
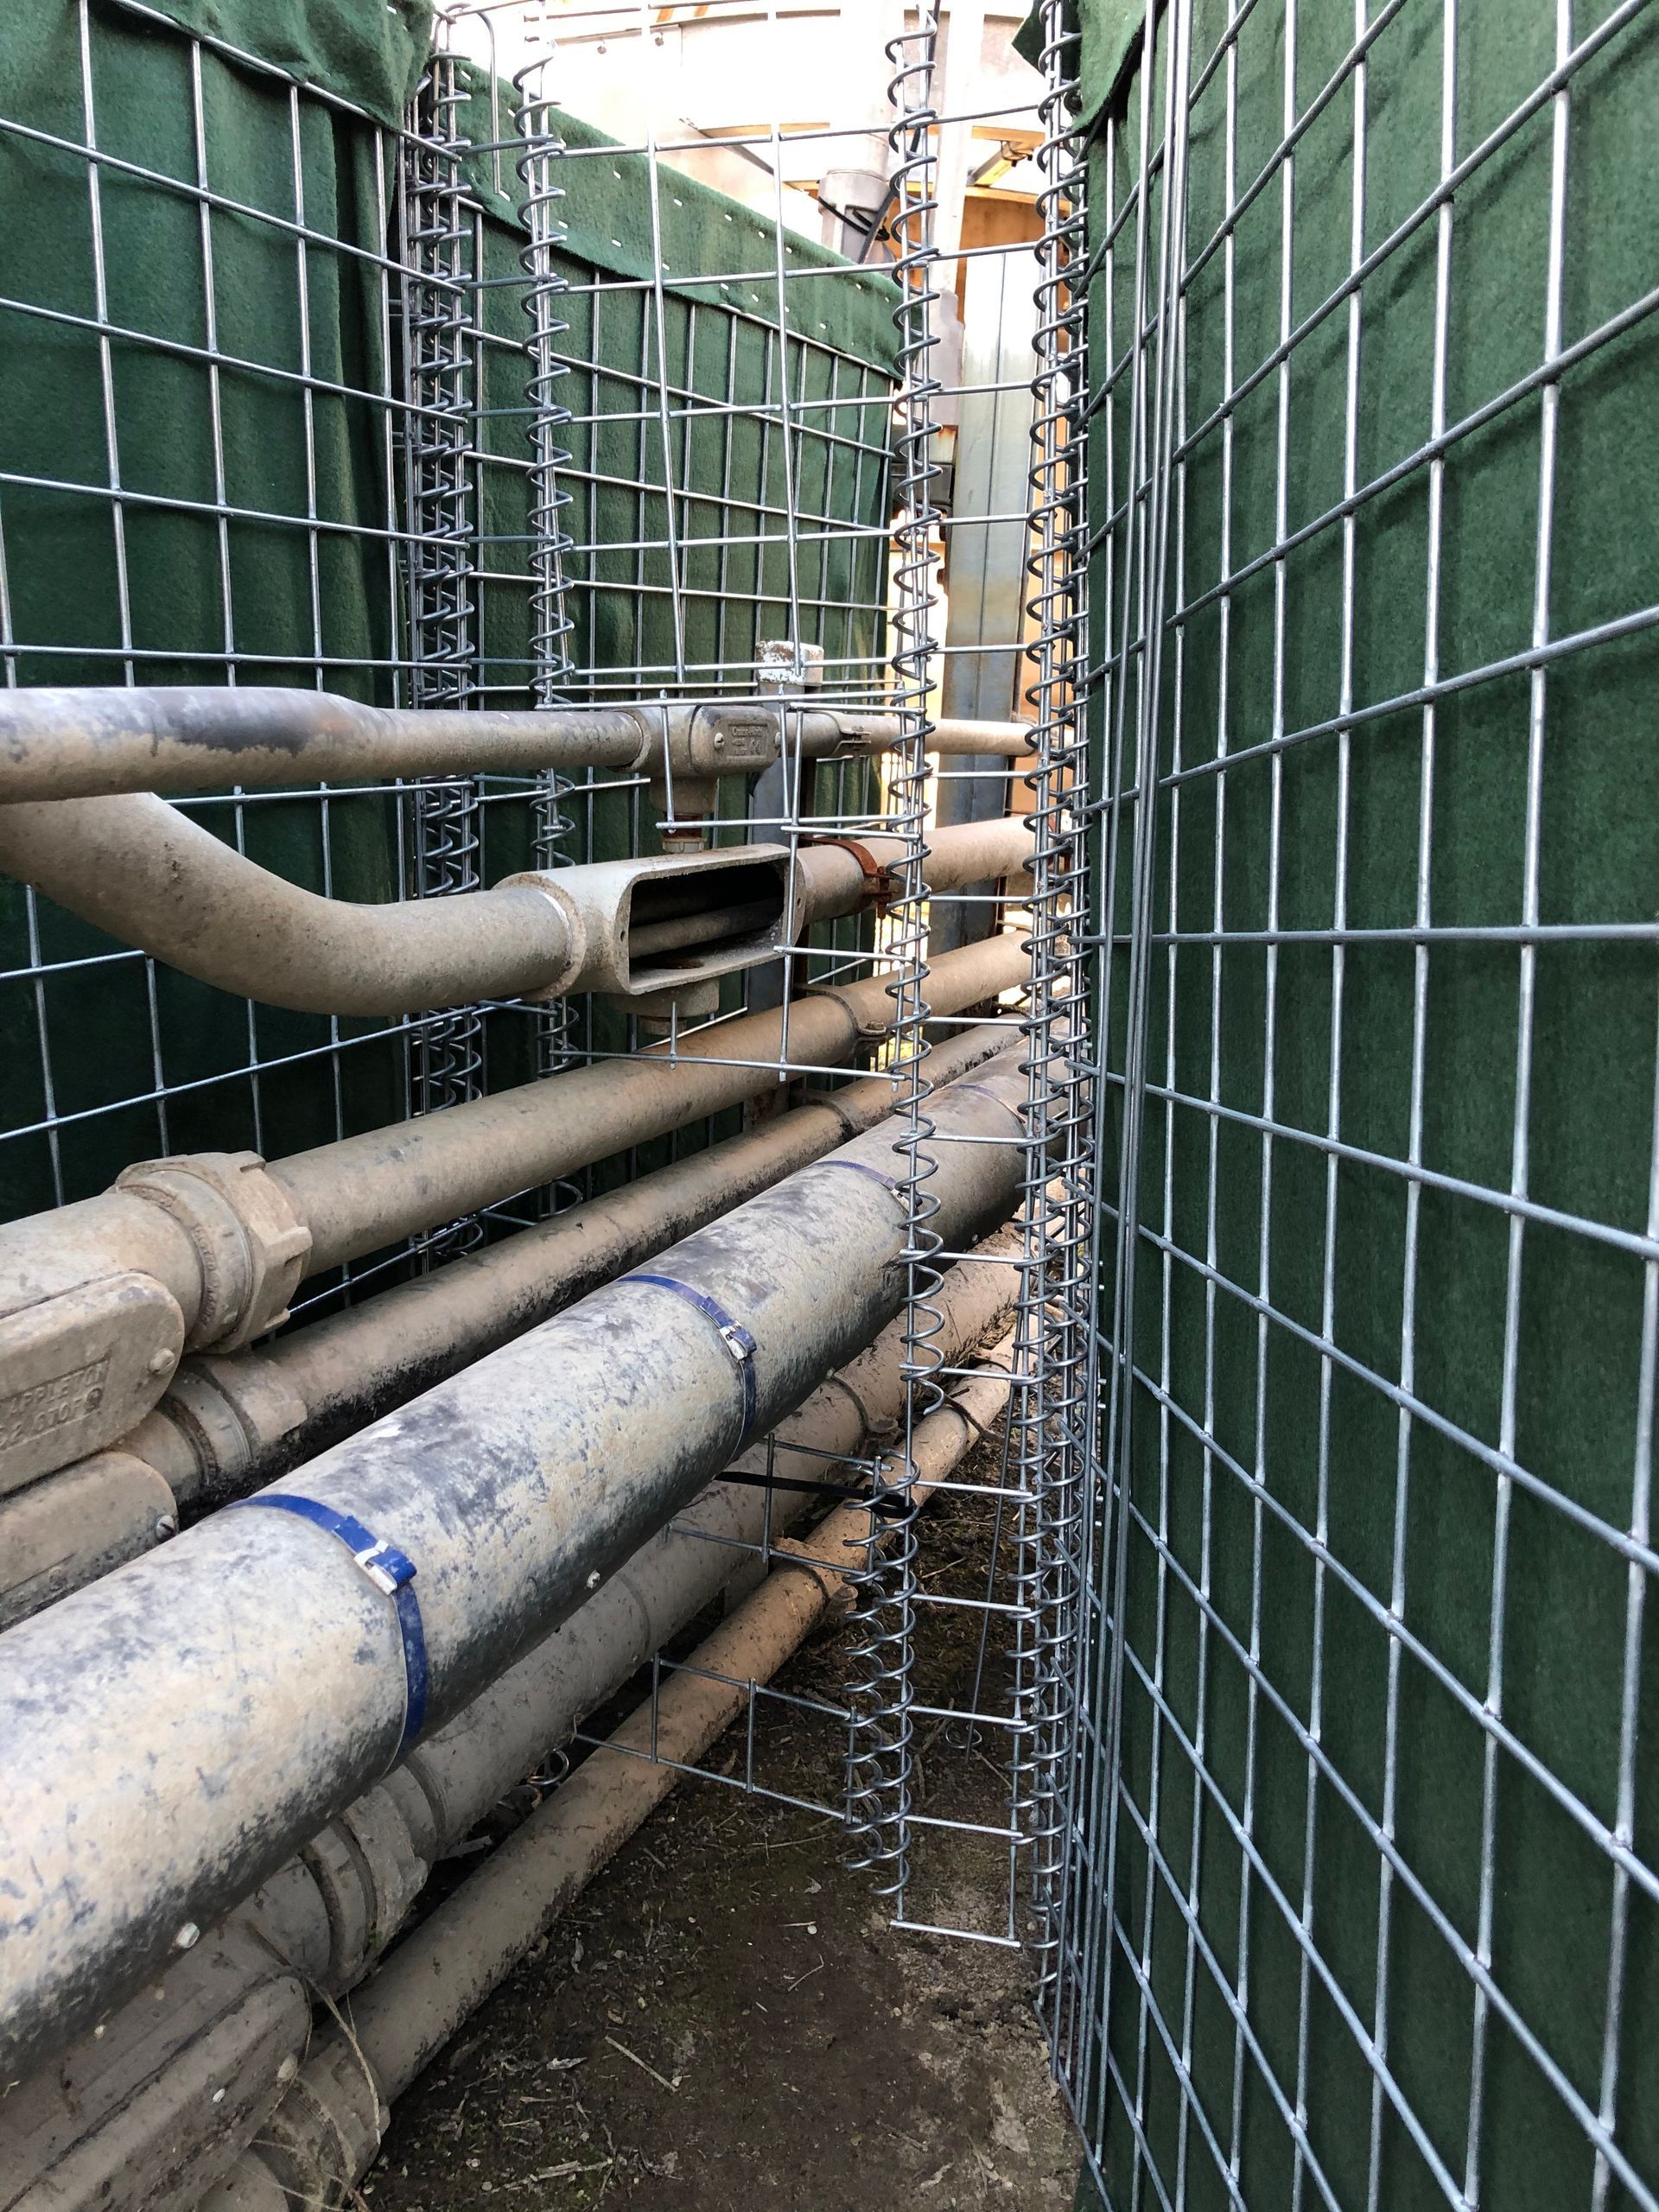
Step 2 – Wire the two units together around the pipes to be sealed. This can be done in a variety of different ways but in this example, we did the following steps:
A) We cut two strips of a single square strip of the welded wire mesh and attached it vertically to the HESCO Bastion units on either side of the pipes as shown NOTE: These strips allow you working space and an anchor point for step B
B) We then cut strips of welded wire mesh which were transitioned from side to side and between the pipes
C) Use a coil on either side of the pipes to screw the wire mesh pieces together and
therefore, connect the sections of HESCO Bastion on either side of the pipes.
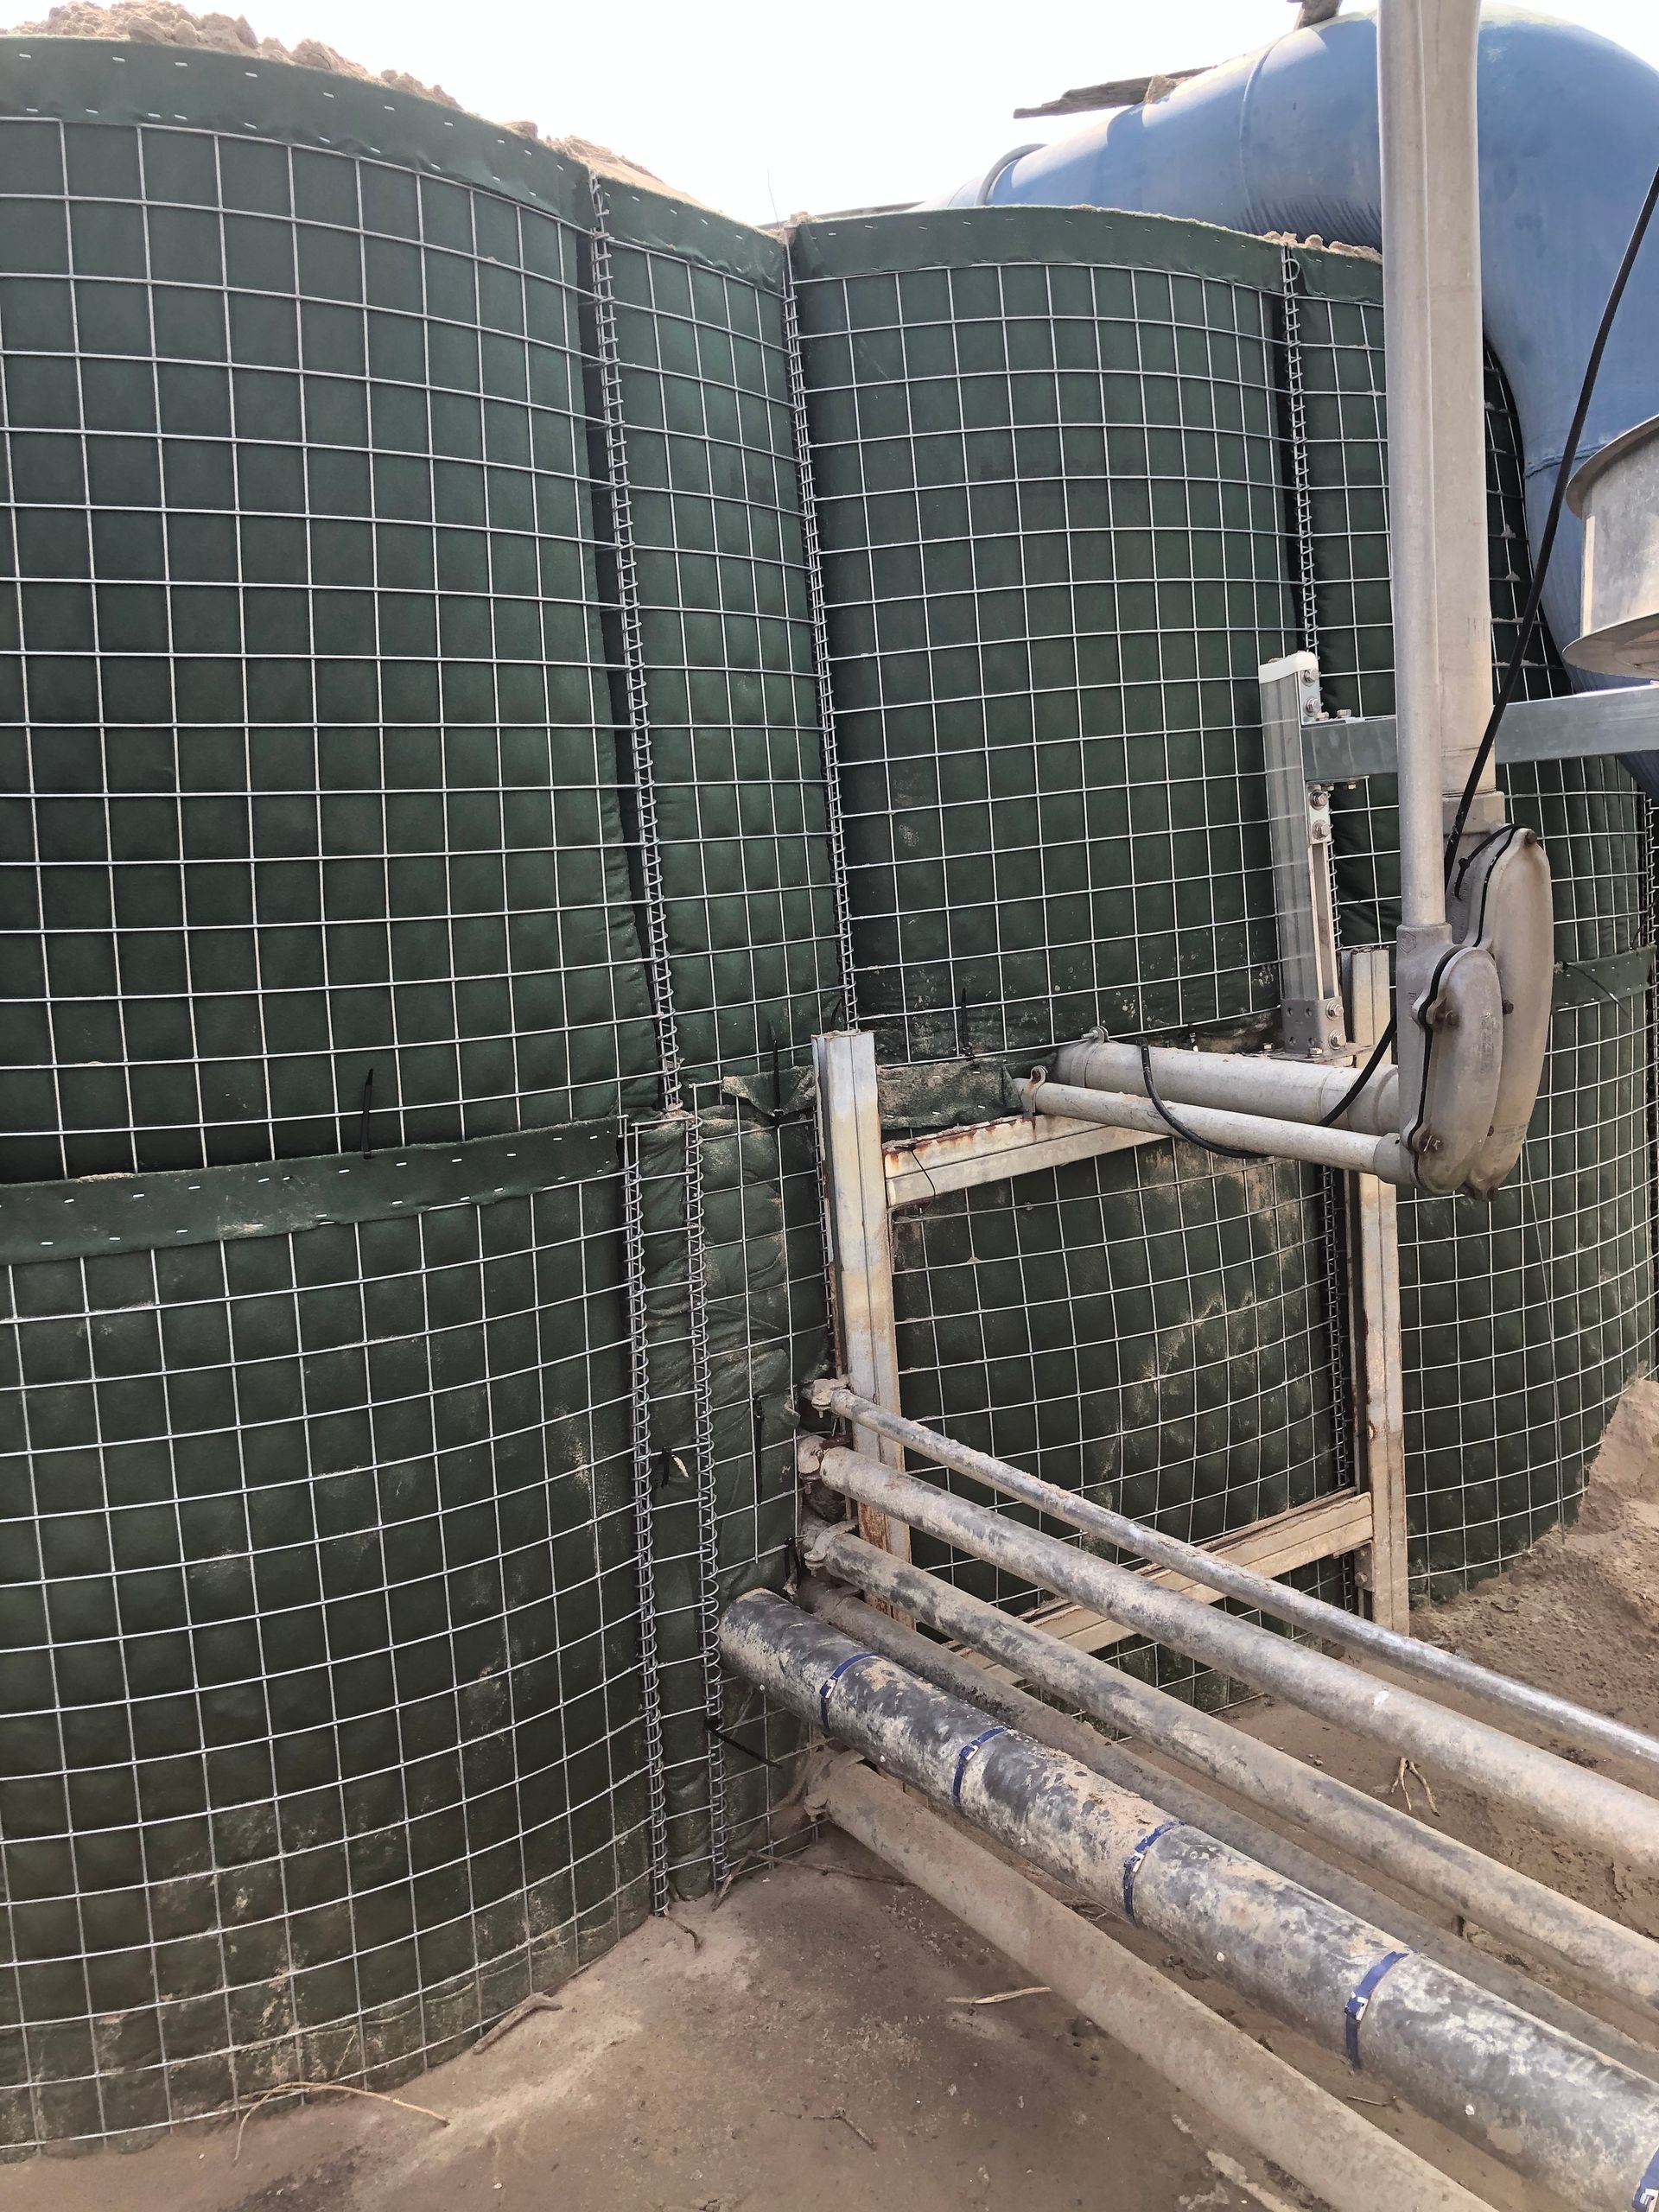
Step 3 – Line your modified cell with geotextile fabric and carefully fill the dirt/sand up and around the pipes making sure the geotextile forms a complete seal around the pipe and that fill material cannot escape. Compact the fill material in 1’ lifts throughout the filling process.
NOTE: We normally do not use water to create compaction but in this case, we did use water to ensure the sand was consolidated and well compact around the pipes throughout this cell prior to stacking the 2nd layer high HESCO Bastion.
Step 4 – Spray Foam Seal for Good Measure
In this case, because of the number of pipes, we felt a layer of spray foam around the point of entry of the pipes into the HESCO Bastion was a good idea as foam is a great tool in sealing up areas where seepage may occur during a flood event. NOTE: Don’t forget, Spray Foam is a wonderful tool in sealing up gaps that may occur within your flood defense perimeter!
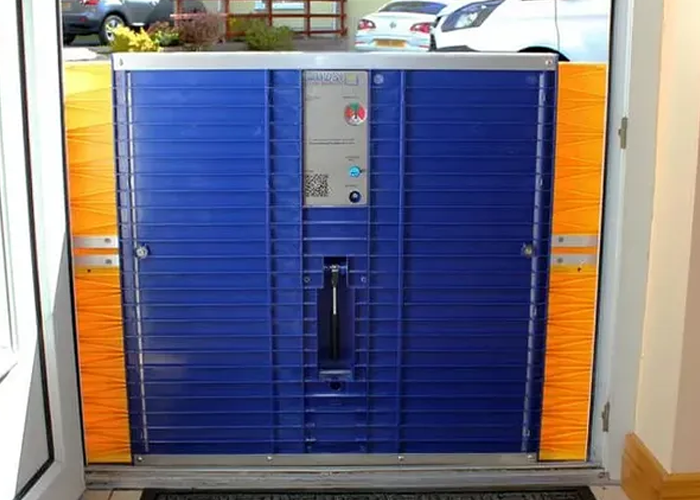
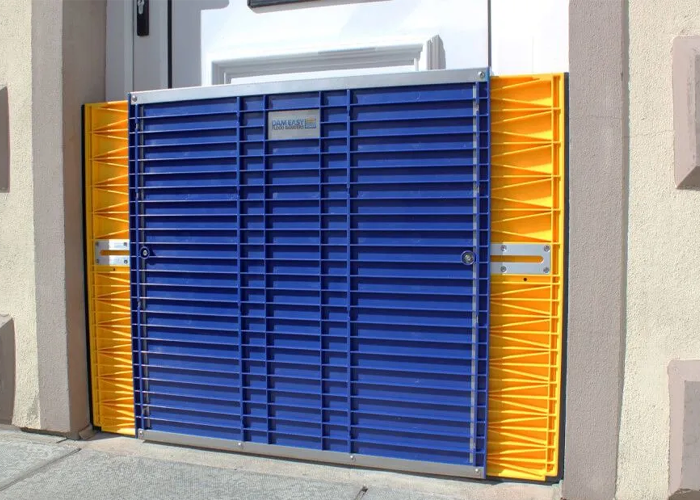
How to Create a Gap Closure Using HESCO
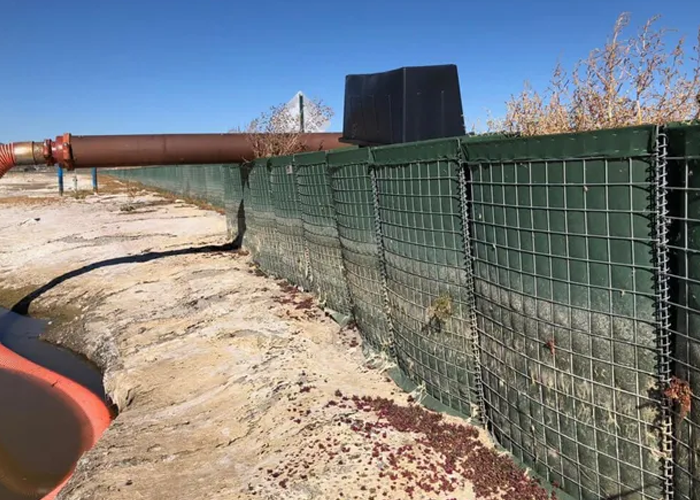
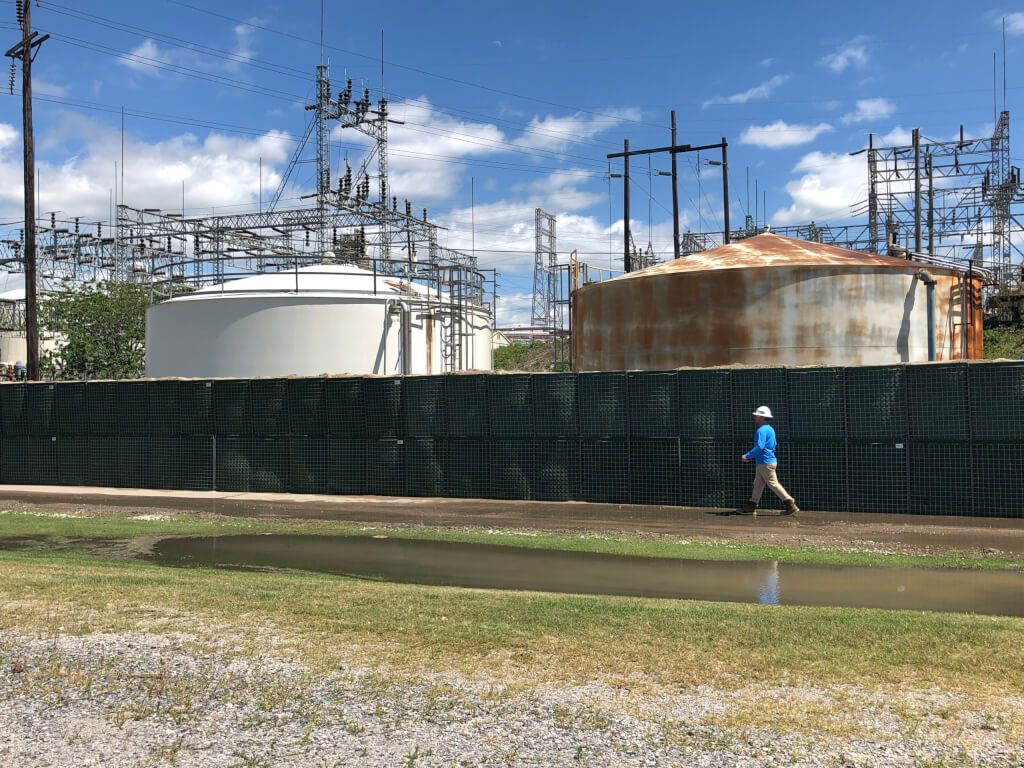
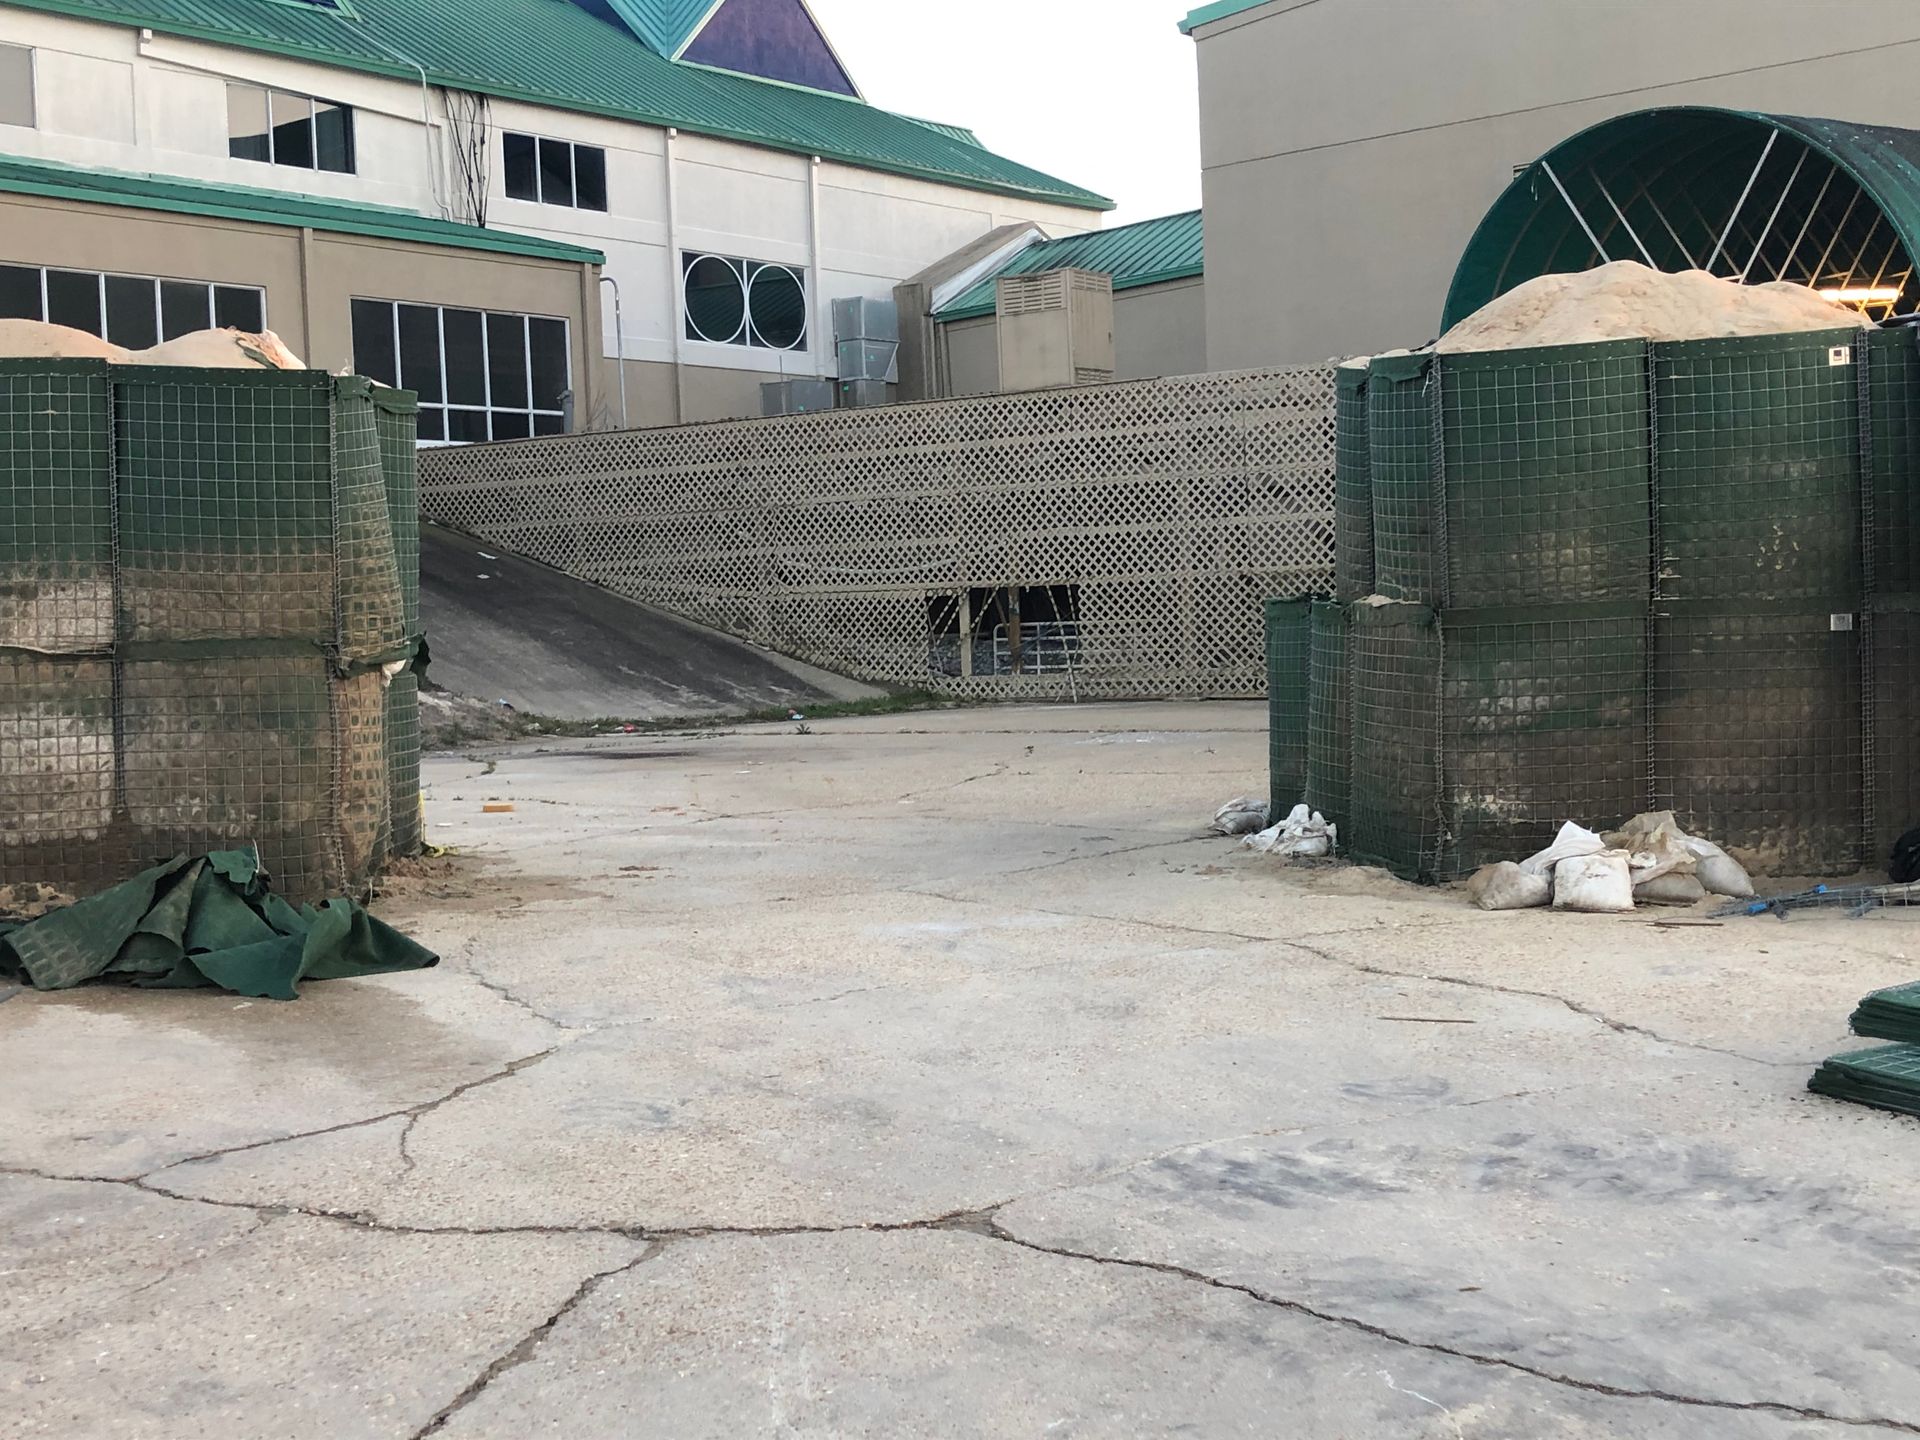
Sometimes, it is important to maintain access to a building when surrounding it with flood barriers. Often, when preparing for an anticipated flood that may take a long time to arrive, there is a need to maintain access to a building or location while also being able to seal it off quickly prior to incoming flood waters. This is an example, where we were able to completely surround a water treatment facility while also leaving access to it. This was done by simply leaving a small section of the HESCO Bastion empty while also making sure the length of these empty cells is the correct length to simply close the gap by pinning these empty cells to the opposite side of the gap and thus ‘close the gap’ immediately prior to a flood.
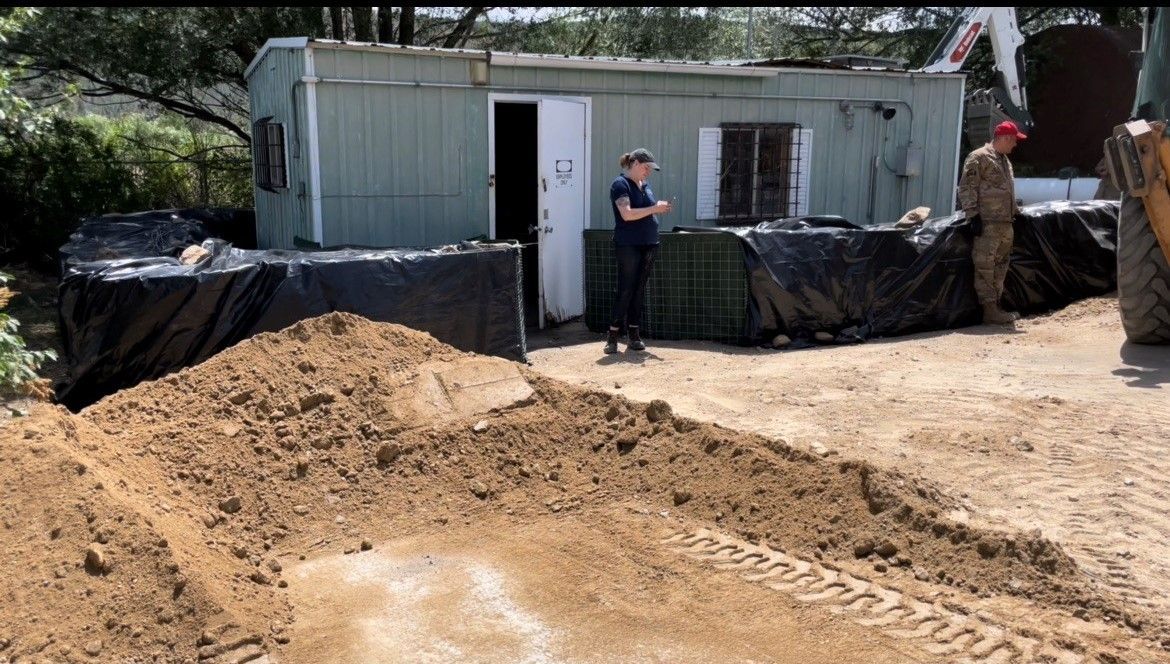
Common examples include:
- Gap closures to leave access to buildings
- Gap closures to leave roads and railroad tracks open until the last minute
- Gap closures anywhere you would want to pass through a flood barrier during times when flooding is not expected and access is required.
How to Add Thickness to a HESCO Structure at No Extra Cost

This structure spanned 2,000 linear feet and was a 3:3:3:2 stacked structure. However, no extra HESCO was purchased for the 3 center rows which saved the customer from having to purchase 6,000 linear feet of product!!! In this case, here were the steps:
Step 1
Stretch out two rows of HESCO side by side
Step 2 Remove one of the end panels at every join (At every connection, there are two panels pinned together. However, you only need 1 panel and can therefore use the 2nd panel)
Step 3 Screw the ‘extra panels’ to each of the two rows of HESCO running side by side (This gives you added thickness while connecting the two rows together)
Step 4 Fill the two outer rows of HESCO
Step 5 Fill the ‘Hollow Center’ to completion
NOTE: You will have an extra panel in the center about every 2-3 cells
NOTE: For flood defense applications, we suggest using geotextile intermittently within the ‘hollow center’ to prevent water from somehow being able pipe through a wall
NOTE: This requires the helical coils to be snipped at the end where they are bent, removed, and screwed back into place as you create the configuration detailed herein
Modify HESCO to Fit a Smaller Footprint Space
Space This an example of how you can modify a HESCO flood barrier to make it thinner. In this case, we were installing flood barriers at the Las Vegas water treatment facility and found that the HESCO was 6” thicker than the base it was supposed to sit on. The solution was to unscrew the helical coils on one side of the entire stretch where the barrier did not fit, move the face panels inward by 6”, and re-screw the helical coils back into place such that the thickness of the barrier was 6” thinner.
NOTE: Some staples within the geotextile needed to be pulled out during this process to allow the face panels to move inward. The geotextile was not cut during this process. We did go back and cut out the extra 6” of wire mesh that can be seen protruding
Step 1 Remove helical coils on either side of a face panel
Step 2 Push the face panel inward to the desired location NOTE: You will have to remove some staples within the geotextile to allow you to push the face panel further into the cell.
Step 3 Re-Screw your coil to the wire mesh of the internal diagram panels at the desired location and your face panel. (as seen in the photo)
Step 4 Cut any protruding wire mesh as desired WARNING: When cutting the welded wire mesh, the location where the wire was cut is sharp.
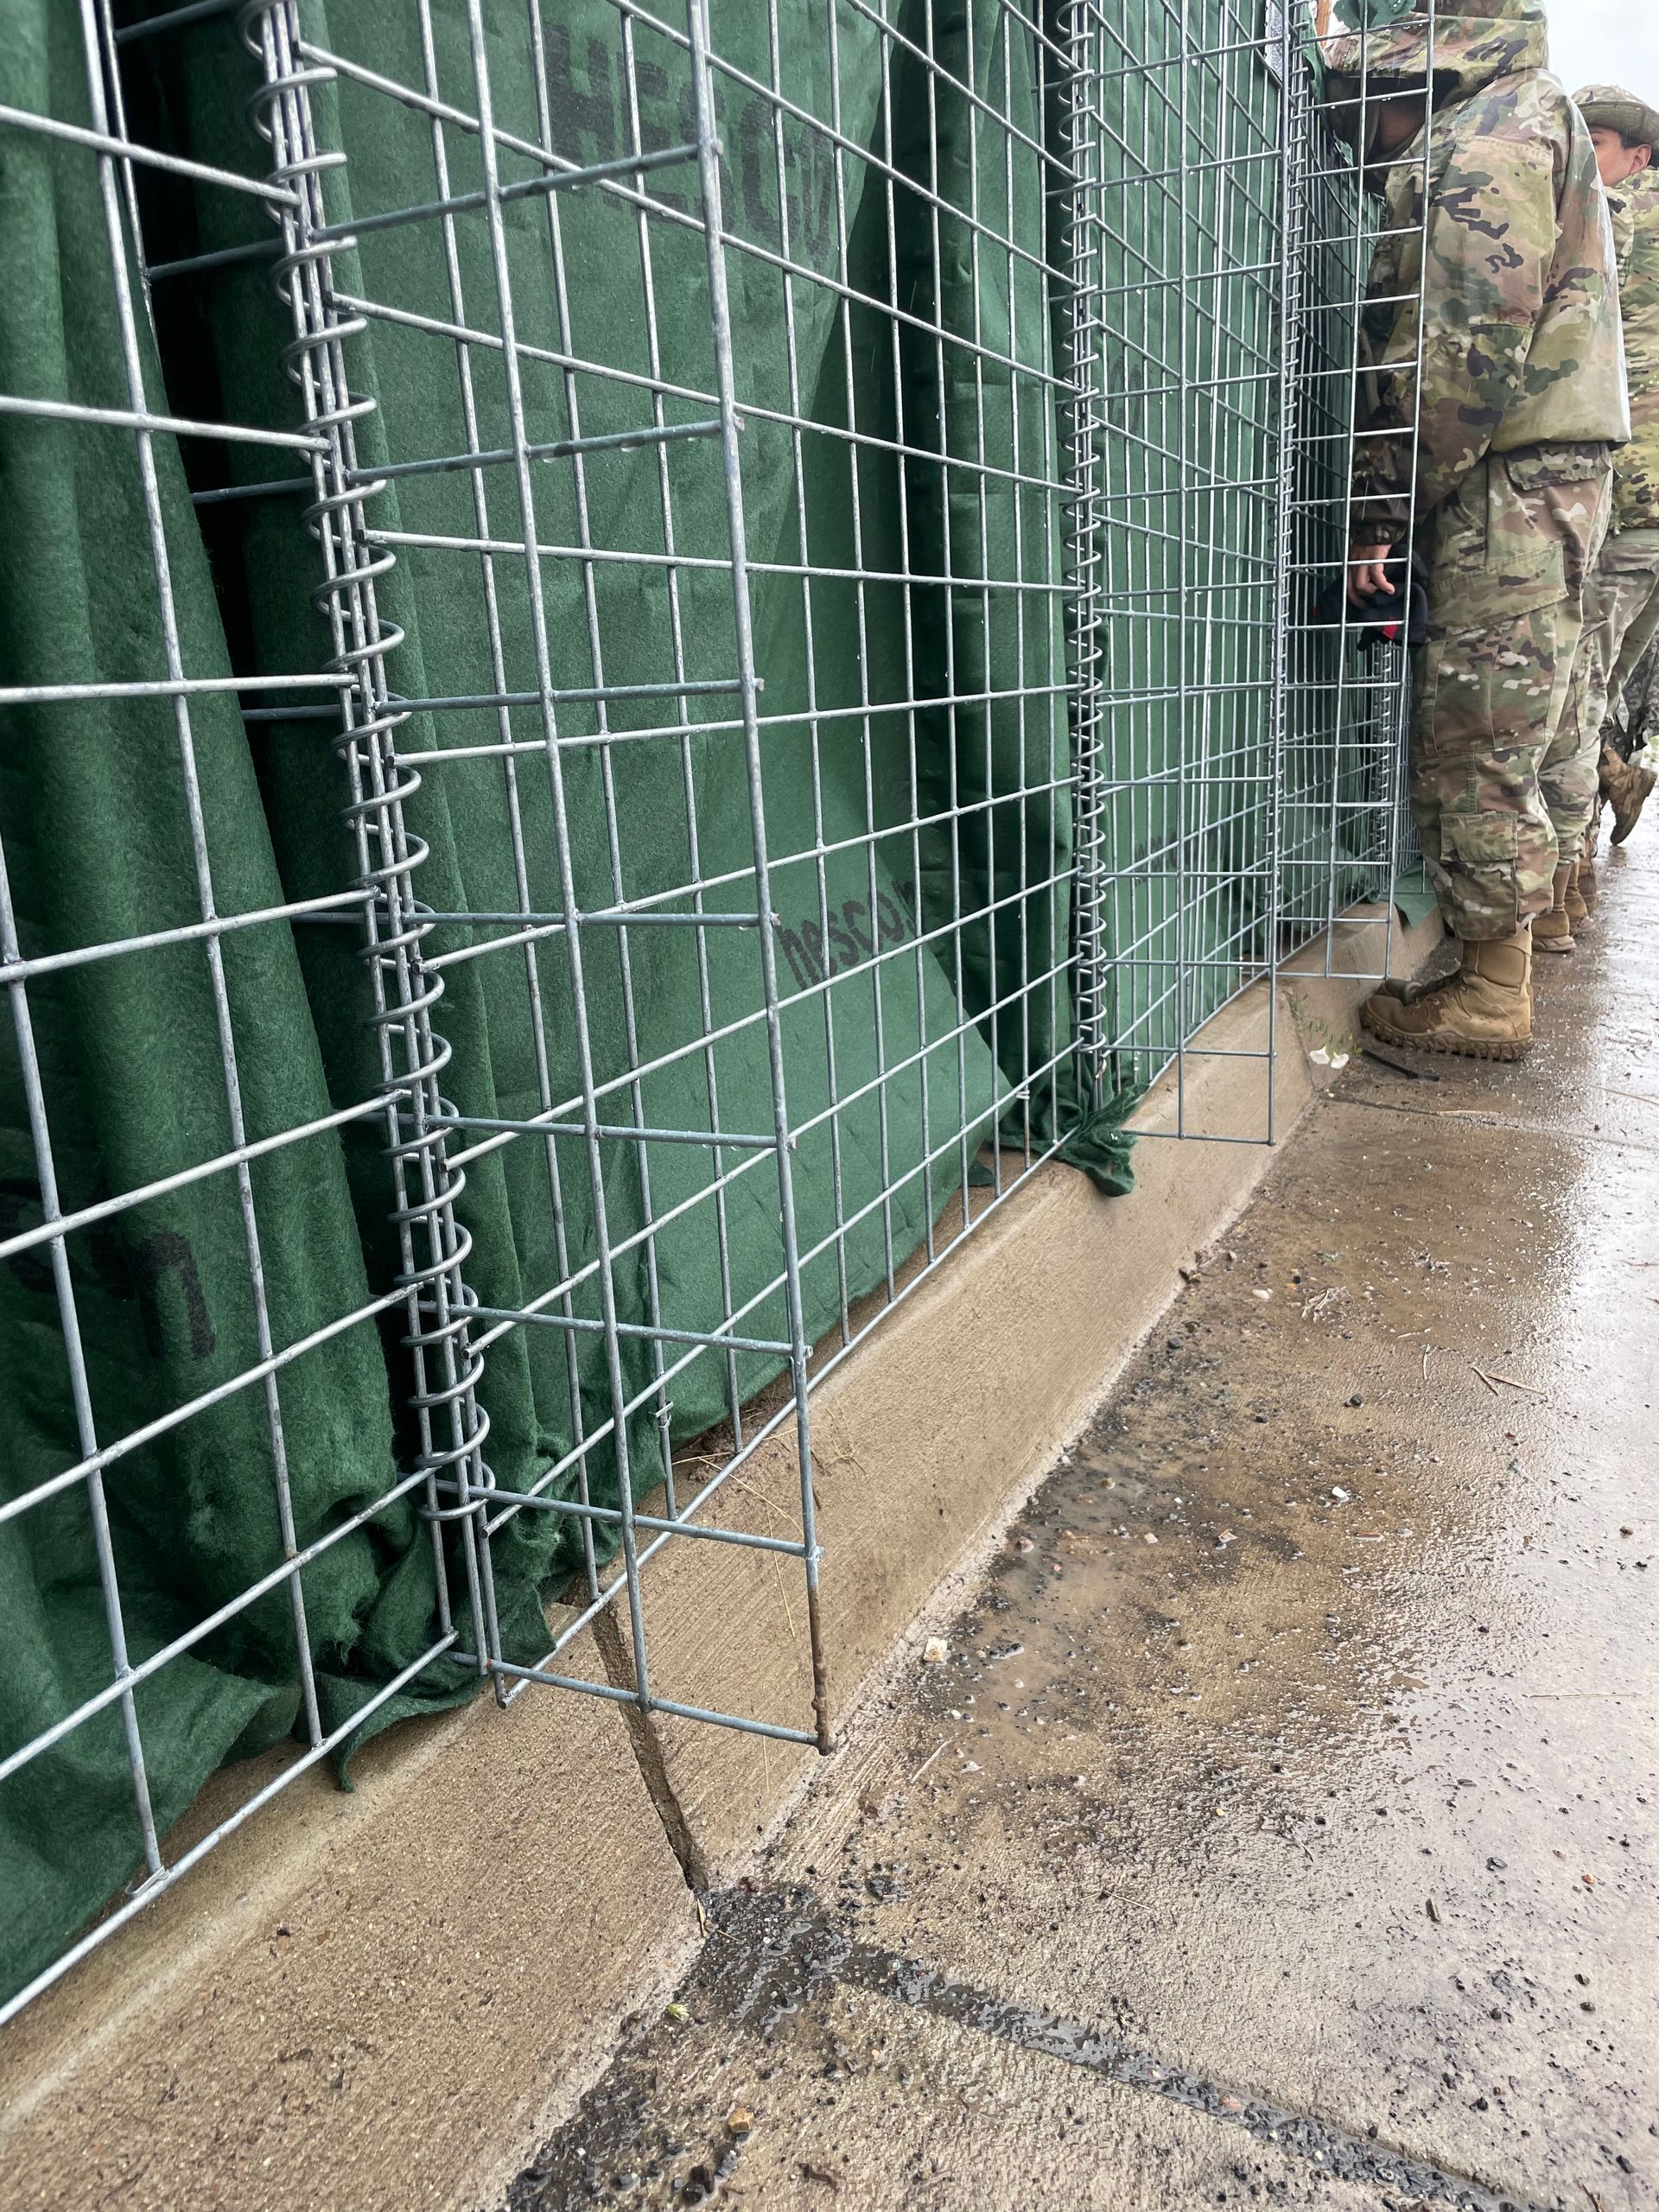
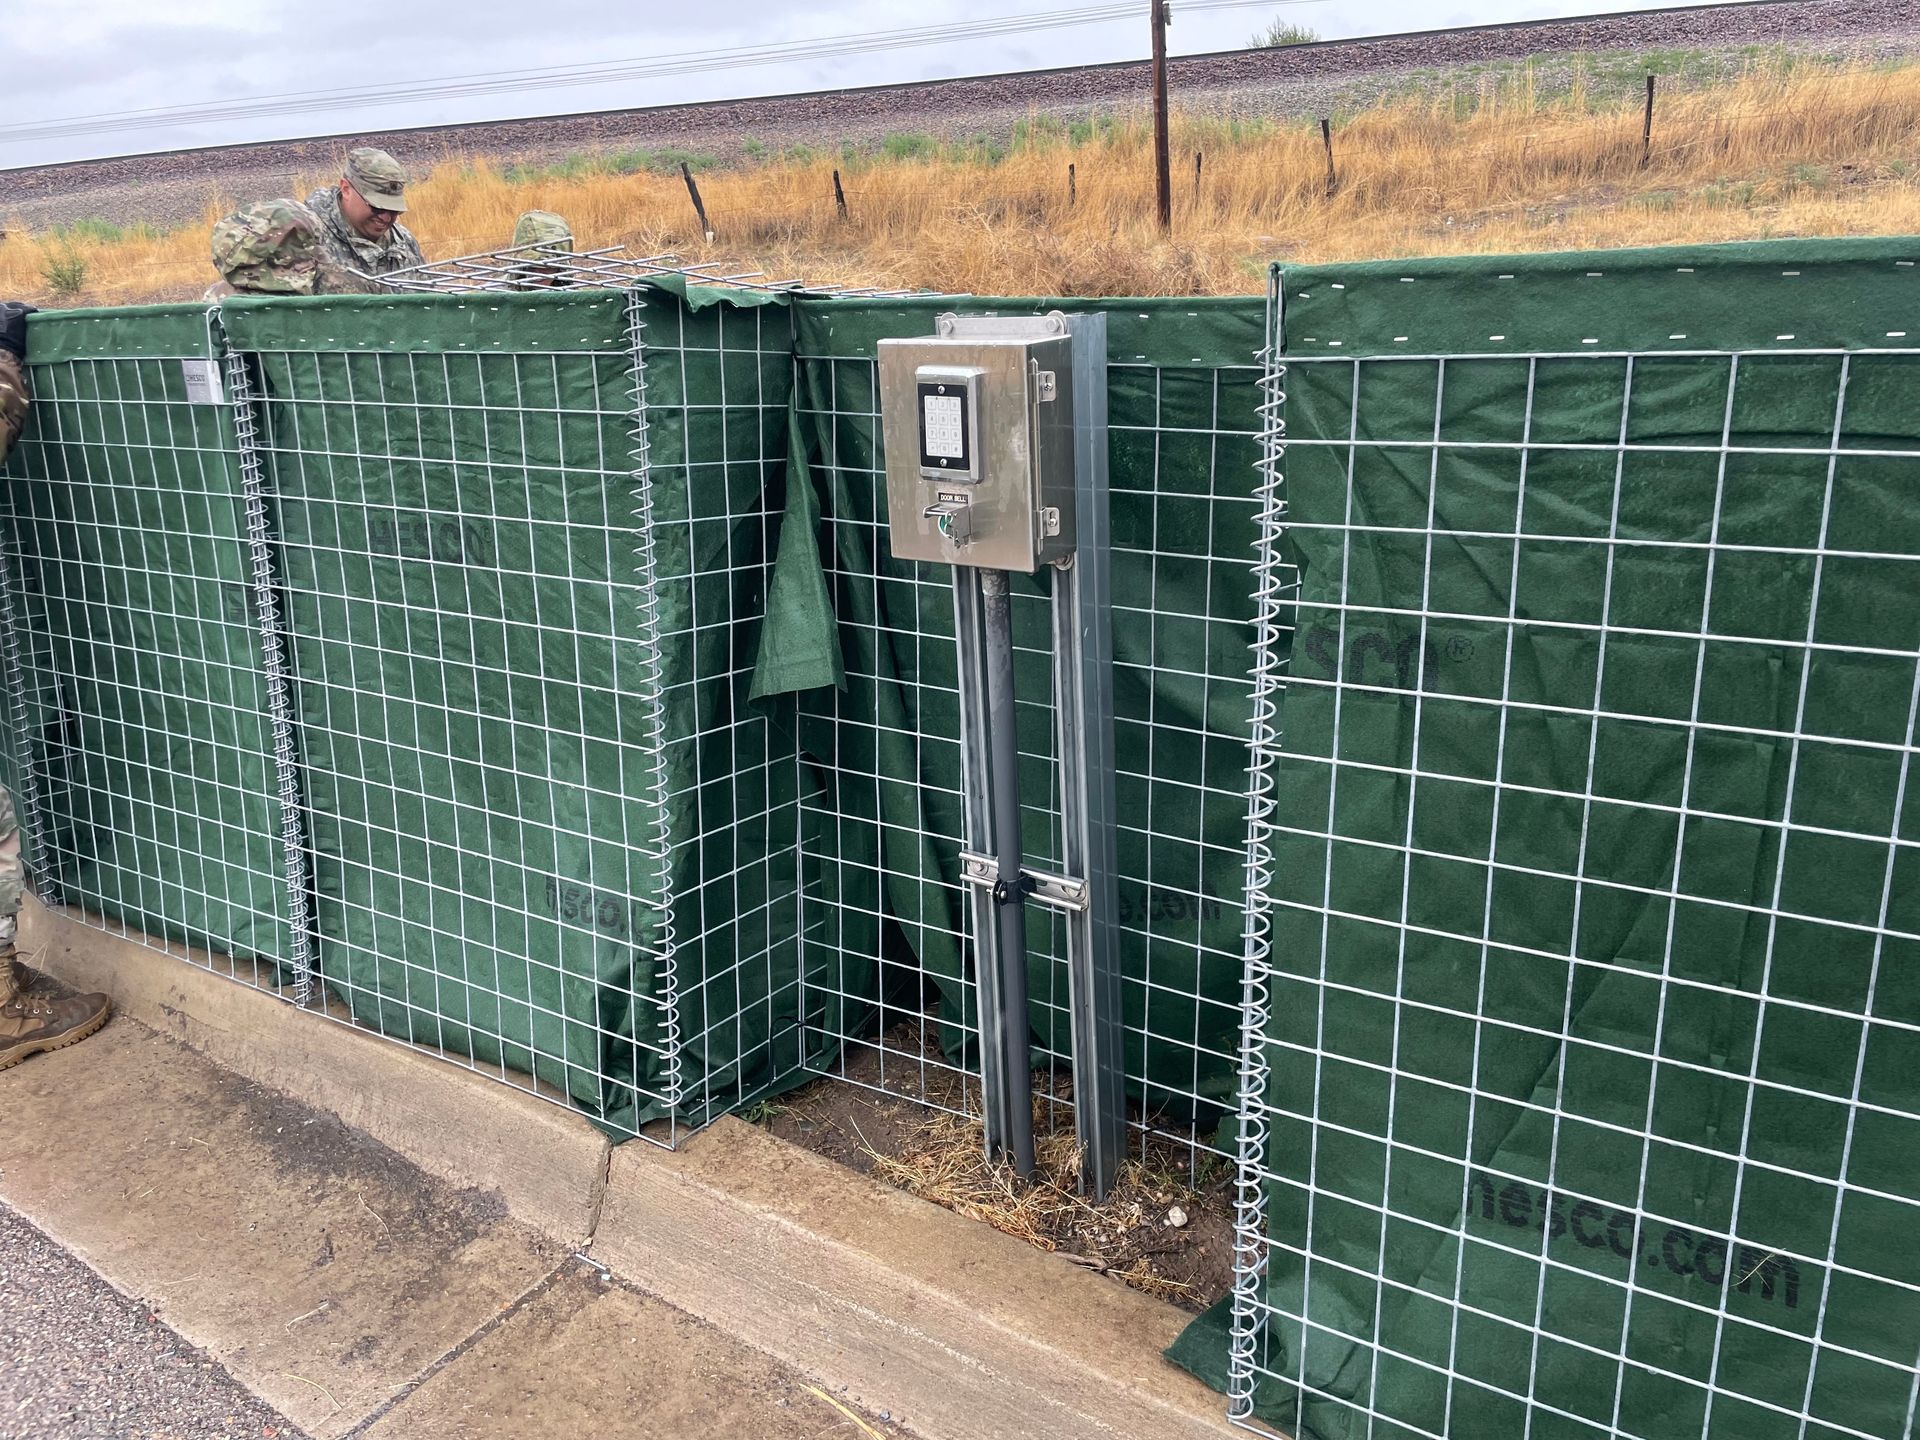
Modification of HESCO Face Panels Around Immovable Obstructions
Similar to the modification above, we had a requirement to push back a single face panel of the HESCO barrier in order to allow access to entry control electronics. This is a fantastic example of how you can move a single face panel of the HESCO when working around obstructions like this.
How to Repair a HESCO Flood Barrier
This is a quick and easy sequence used when repairing a damaged unit of HESCO. If the wire mesh is not bent or bulging out in any way, it is not necessary to remove it and you can simply overlap the repair panel over the damaged area.


Step 1: Identify the unit to be fixed
Step 2: Cut out damaged material and remove any soil that spills out such that a new panel can be freely attached without obstruction from the dirt.
NOTE: If the wire of the damaged unit is not significantly damaged, it can often be left in place and the repair panel simply overlaps the damaged panel
Step 3: Prepare a single panel of the same size as the one being repaired by taking a single panel with extra fabric on each side and a coil which is attached or ‘screwed on’ to each side of the panel
Step 4: Attach the replacement panel (or panels) to the unit being repaired using coils and pins provided to create a join and ensure the extra fabric lines into the newly repaired basket to ensure a tight ‘seal’ from leakage of the fill material.
Step 5: Backfill and top off repaired cell with fill material.
Finished View: In this example, multiple coils were screwed together in creating this join as discussed during the inspection.
How to Connect an Empty HESCO to a Full HESCO
Step 1 Remove the end panel of the new HESCO unit to be joined
a) Remove the helical coils on either side of the panel being removed
b) Remove the staples holding the geotextile to the panel being removed (NOTE: You should never have to cut the geotextile fabric)
Step 2 Screw the helical coils back into place now that the end panel has been removed
Step 3
Use a joining pin or any of the methods detailed below to connect the empty HESCO to the full HESCO
Step 4 Use a zip tie to connect the fabric of the new HESCO to the full HESCO cell you are connecting so it is ready to be filled

Different Methods to Make Connections with HESCO Bastion
Empty Coil Method
Step 1 Pin (or screw) a single coil to the coil of the full unit you are connecting to
NOTE: This single coil will be loose such that is has the ‘play’ within it making the connection of a new unit easier.
Step 2 Pin the coil of the new you need to connect to the ‘empty coil’ you pinned to the full unit
Screw the Coil to the Coil Method
Step 1 Take a single coil and simply screw it to the coil you are attaching to.
NOTE: This example shows a coil being screwed to a coil AND a panel of the HESCO. This is an excellent example of how you can make your joins if you do not have joining pins.
NOTE: The top and bottom of the coils are bent during fabrication to prevent them from unscrewing. You have to cut off about 1” of the bent part of the coil at the top and bottom of the coil such that you have a factory curve of the coil and not bent.
Pin the Coil to the Wire Panel Method
Step 1 Take a single coil and mash it into the wire mesh wherever you want to make the connection
Step 2 Insert the joining rod into the coil from behind (or inside) the wire mesh


How to ‘harvest coils’ with HESCO
During the process of modifying HESCO, it is common to need extra coils. This often leads to removing coils from another unit of HESCO and therefore, losing a good cell (or box) within a strand of HESCO boxes. This technique will save you money by preventing loss of good material when extra coils are needed.
Description: Every time two HESCO units are normally connected by joining the helical coils with a joining pins provided, you can harvest x2 coils and x2 pins without wasting any material.
Step 1 Remove the 2 coils at any place you would normally connect with a joining rod NOTE: You will need small bolt cutters to snip the bent portion at the coils prior to unscrewing)
Step 2 Join the material to be connected re-screwing a single coil around the panels being connected
RESULT: Your HESCO units are connected, and you now have an extra coil and an extra pin from any/every connection point you do this to.
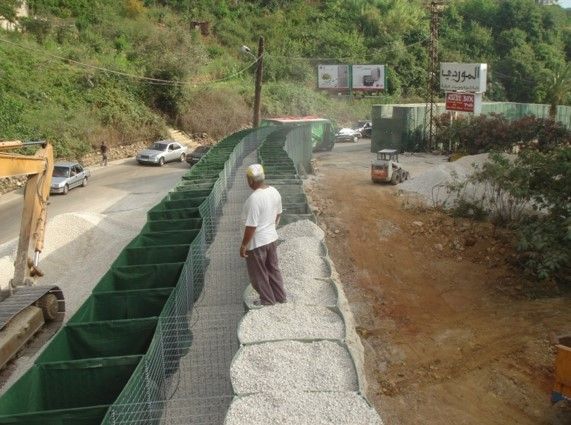
Modified HESCO to Create an Impromptu Rock Gabion for Scour Protection
This is a great example of how you can completely take apart a HESCO barrier and create something totally different by using the coils and wire mesh. In this case, we cut the wire mesh panels, wrapped/screwed them together and around the guard rail posts to act as an anchor to which we then attached HESCO panels. This allowed us to fill them with rock like a traditional ‘gabion’. This was done because there was serious erosion and loose soils at the base of the flood barrier on the road above creating a significant vulnerability of scouring and undermining of the flood barrier. By doing this, we were able to further protect the slope from failure during a flood event by providing scour protection.
City skyline
Modify a HESCO Face Panel to Join 2 Sections
This is one of our most common modifications. During a HESCO flood barrier deployment, it is common to have multiple crews building HESCO at multiple sections of a floodwall at the same time. There will often come a time when two sections need to be connected which generally calls for a ‘modified face panel’. You can see how a face panel was cut to fit and subsequently attached using the helical coils at the connection points. NOTE: Make sure there is extra geotextile on either side of this modified panel. This extra geotextile overlaps the area of the join within the barrier so there is no loss of fill material out the corners during the filling process. We will use zip ties to secure these geotextile flaps into place on either end of the modified panel during the filling process.

City skyline

Irregular Tie-ins with HESCO Using Spray Foam
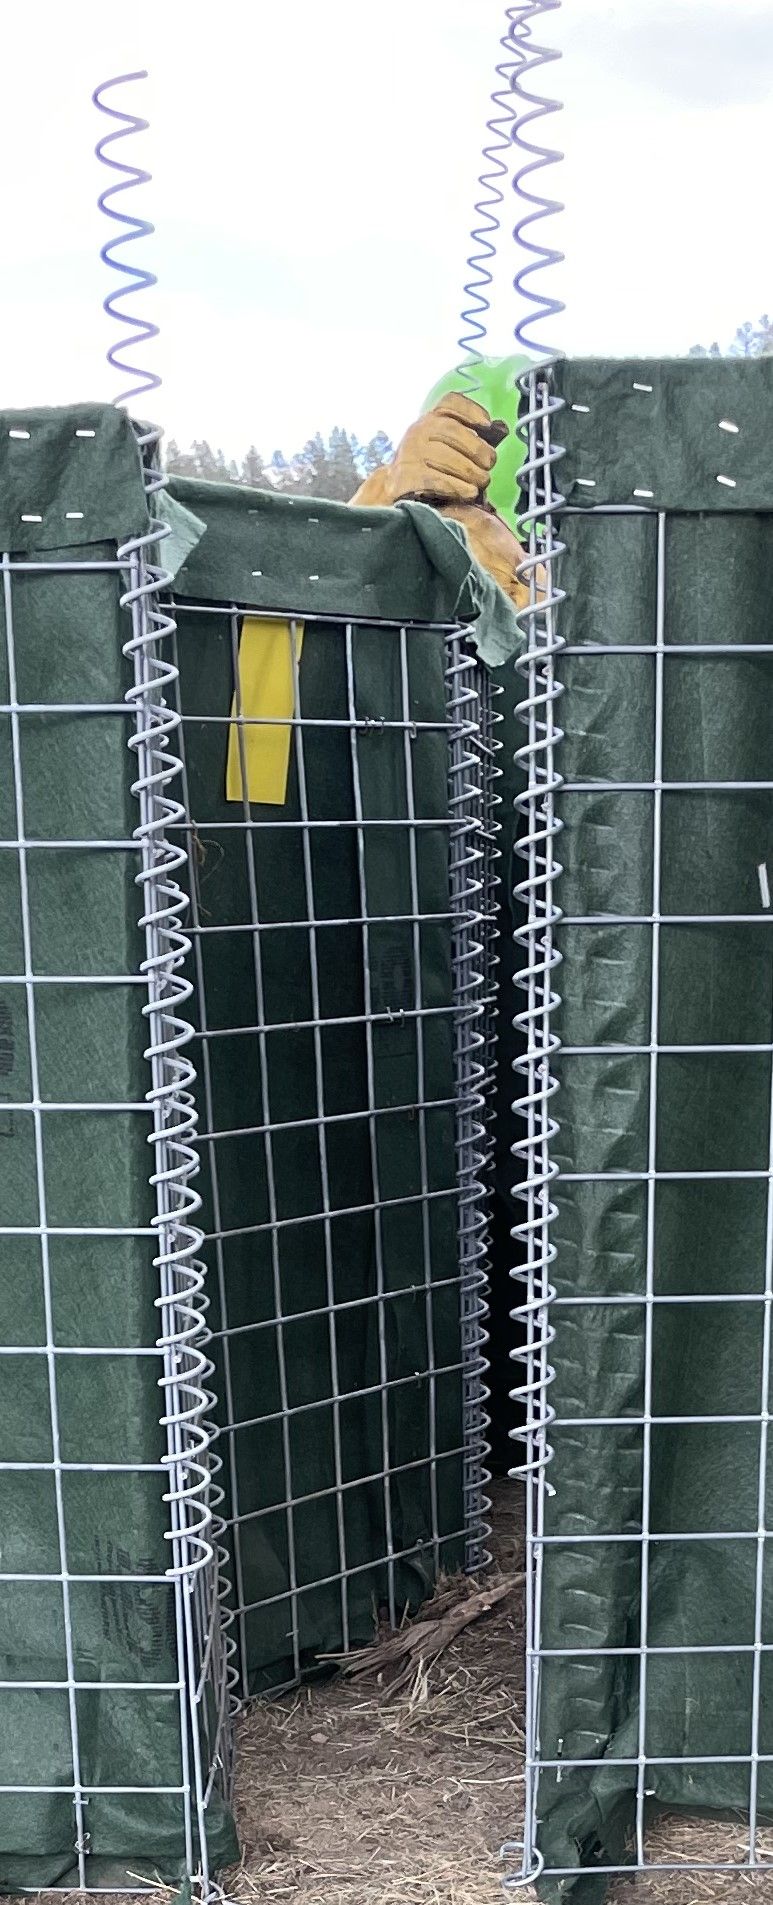
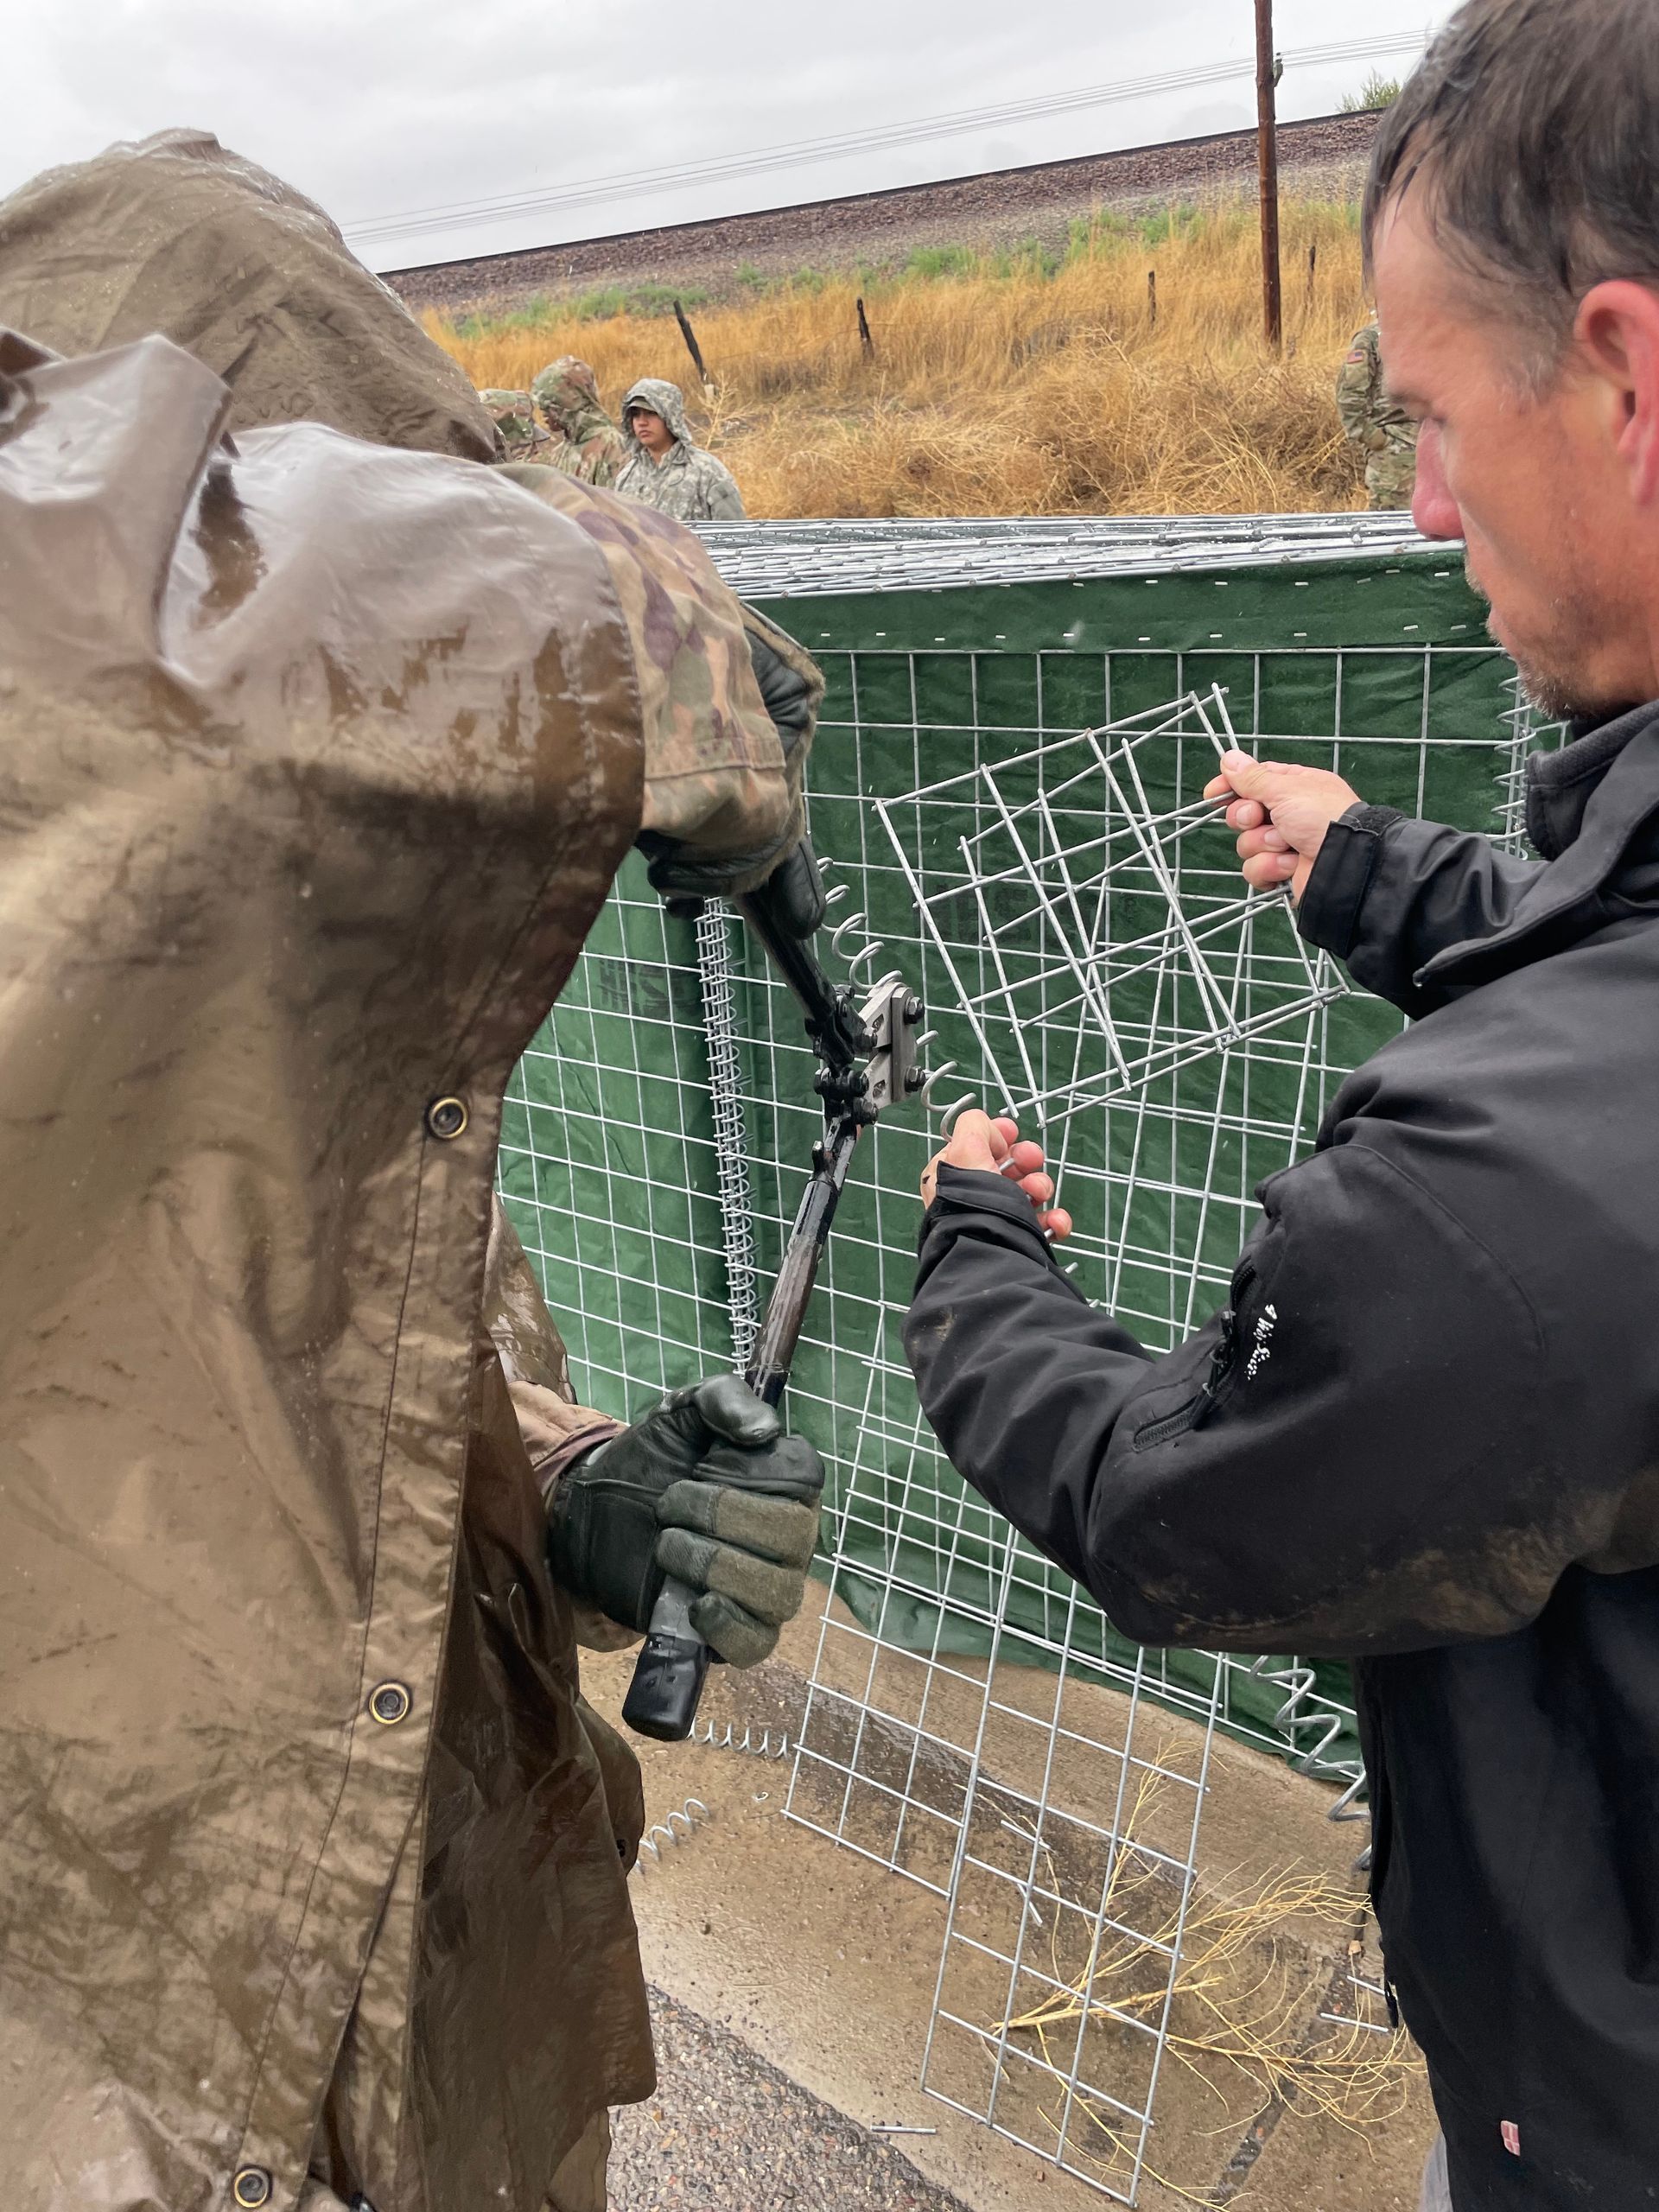
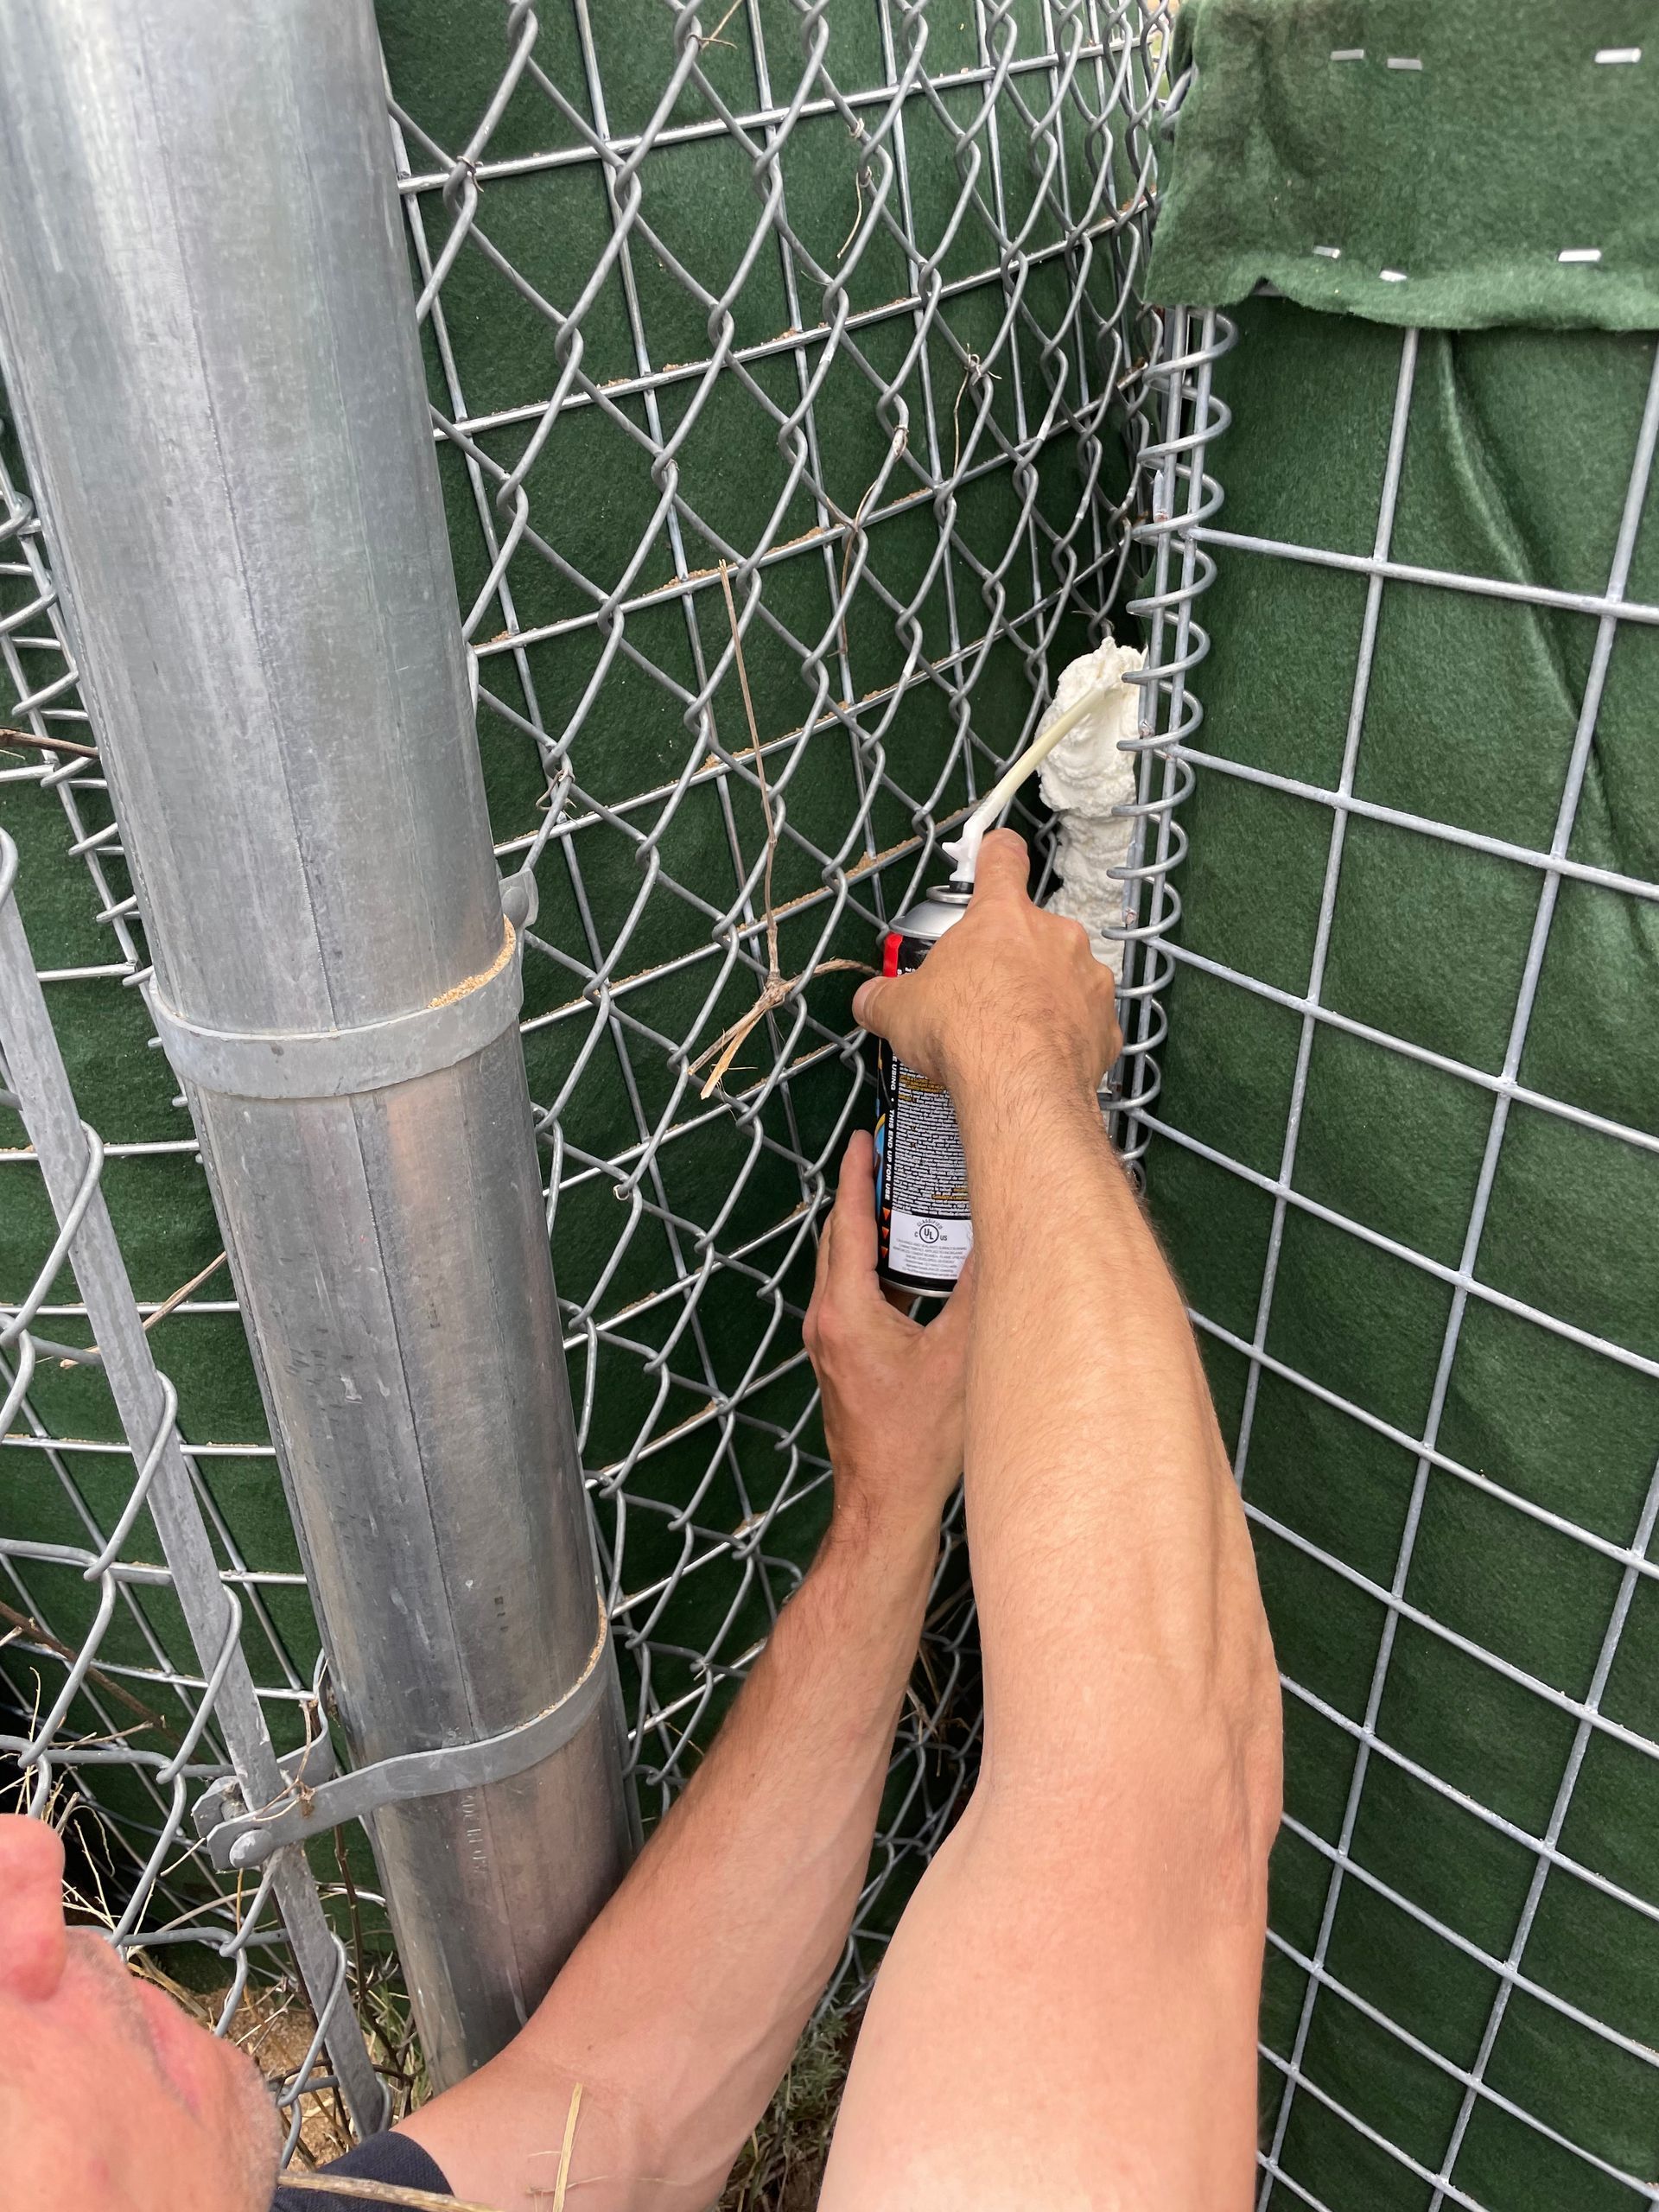
Normally, we always make sure to join the HESCO flood barriers at the coils with the pins provided. Sometimes, there are obstructions that prevent the HESCO from being joined properly. In this case, there was a fence that the property owner did not want to cut so we worked around it. You can see how we butted the HESCO flood barriers as close together as we could on either side of the obstruction (a fence) and proceeded to fill the HESCO cells on either side. During the filling process, the end panel of the HESCO expanded slightly which reduced the amount of space that water can pass through. We then used spray foam to seal this gap. Spray foam is extremely effective at closing gaps or sealing points of potential seepage within a flood wall and a fantastic tool to have on hand!
City skyline

HESCO Shooting Ranges – How to Protect HESCO from Bullet Impacts
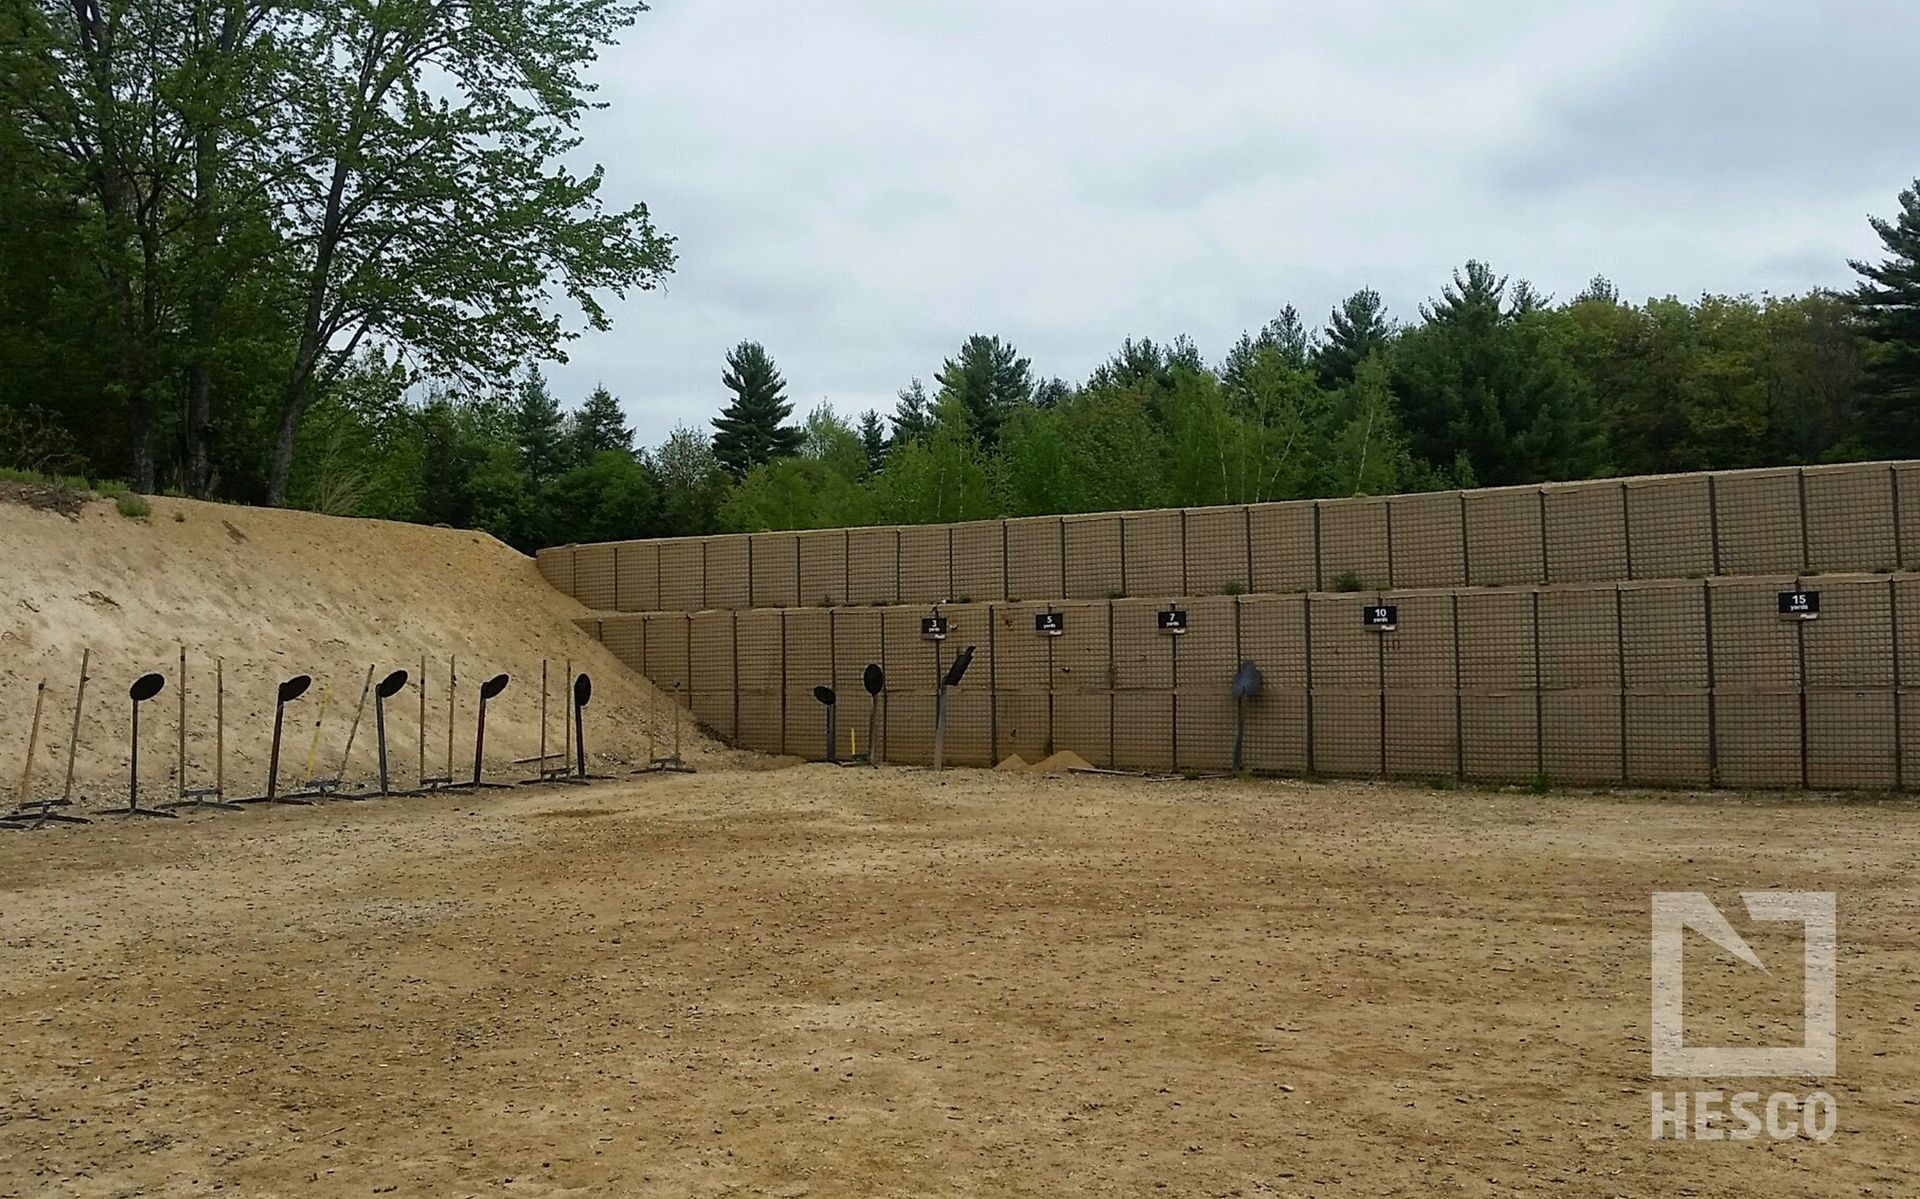
A ‘HESCO Shooting Range’ is a common application for this product. The ballistic stopping capabilities of soil and sand makes this an amazing product for this type of application. Shooting enthusiasts regularly use this product to create ballistic backstops, wing walls, and elaborate shoot-houses out of this product.
Sometimes it is nice to protect the high impact areas from bullet strikes immediately behind a target!
Within this photo, you can see how a section of the welded wire mesh was cut and connected to the HESCO in order to create wire mesh ‘extensions’ protruding off of the barrier. Two 2x4 wooden planks were then sandwiched/screwed together with over the wire mesh extensions. This creates ‘studs’ on which you can screw 3/4” plywood and fill the void between the HESCO and the plywood.
By doing this, you can ‘clad’ your HESCO with soil and isolate your lead within this ‘soil cladding’. When it is time to replace a specific backstop, you can remove the plywood and ‘soil cladding’ it retained. You can then replace the plywood and re-fill the area between the plywood and the HESCO.
Step 1: Cut strips of 3-4 squares of the wire mesh to create ‘wire extensions’
Step 2: Connect these wire mesh strips to the HESCO
Step 3: Sandwich a couple 2x4’s over these wire mesh strips to create ‘studs’
Step 4:
Attach ¾” plywood to the studs NOTE: Use washers on the screw heads to better take the pressure of holding the soil fill
Step 5: Backfill sand to fill the void between the HESCO and the plywood NOTE: Tarpaper can be used within the void to extend the life of your plywood
FINAL NOTE: This is a wonderful technique to protect HESCO geotextile from excessive round impacts. However, the geotextile that this product is comprised of has an amazing capability to continue functioning after countless round impacts. Over the course of time, a cement slurry application (seen below) may also provide a similar function in protecting the HESCO……while not isolating the lead projectiles.
How to Extend the Life of HESCO against UV Rays
UV rays generally dictate the lifespan of a HESCO Barrier. If you want to use HESCO for longer term applications, you need to protect the fabric from the effects of UV exposure. These are the most common ways of extending the lifespan of a HESCO barrier by protecting the geotextile fabric.
1) Oil Based Paint
Oil based primers and paint do a great job sticking to the geotextile fabric while offering great UV protection. It is generally done in a couple thick coats to make sure your units are well coated. Prior to a paint application, it would be prudent to run around and clean any sand off the areas to be coated with a broom and/or a blower.
2) Cement Slurry
This has always been our tested, and favorite application. It is simple, effective, and generally inexpensive.
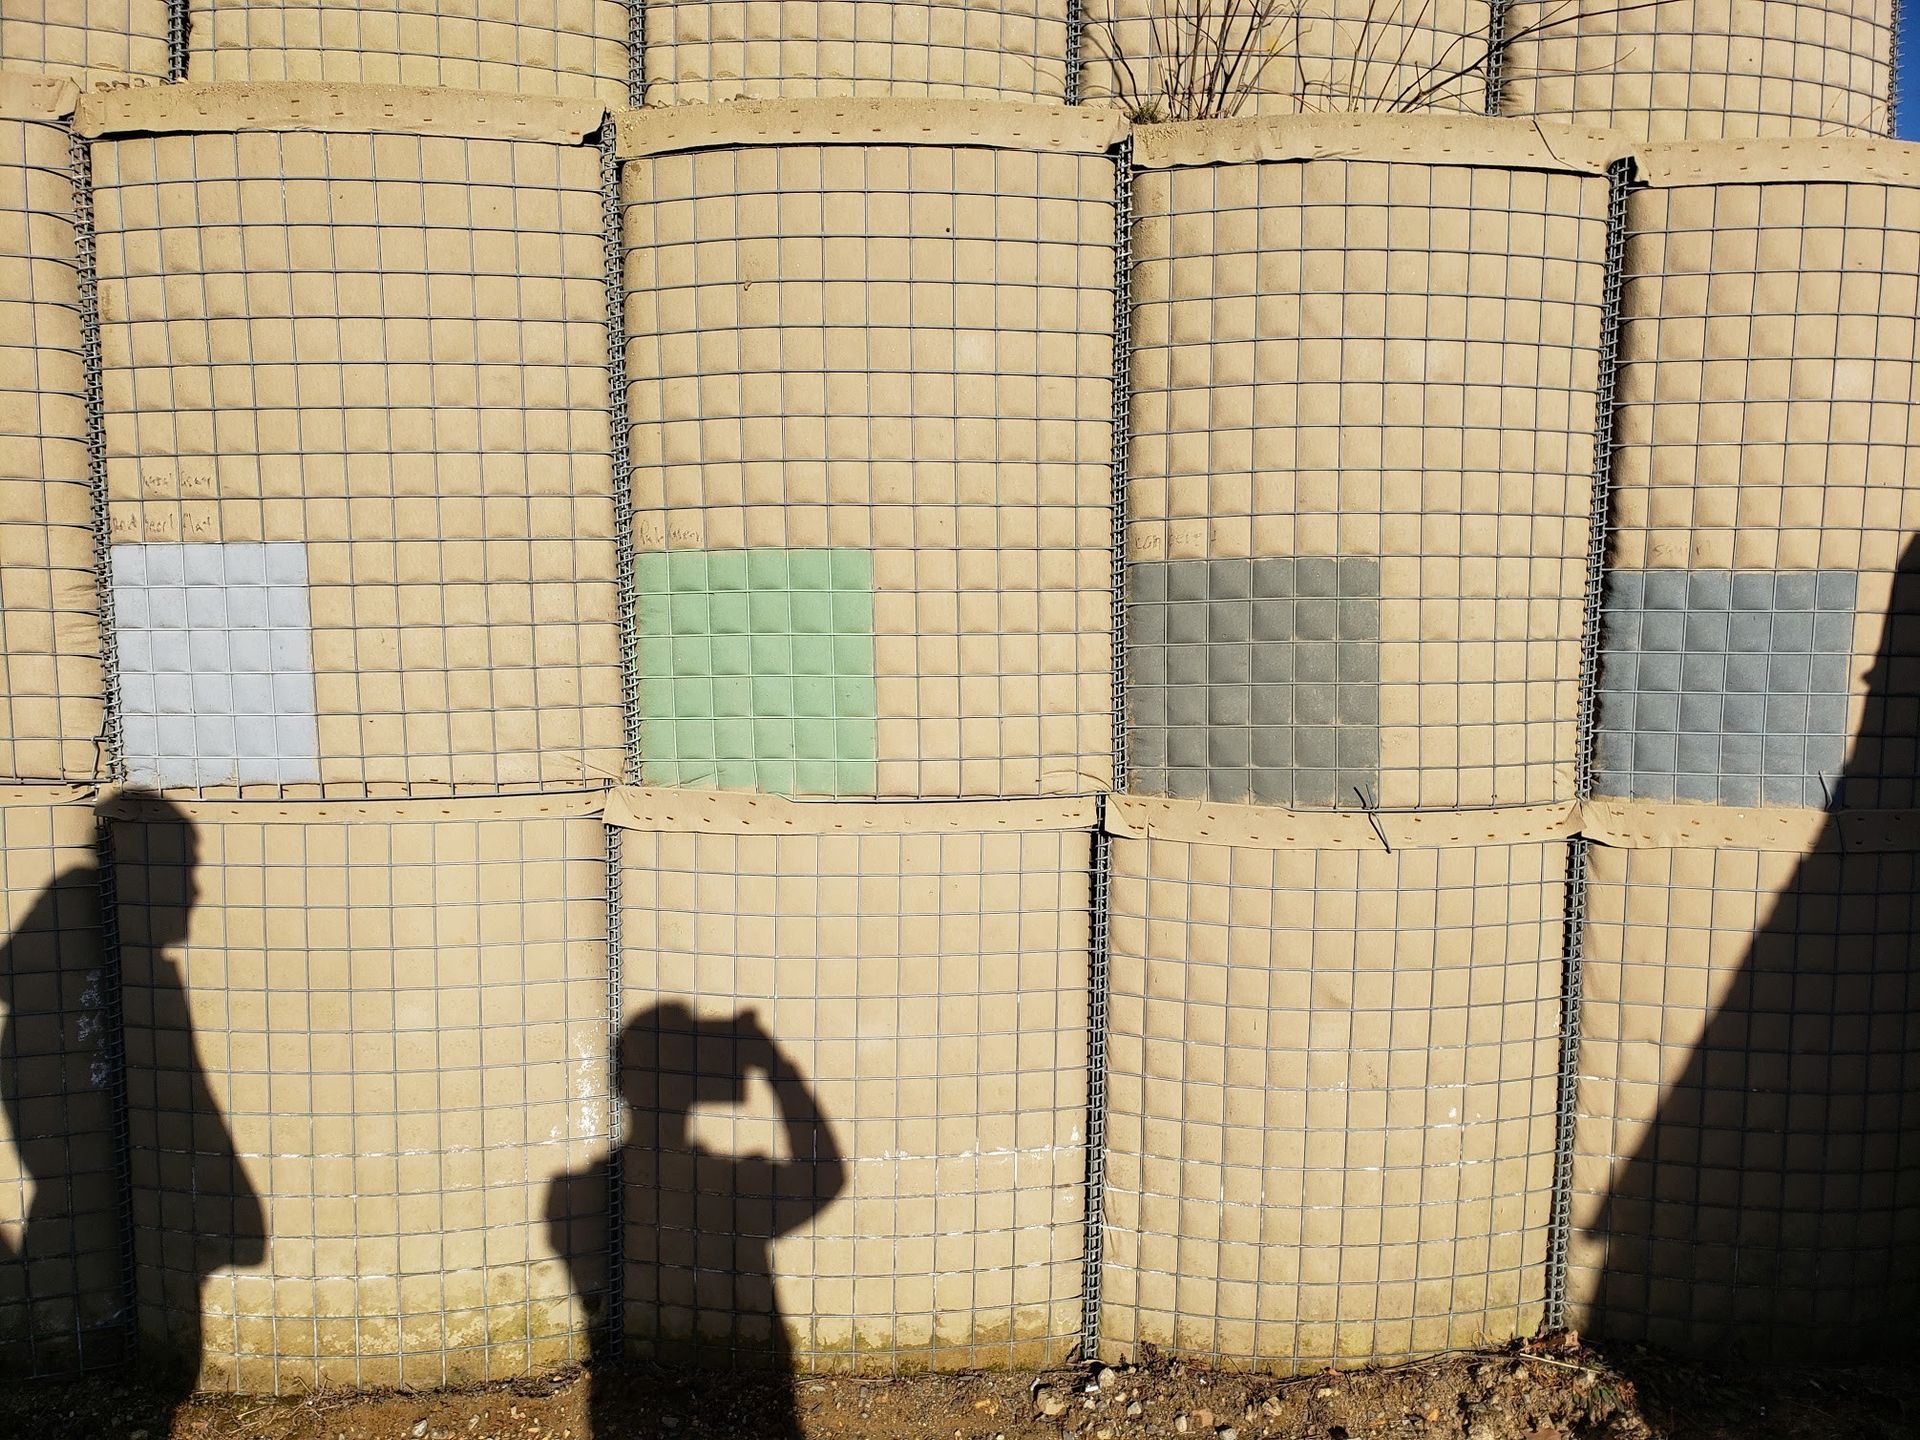
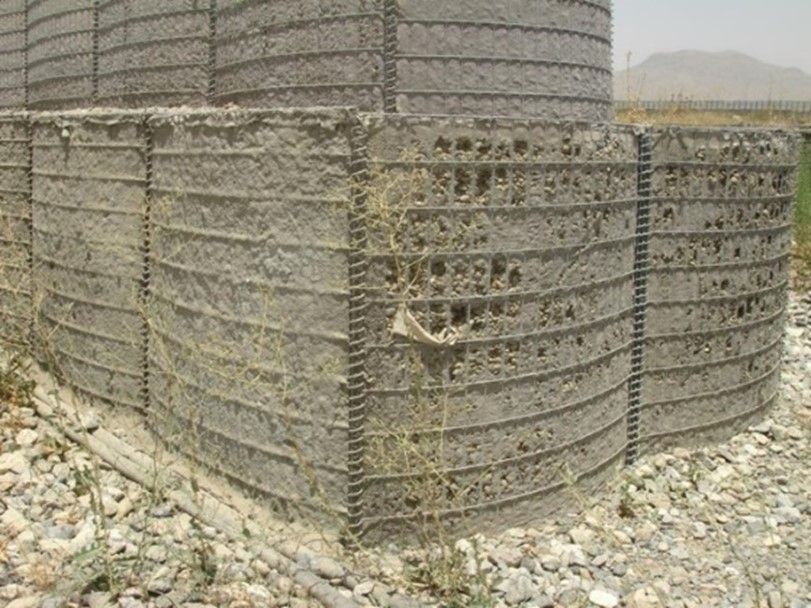
EXAMPLE: This is a picture I took in Afghanistan of a product that was a knock-off of HESCO Bastion that was sold out of China. The geotextile fabric in a HESCO Bastion is heavily stabilized to protect it from UV rays and UV degradation whereas the Chinese product in this photo was not. This knock-off product was experiencing total failure from degradation of the geotextile in less than 2 years. In effort to help (the Canadian Army), I experimented with the cement slurry application and it worked beautifully!! It stopped all degradation of exposed surfaces and stayed in great shape for the following 7 years that I was in country and able to monitor it. This is an example of how well a cement slurry application does on a geotextile fabric that was woefully inferior to the quality to be expected from HECO Bastion. In this picture, you can see the difference in weathering between the surfaces I did not spray vs the surfaces that I did spray.
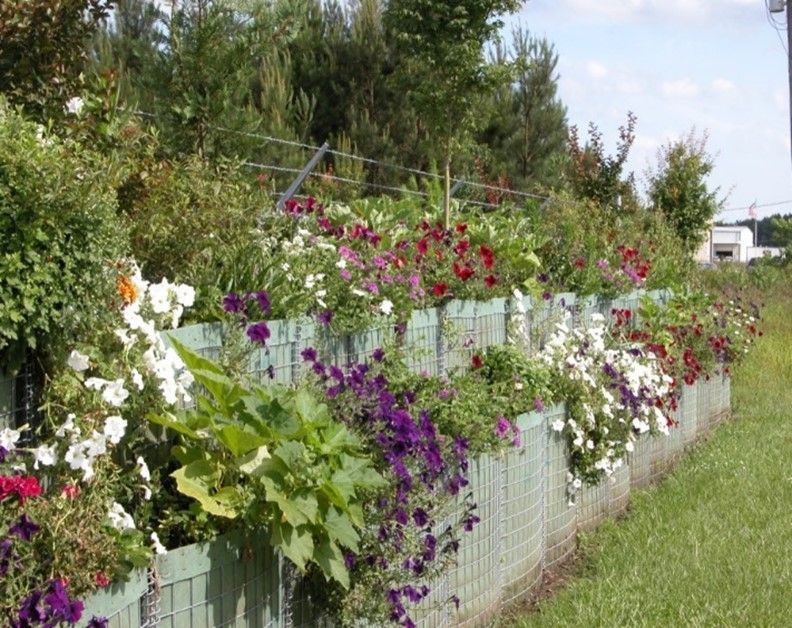
3) Shade through Vegetation
If you live in an environment that allow it, vegetation like trees, vines, and bushes that shade the geotextile fabric do an amazing job of extending the lifespan of the geotextile fabric!
How to apply cement slurry to a HESCO barrier
Steps for a cement slurry application:
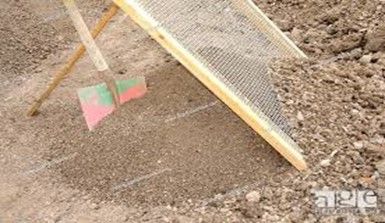
Step 1 Screened Sand
You can purchase screened sand screen it yourself by shoveling sand onto a wire screen that removes any stones large enough to clog your cement slurry gun
Step 2
Mix Sand/Water/Cement
Mix approximately 1 part screened sand to 1 part cement to 1.5 parts water into a cement mixer. You will need some sort of container to transfer this material into the hopper of your spray gun. You may change the ratio of the solution until you find the right consistency but once you find it, make sure you are using the exact same ratio because if you are not consistent with your ratio, you will be able to see the variations as the slurry dries. This would not matter for function, but we like it when things look good too!!
Step 3 Apply the slurry mixture in 2 coats to prevent running
Pour the mixture into the hopper of your spray gun, and apply it to the HESCO Bastion. Similar to the paint, I suggest doing it in 2 coats. This provides a great coating with a nice finish. If you try to spray too much at once, it will be runny and create unsightly runs within the sprayed concrete. NOTE: It is a good idea to wet the units first. I have been told that the concrete will bond better to the wet surface while drying but I have done this on both wet and dry surfaces without any premature cracking or adverse effects NOTE: You are wanting to protect the HESCO Bastion from the sun while also providing extra sealing of the product against seepage. With this in mind, I would pay extra attention to spray into the coils/panels pinned together at each join because this is the area prone to the most seepage
City skyline

a. Outer finish
Once you are done with this coating, you can freely paint it for general beautification purposes as desired.
b. Additional Thoughts & Beautification
One common addition to a HESCO Bastion being left in place for an extended period of time is a concrete cap. This is commonly done to prevent sand from blowing out of the units and making a mess as well as prevents weeds from growing out of them. If you choose to do this, I would fill all units to about 1”+- from the top and simply cap the final 1”-2” with concrete. This is not required but would be more aesthetically pleasing for a longer term application. A thinner cap would be easier to take out when the time comes to remove your barrier.
Cement Slurry Breakdown of Requirements:
Texture Gun (about $80) - https://www.dropshiptraders.co.uk/product/clarke-air-texture-gun-ctg8/
Cement Mixer
Air Compressor
Water
Shovel
Screen
Measuring bucket/can for mixture rations1 80 lb bag of quickcrete every 8 ‘faces’ of a HESCO Bastion cell (approximately)
2-3 workers
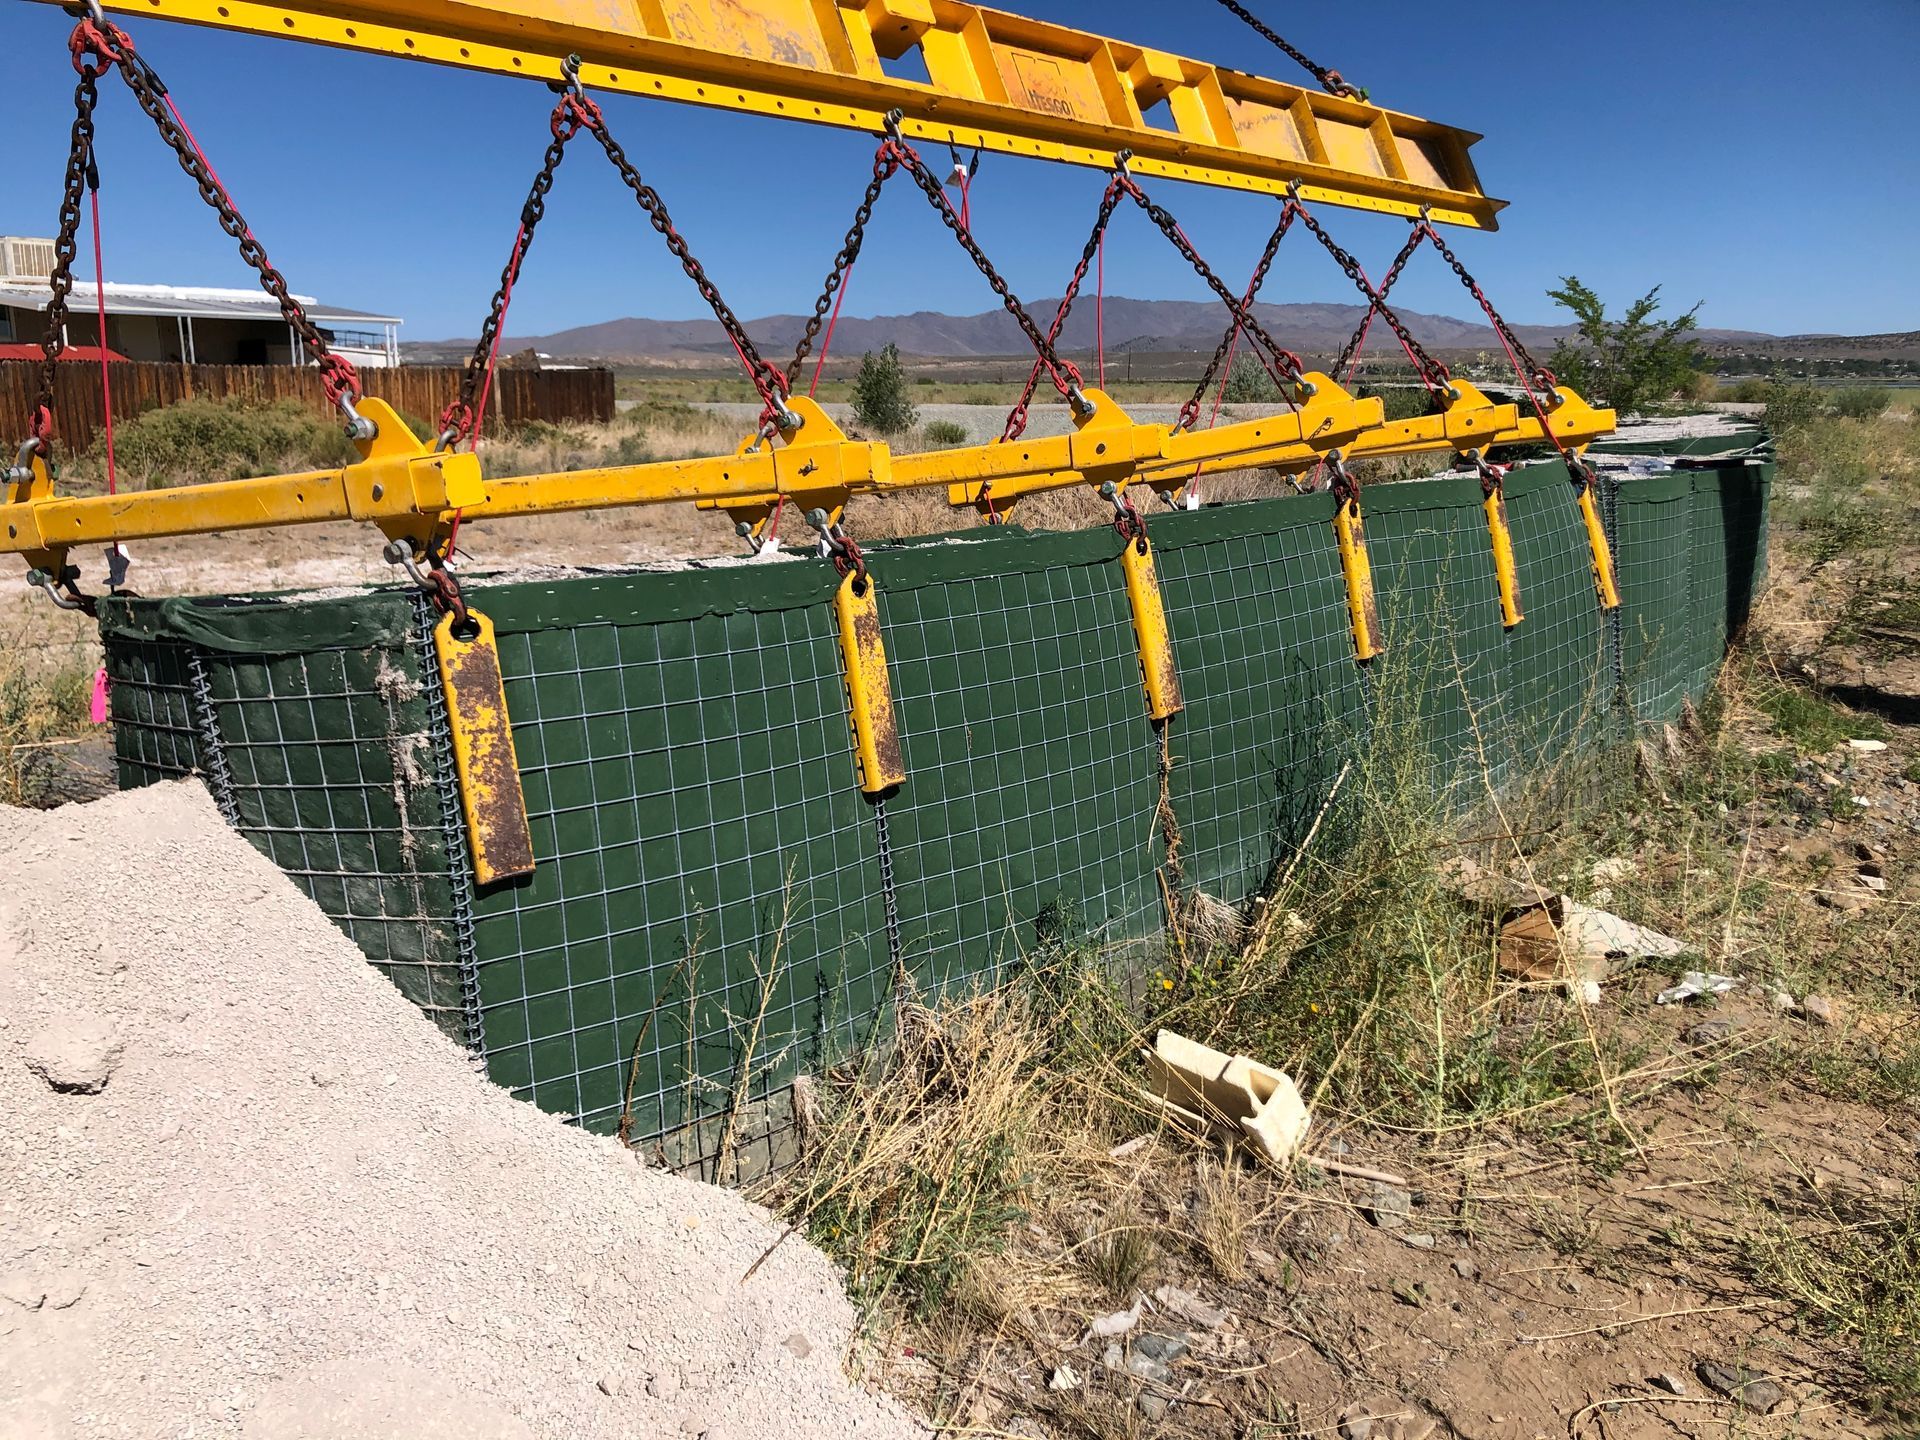
How to Remove HESCO using the HESCO Lifting Beam
https://www.facebook.com/flooddefensegroup/videos/3233636996962842
This link shows the use of the ‘HESCO Lifting Beam’ and is a fantastic tool to recover your HESCO flood barriers. This tool widely used by federal and municipal organizations who are regularly called to erect HESCO flood barriers and take them down after floodwater recedes on an ongoing and regular basis.
NOTE: HESCO barriers recovered with a lifting beam are regularly reused and can be reused multiple times. However, once this product has been removed the first time, there are no warranties or liability associated with product against failure because it cannot be guaranteed to perform as a brand new unit has been tested/expected to perform.
Additional Modification Capabilities – Fun Inclusion
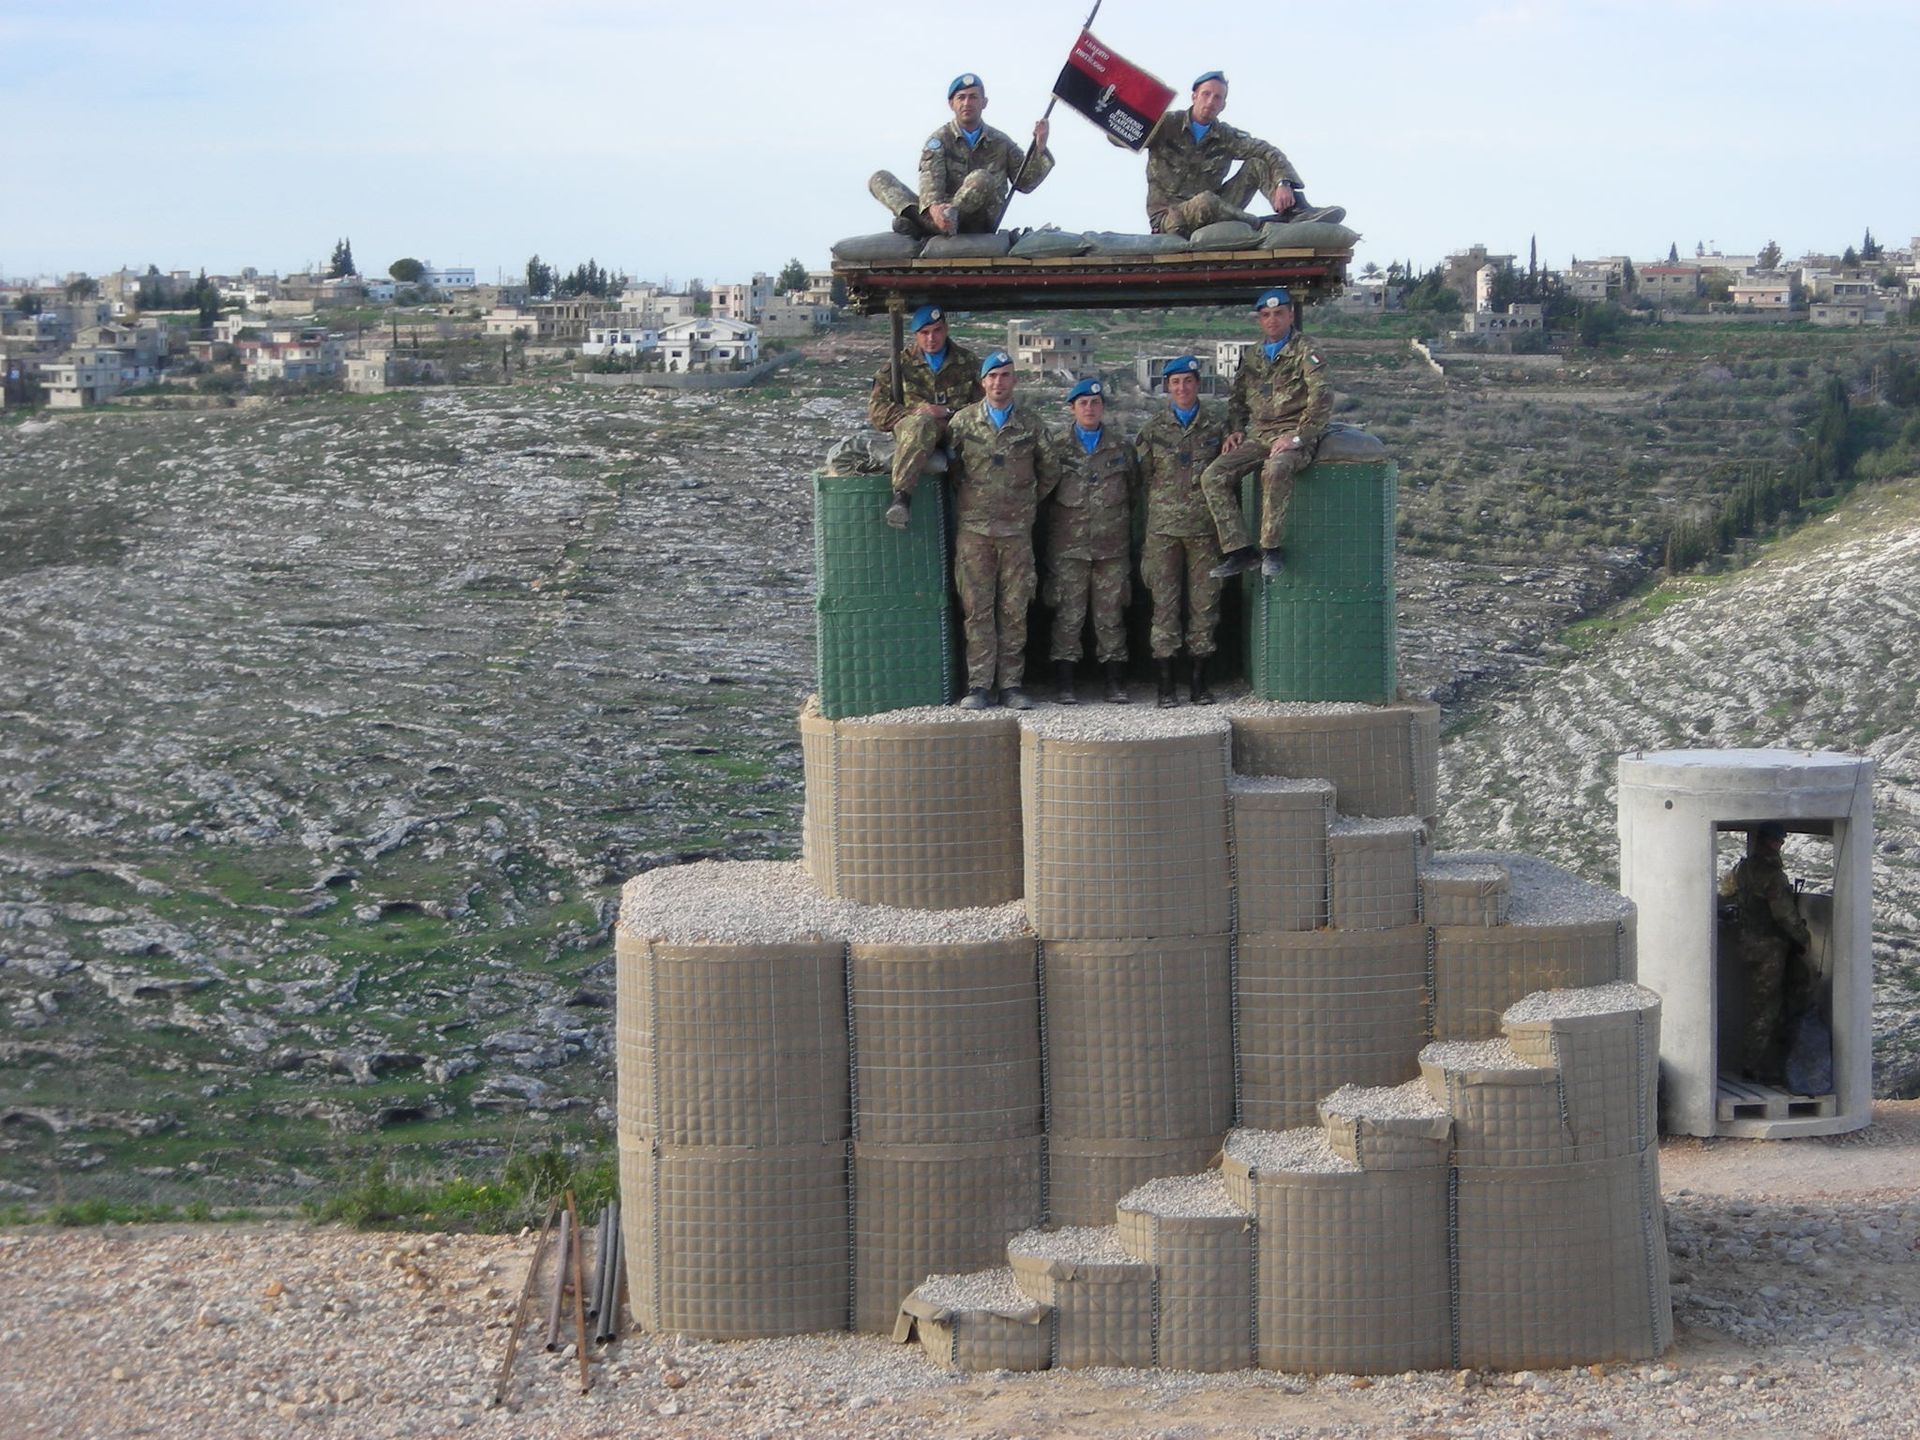
Create a Raised Platform with HESCO
This is a fun example showing how you can use HESCO to create a raised platform. In this case, the Italian Army needed to raise a HESCO guard post for interlocking fields of view with other guard posts so they simply created a raised platform using HESCO.
They then went and modified the HESCO units to create stairs to their guard post.
Modified HESCO to Protect Sewage Pipes Against Debris Impact This is one of our most unique, non-traditional applications of this product during a flood event and is a great testament of how this product can be taken apart and reassembled to creatively solve challenging problems. In this case, there was a sewer pipe below a pedestrian bridge that had been damaged from floodwater and debris impact in the past. With monsoons coming and a very real threat of imminent flooding, it was important to devise a way to protect this sewer pipe from damaging debris impacts during a flood event from both the side and below. To solve this problem, the HESCO was completely taken apart and clad to the side of the bridge, securing it with zip ties, tie wire, and parachute chord. To protect the pipe from below, we were able to wrap/screw sections of wire mesh around the steel beams on either side at the bottom of the bridge as an anchor for additional wire panels to span below the bridge. This was designed to mitigate against floating debris from going under the bridge and somehow damaging the pipe by getting stuck or wedged against the pipe during a flood event.
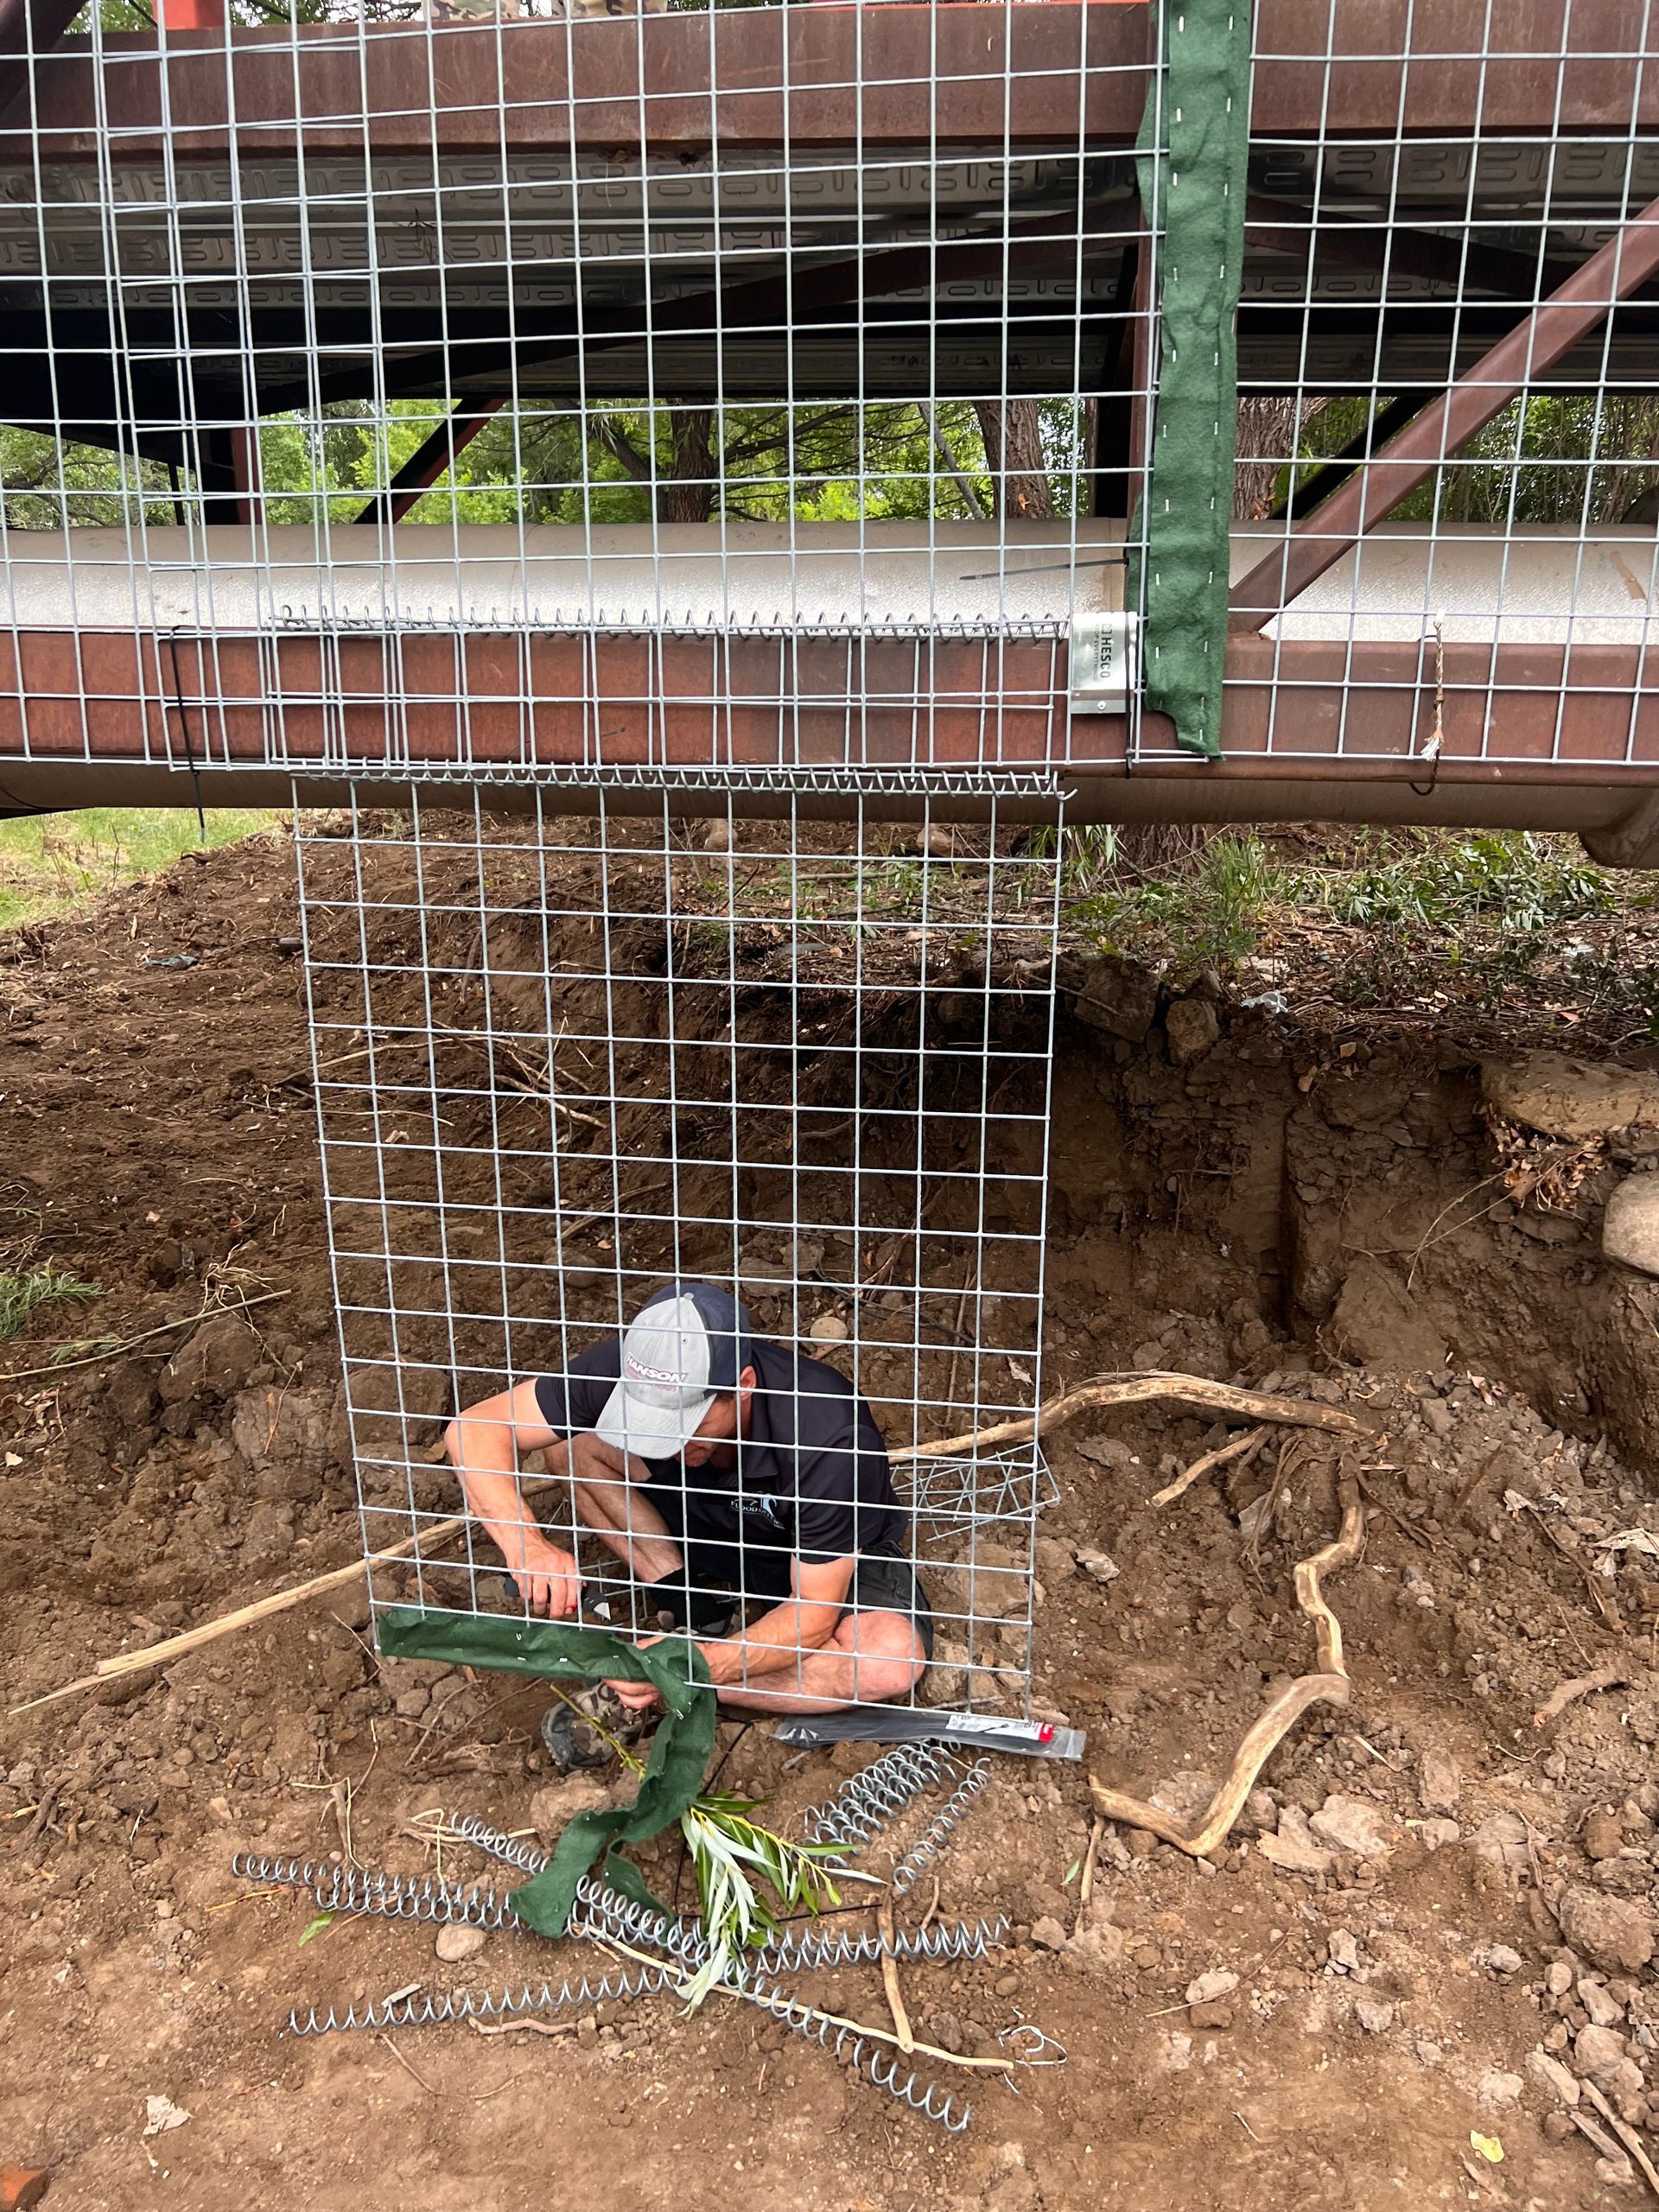
NOTE: This example of wrapping the wire mesh around the steel beams of the bridge using wire/coils is similar to the gabion example above where we were able to wrap the wire mesh around the guard rail posts. In both of these examples, wrapping the wire around fixed objects can provide wonderful ‘anchor points’ when getting involved in unique modifications like this.

City skyline

Field Expedient Reinforcements or Anchoring for a HESCO Barrier
This is an extremely simple and effective way to reinforce a line of HESCO by simply attaching your floodwall to a tree!
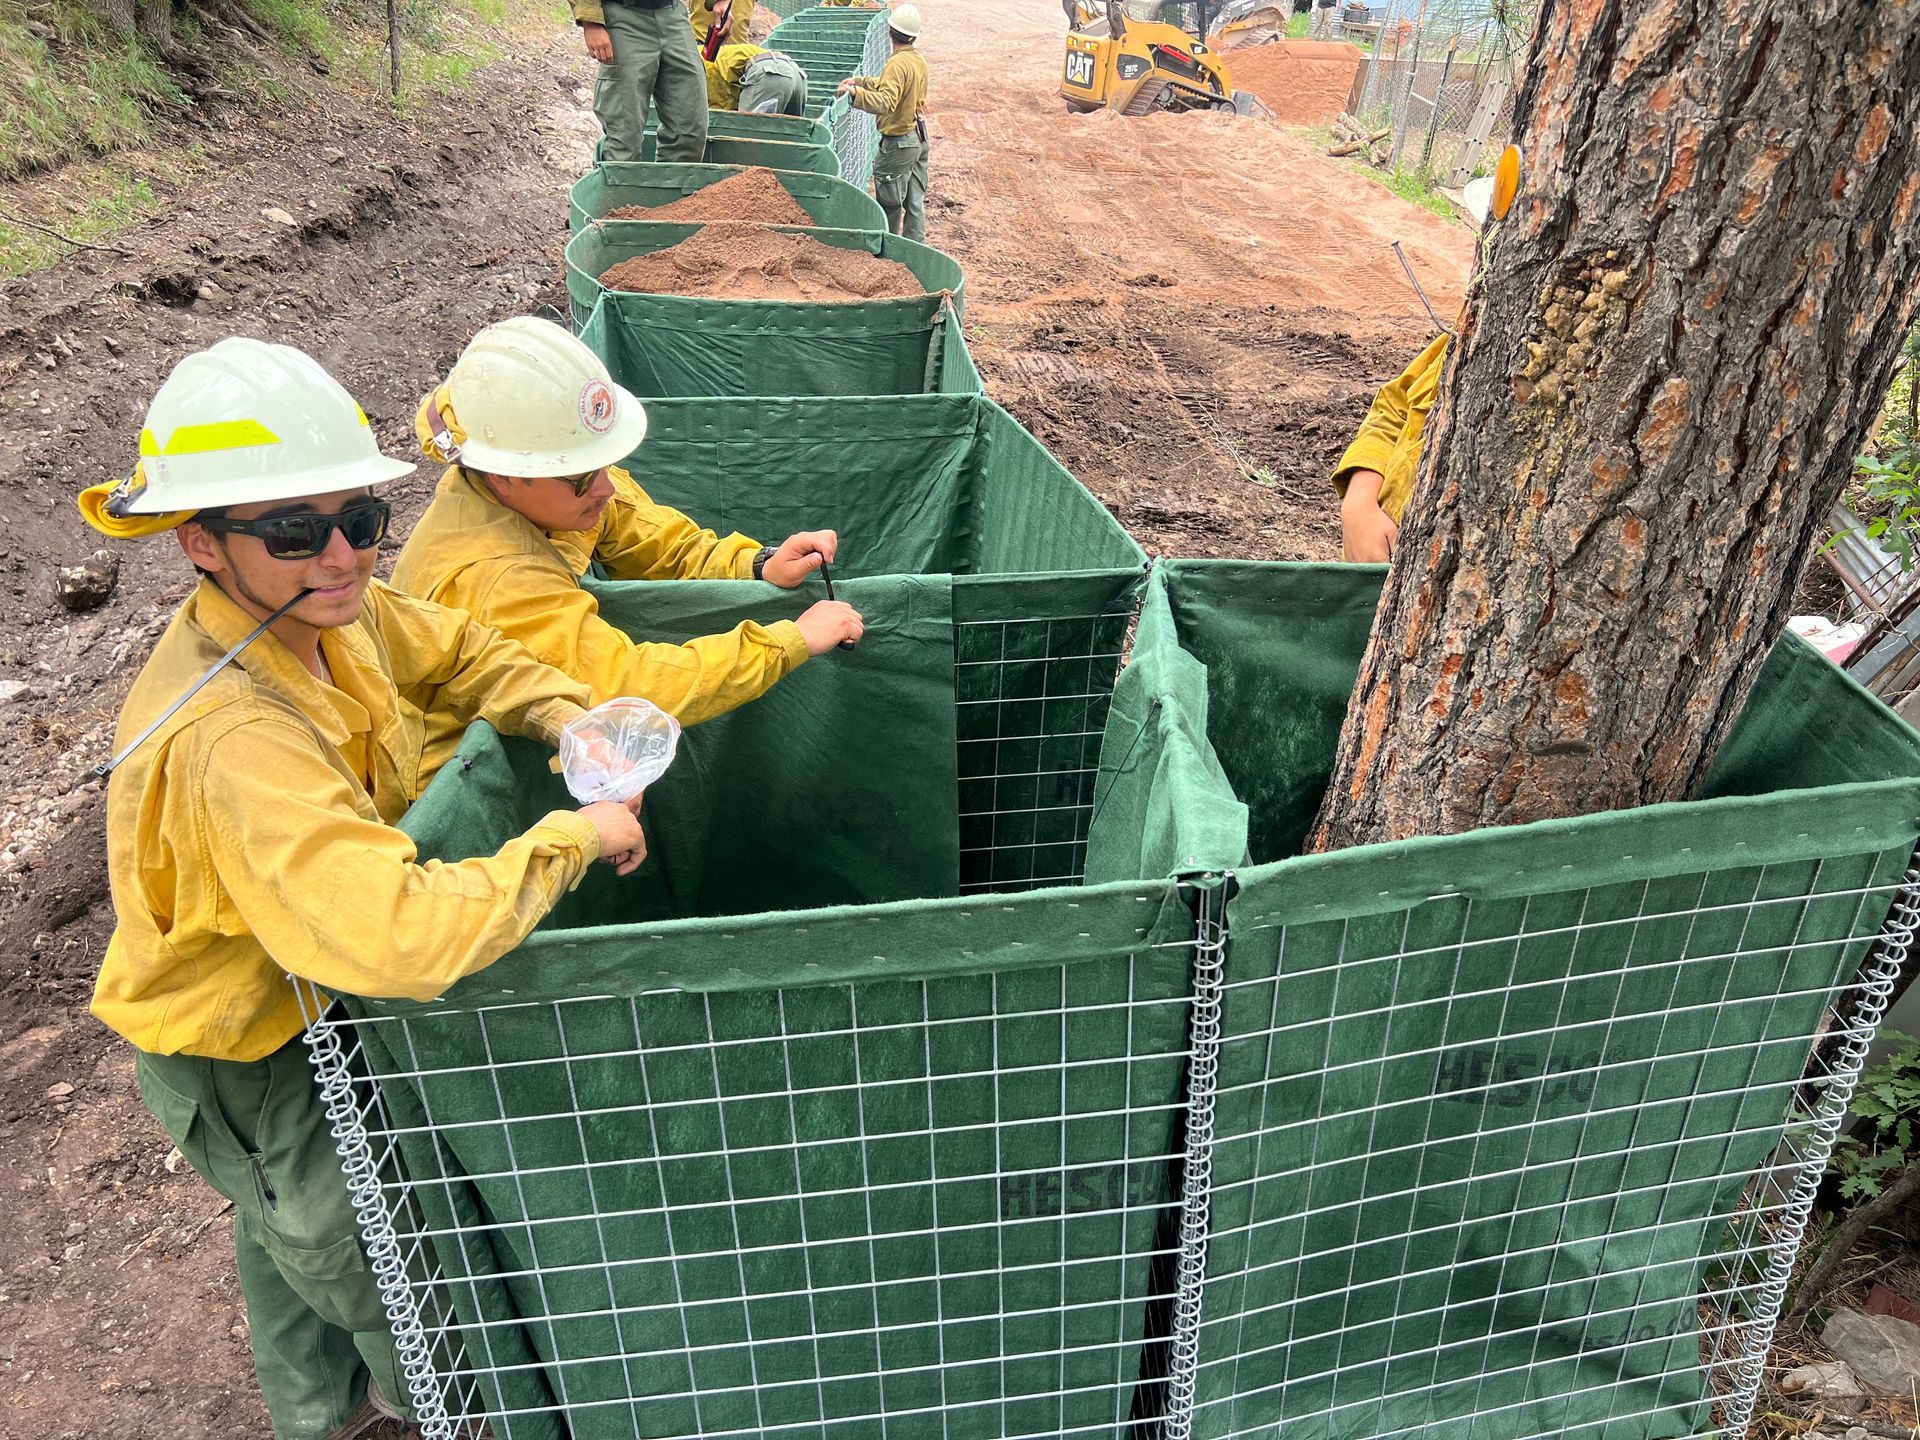

NOTE: Similarly, you can use timber beams within the HESCO during the filling process to support roof structures for houses, sheds, bunkers, guard towers, ect..
In this example, it was immediately after a forest fire where debris flows already caused massive flooding. Emergency action was being taken to prevent debris flows from further flooding homes and the greater community and the ground soils were extremely erosive. If catastrophic scouring were to take place at this location, the tree would have kept the HESCO from being pushed away by an overwhelming debris flow.
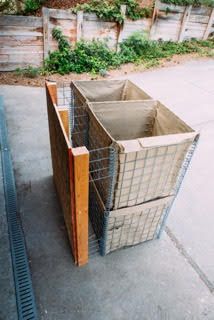
Cut a HESCO Barrier in Half!
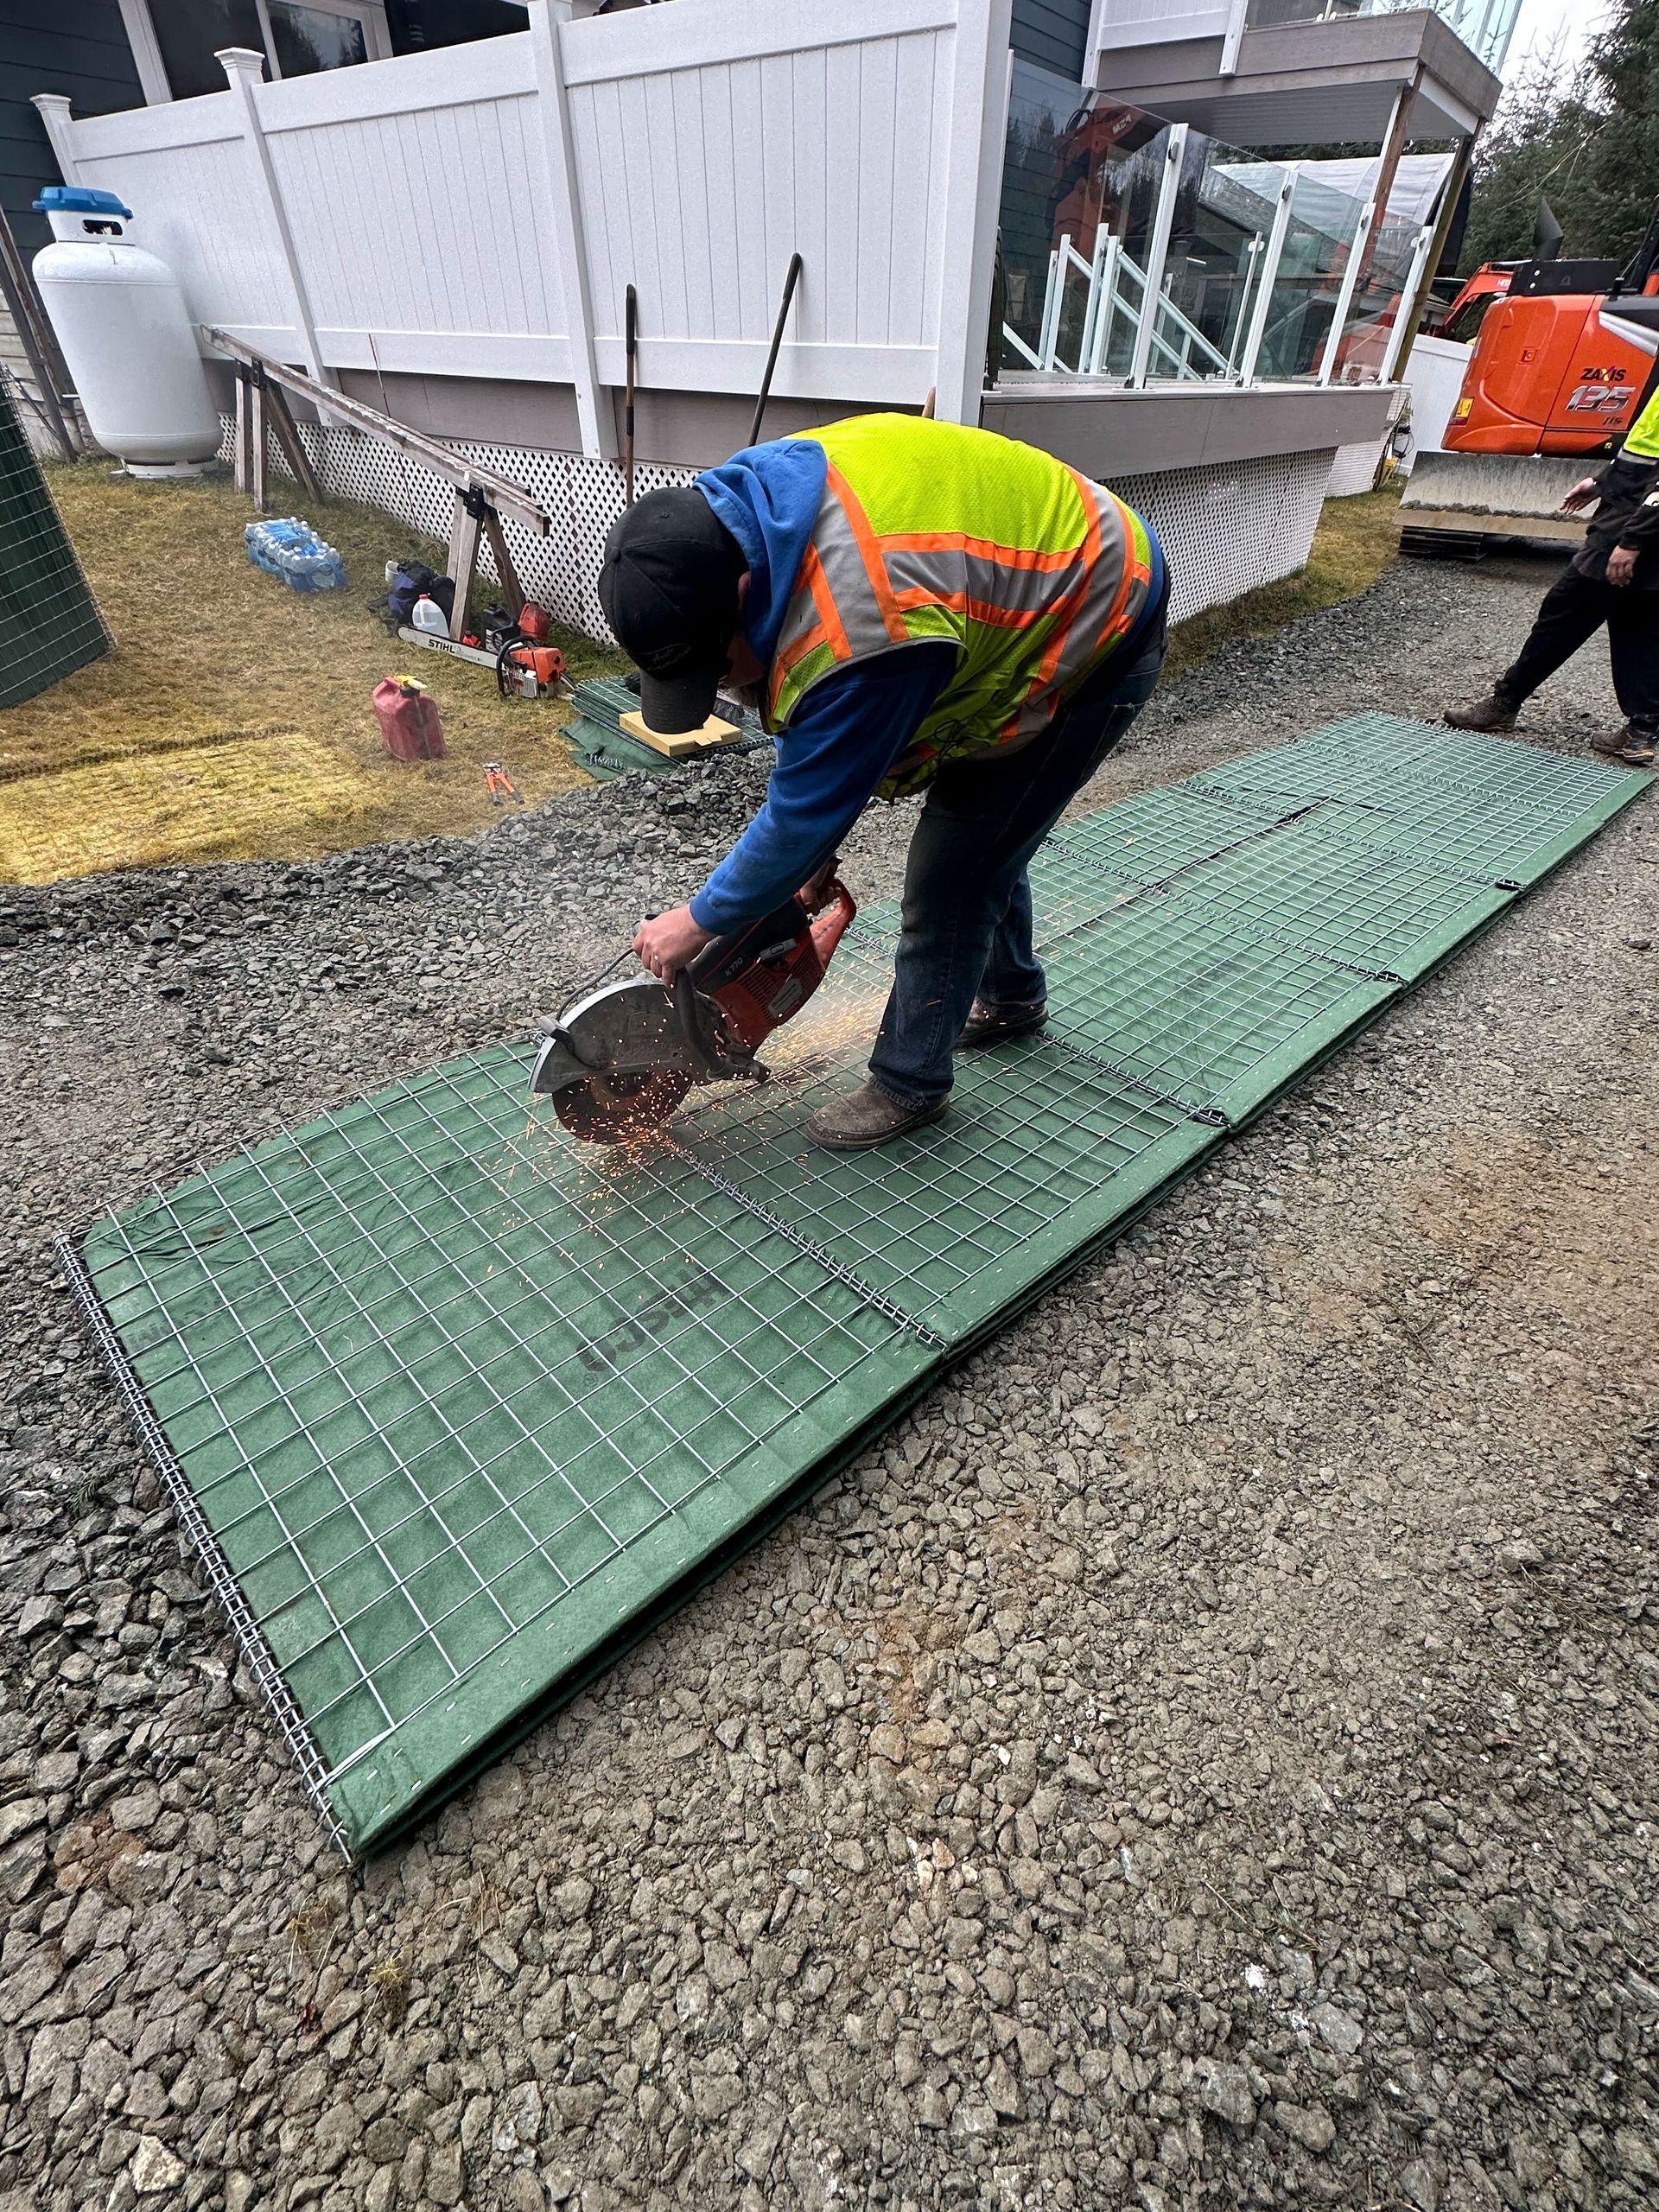
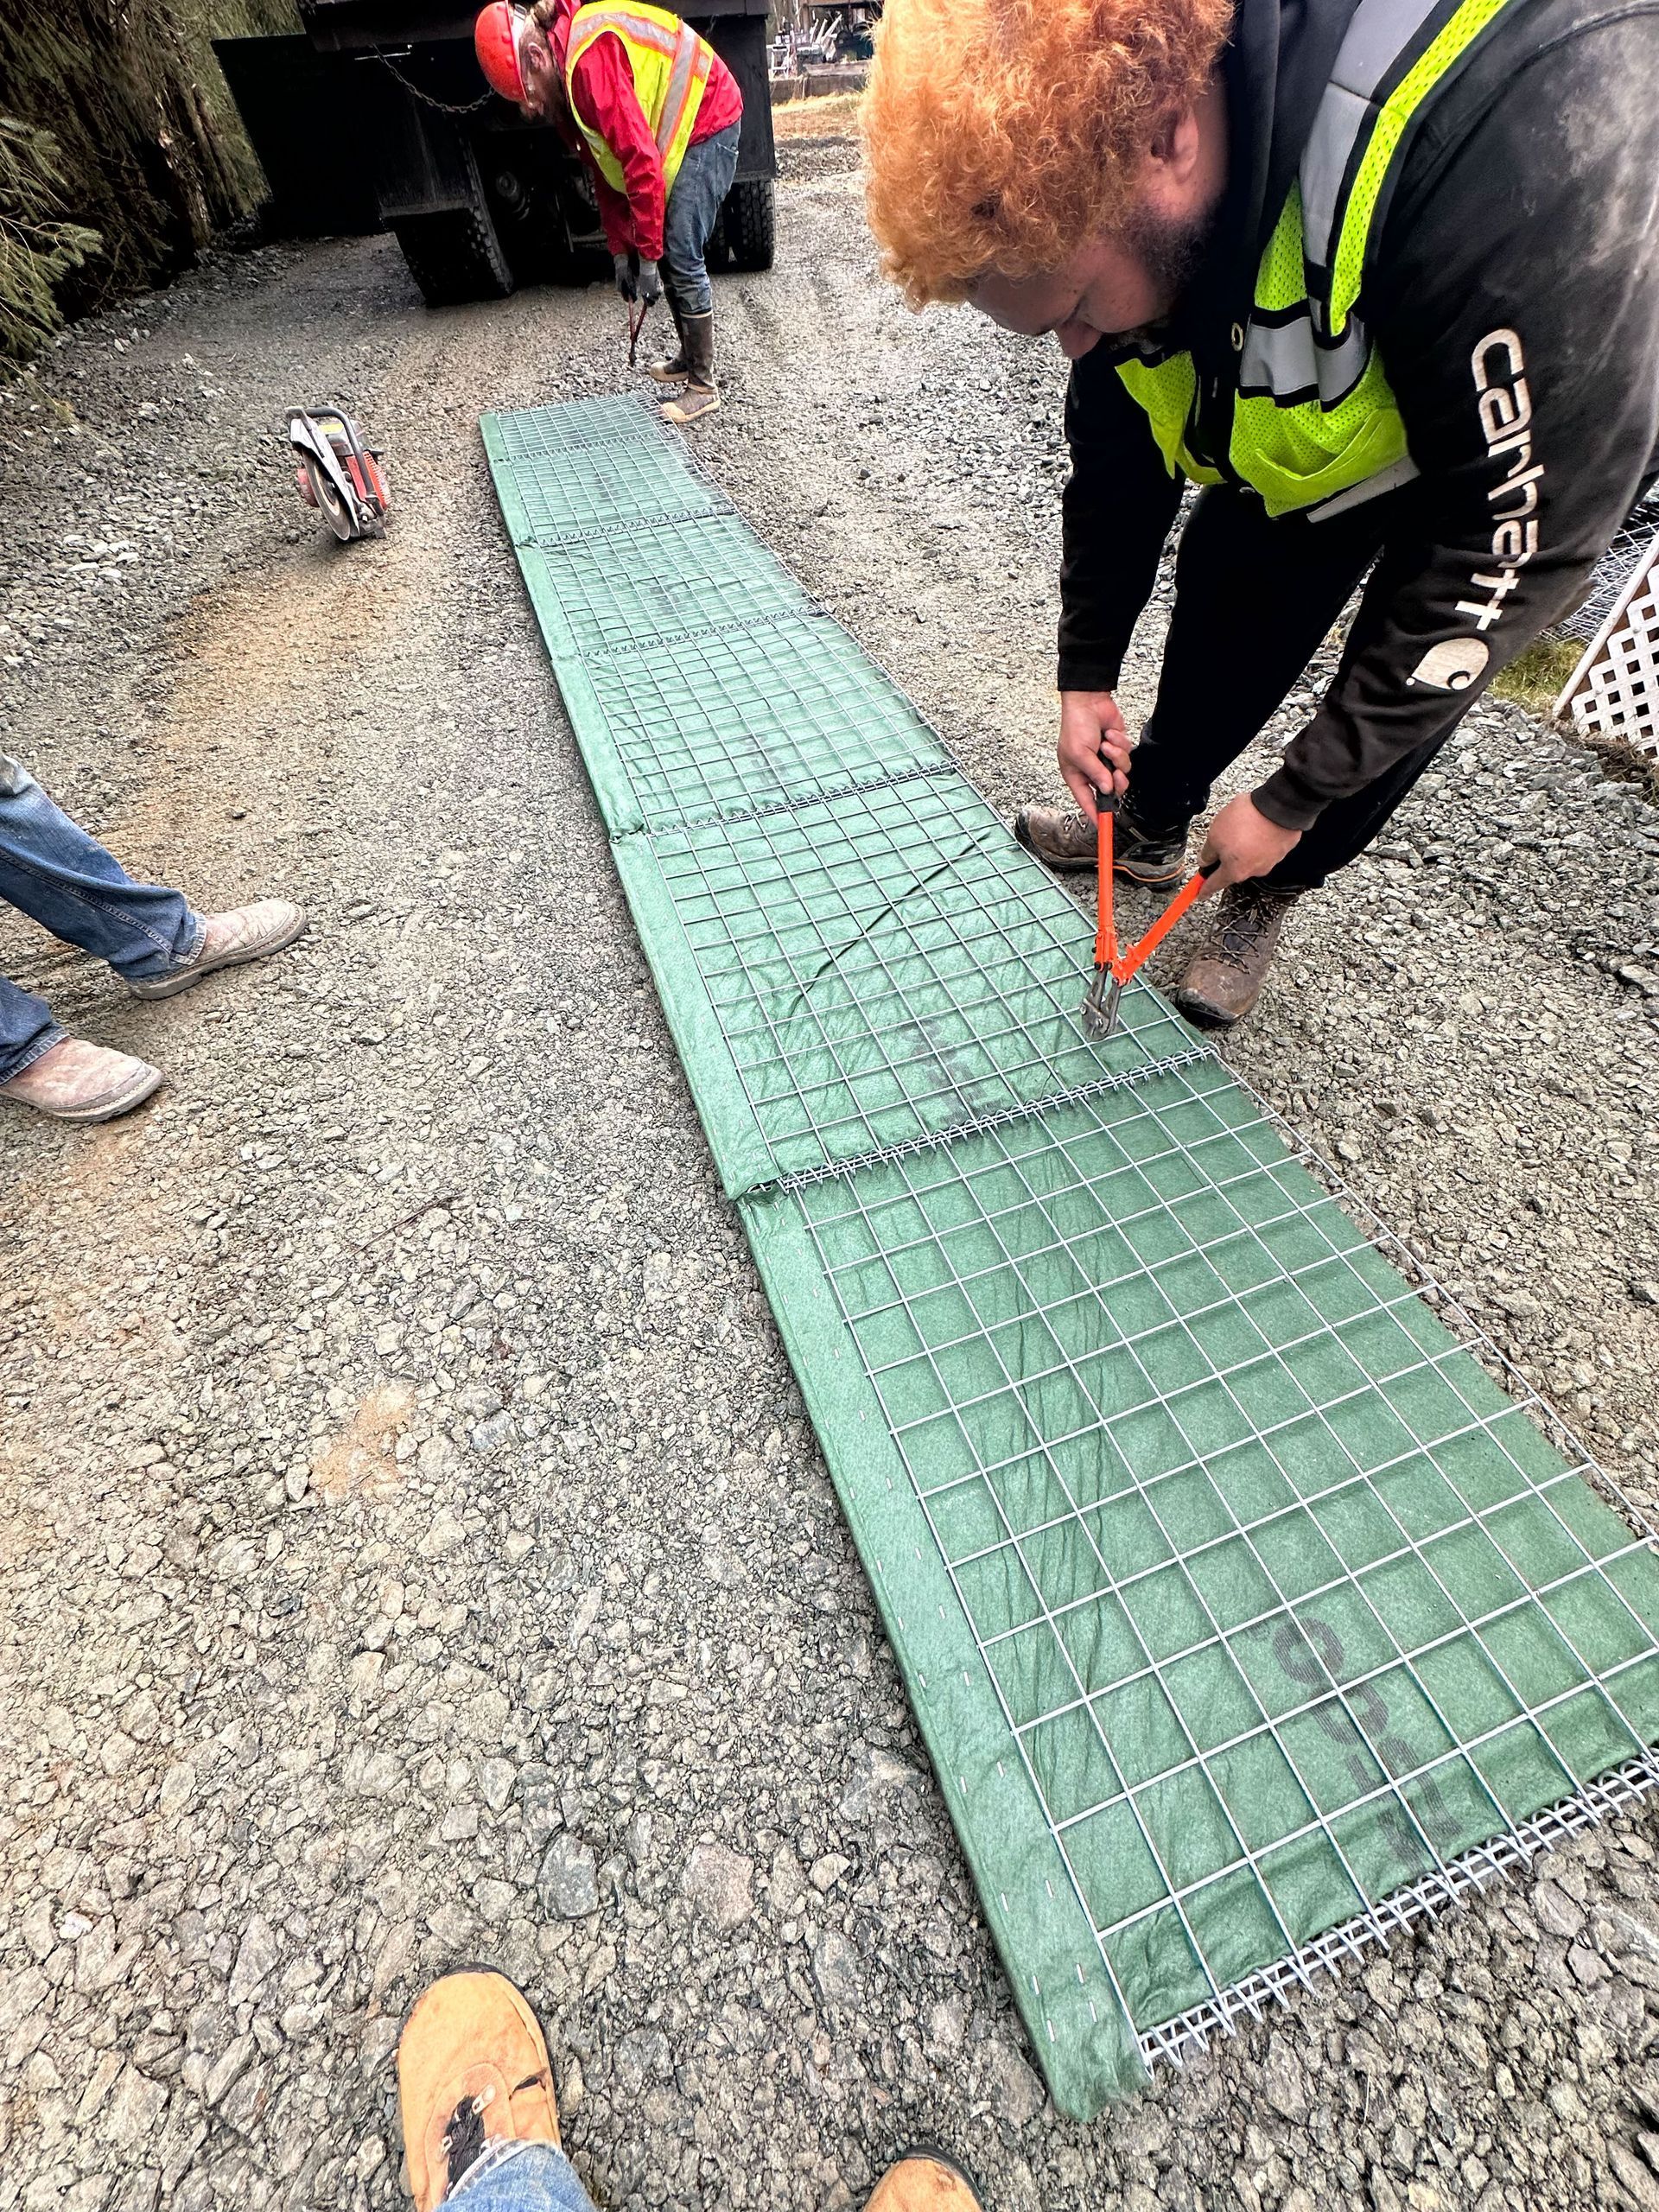
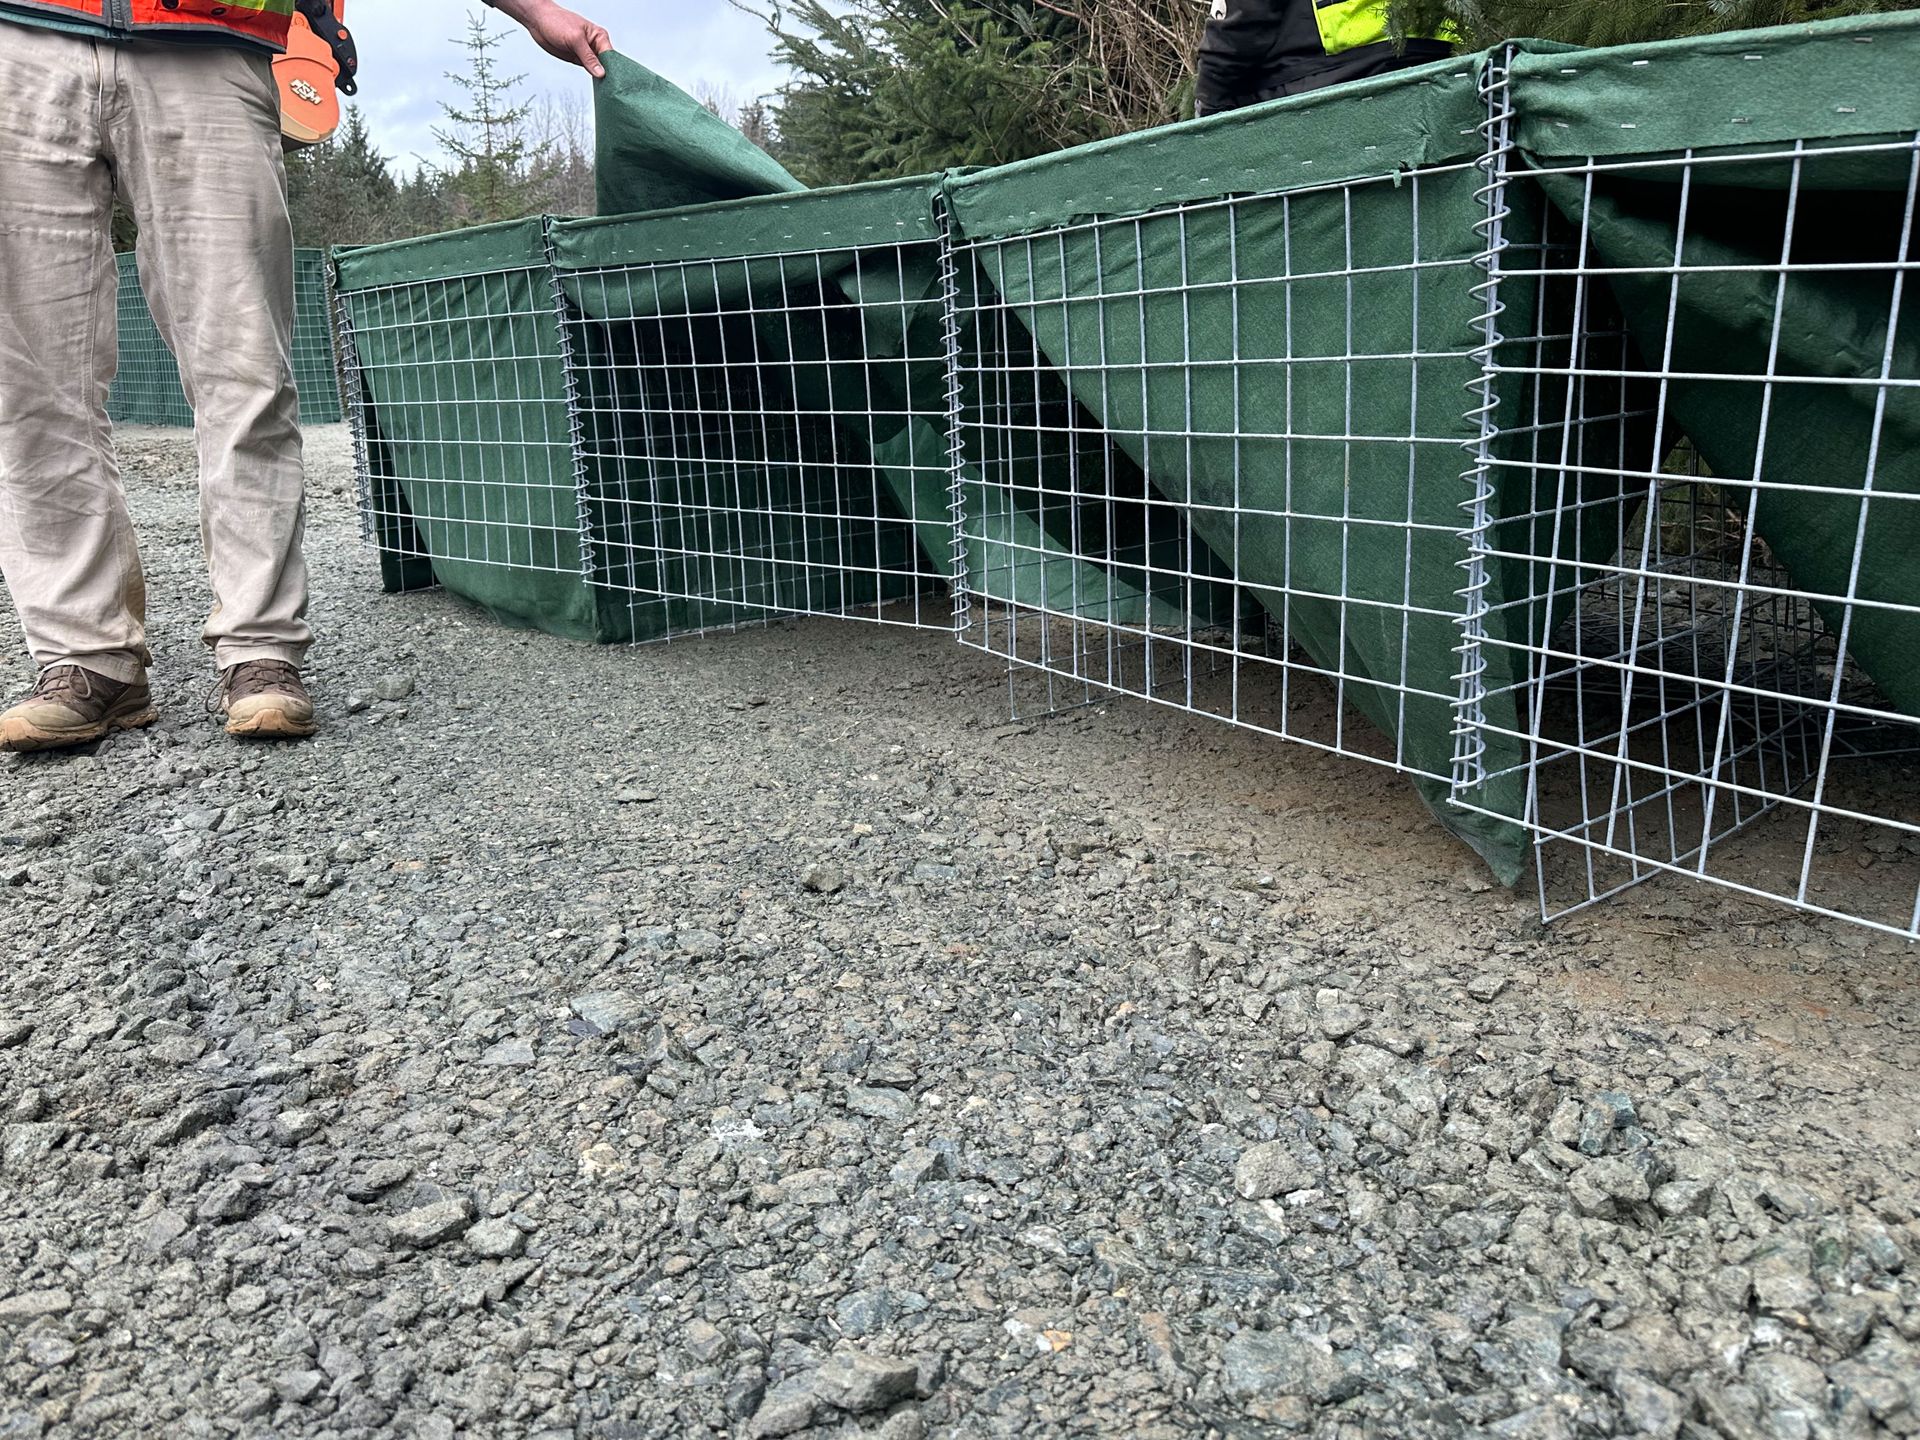
Here, a 4’ tall HESCO Floodline Barrier was cut in half to create a 6’ wall. It is up the customer to endorse this technique, but it worked really well. It allowed the customer to create a 2’ version of the 4’ tall barrier which could then be vertically stacked. It was a simple and fast solution and here are the steps the contractor on this project took:
- Cut a 4’ tall HESCO directly in half to create a 2’ barrier using a concrete saw (Figure 1)
- 1 strip of the 3” weldmesh wire was cut off the bottom of the face panels (Figure 2)
NOTE: This made the center diaphragm panels sit inside the lower HESCO (Figure 3) - The newly modified HESCO was stacked directly on top of the existing HESCO that was 4’ tall to easily create a 6’ tall floodwall. (Figure 4)

END
We will continue to expand onto this list of ‘HESCO Modifications’ which we believe to be a great form of reference material to better understand the capabilities of modifying HESCO. If you have a HESCO project and are in need of some HESCO material, Flood Defense Group stocks the HESCO barriers and are happy to provide a quote or project feedback as desired.
Keith Anderson - CEO
www.flooddefensegroup.com
1-208-585-1815